What's up Race Team?!
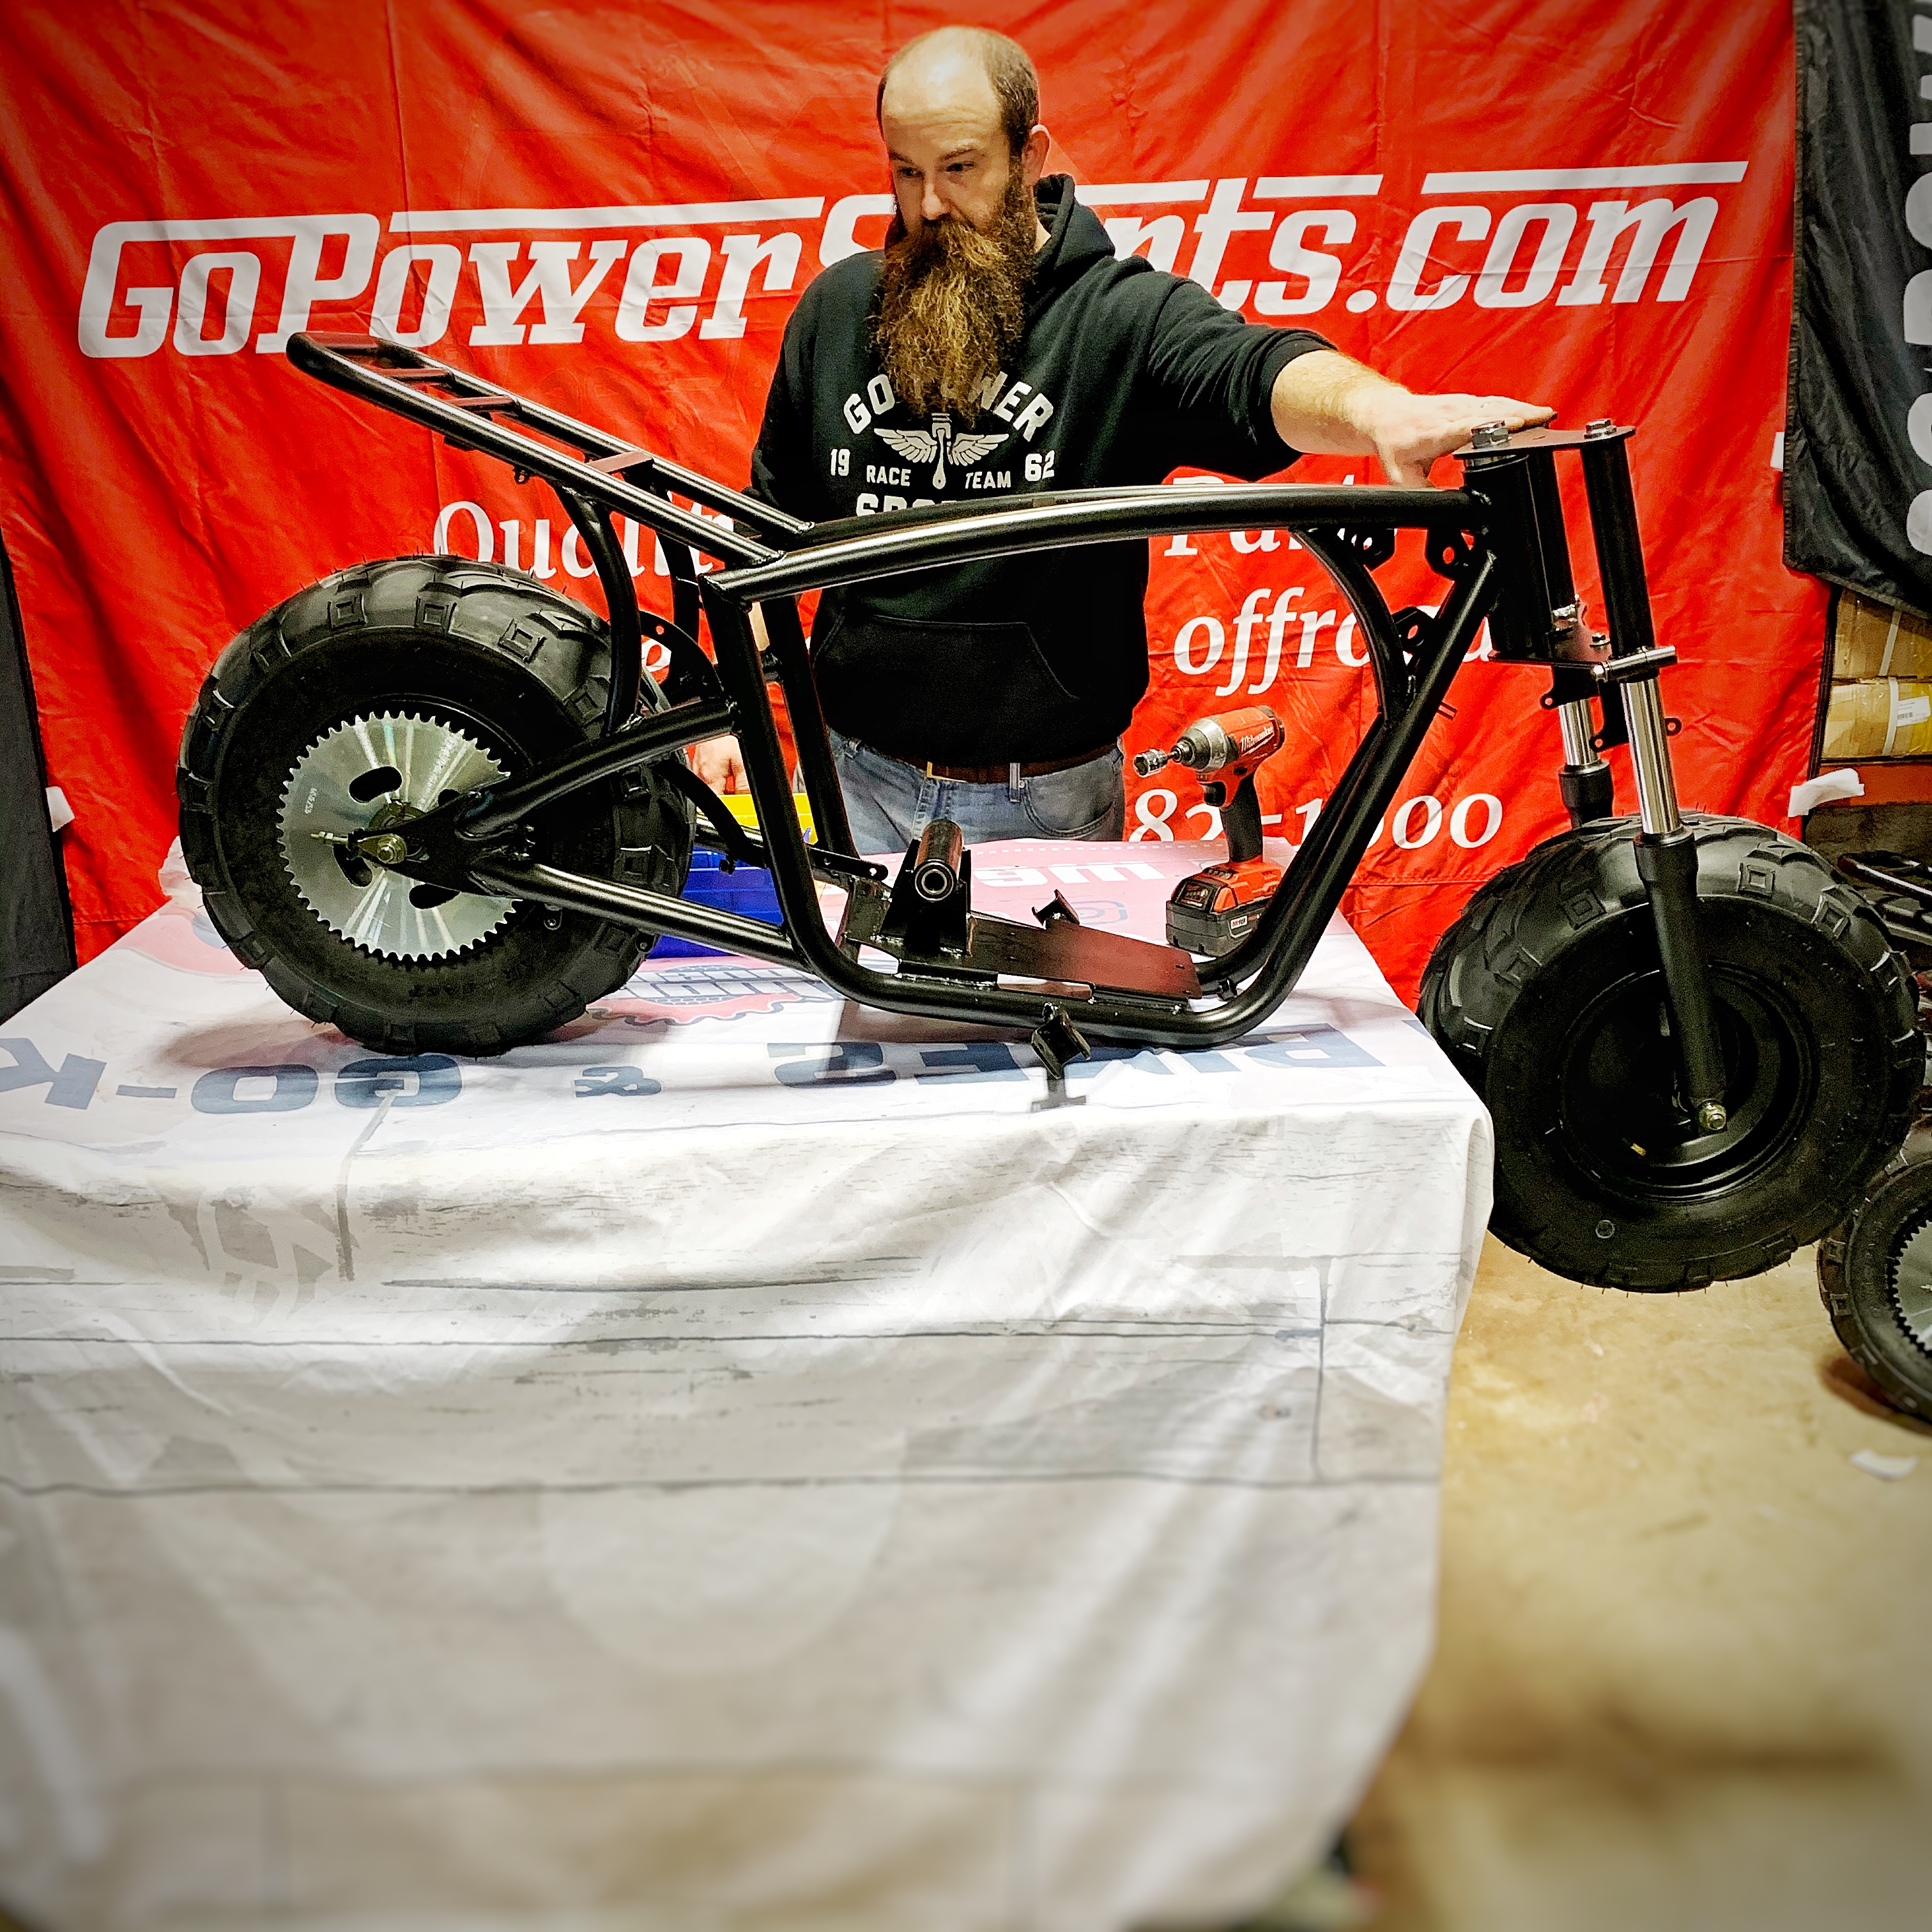
Below is your guide to putting together a Mega Moto 212 Frame Kit.
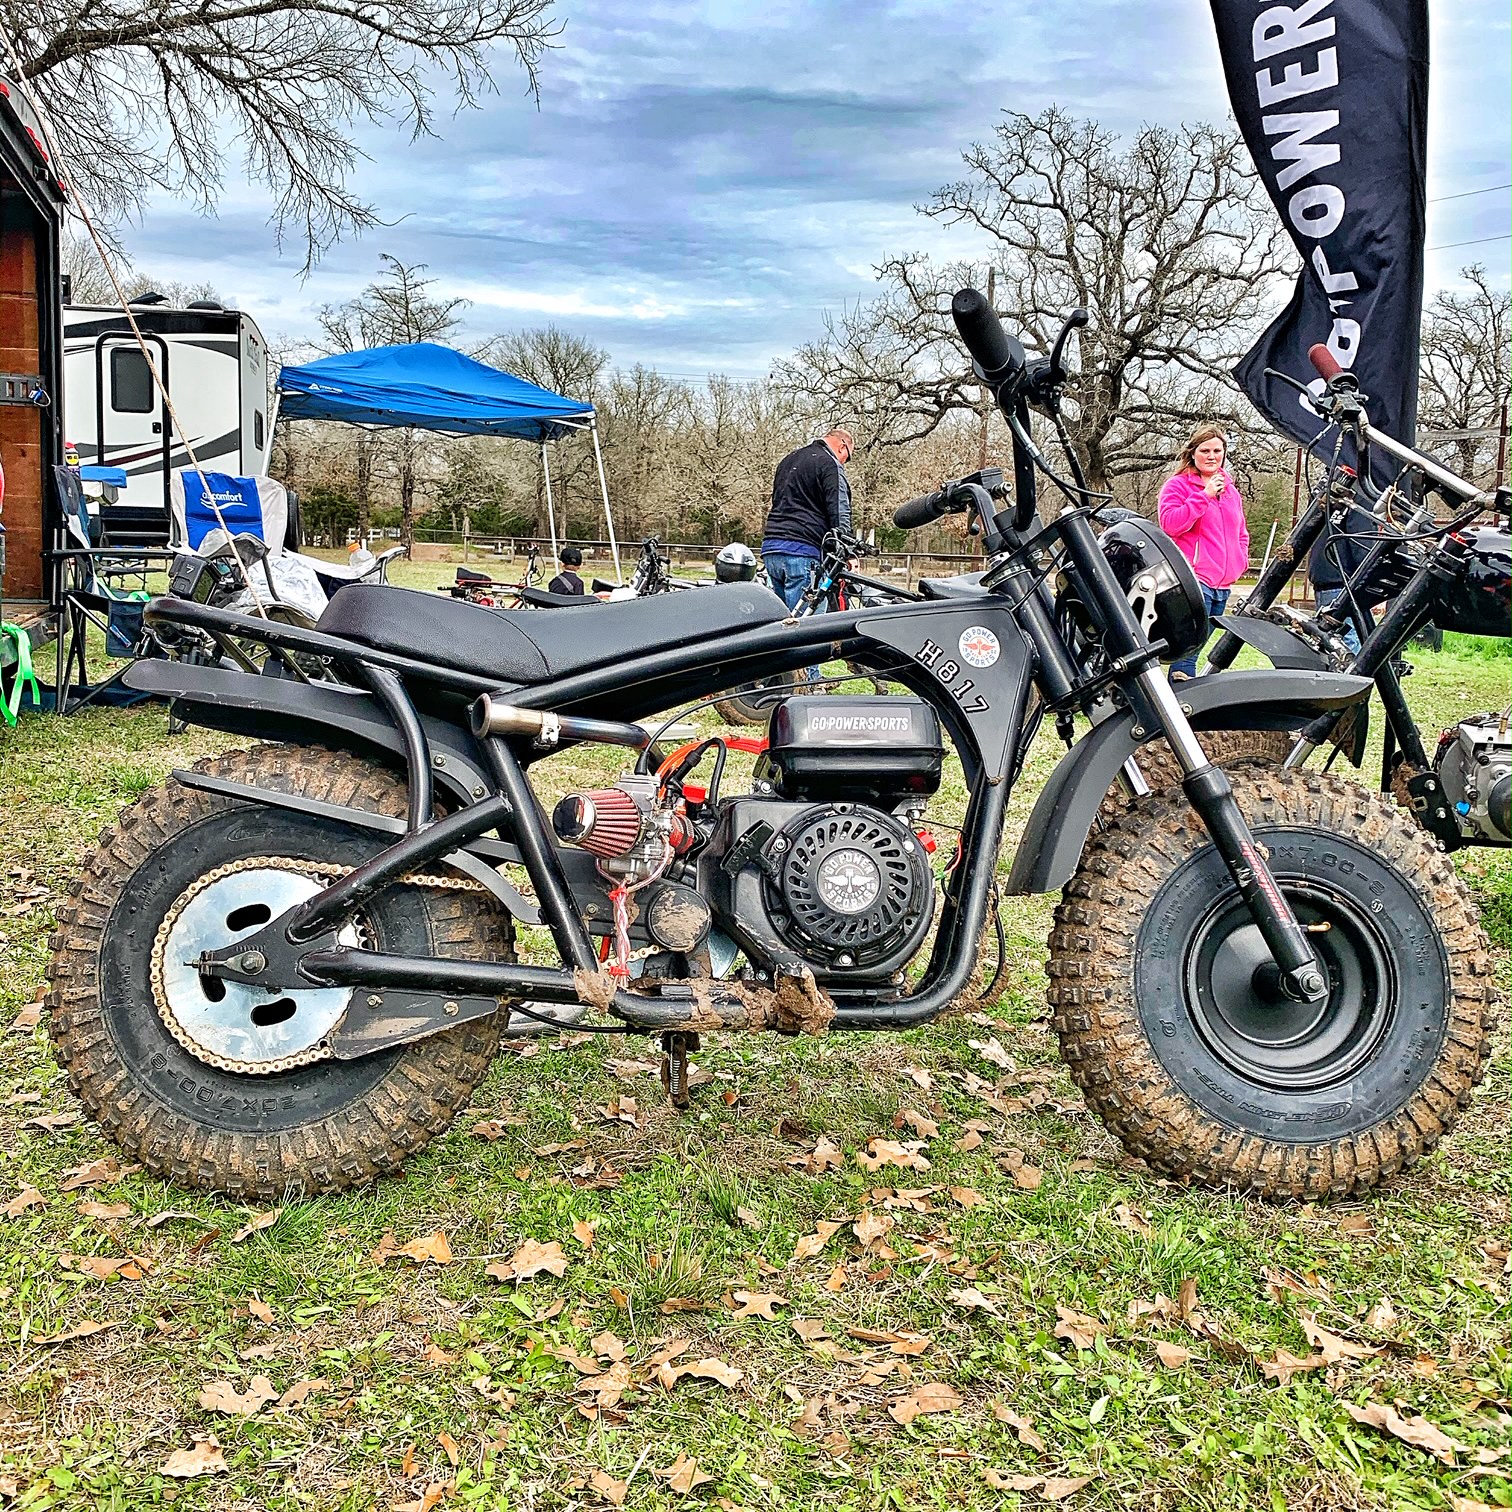
One of our favorite frames because the Mega Moto 212 Frame is solid and thicker than most mini-bikes out there. The Mega Moto 212 has even won the Oregon Gambler Mini Bike Enduro Race a few years in a row. The positives on Mega Moto 212 Pro bike would be:
- Front Suspension
- Front and Rear Hydraulic Brakes
- 30 Series Torque Converter
- Solid Frame
- 8" Rims
Click Here for the Mega Moto 212 Parts Breakdown. (This breakdown is very useful, I would print it out.)
Click Here for the Mega Moto 212 Video Breakdown.
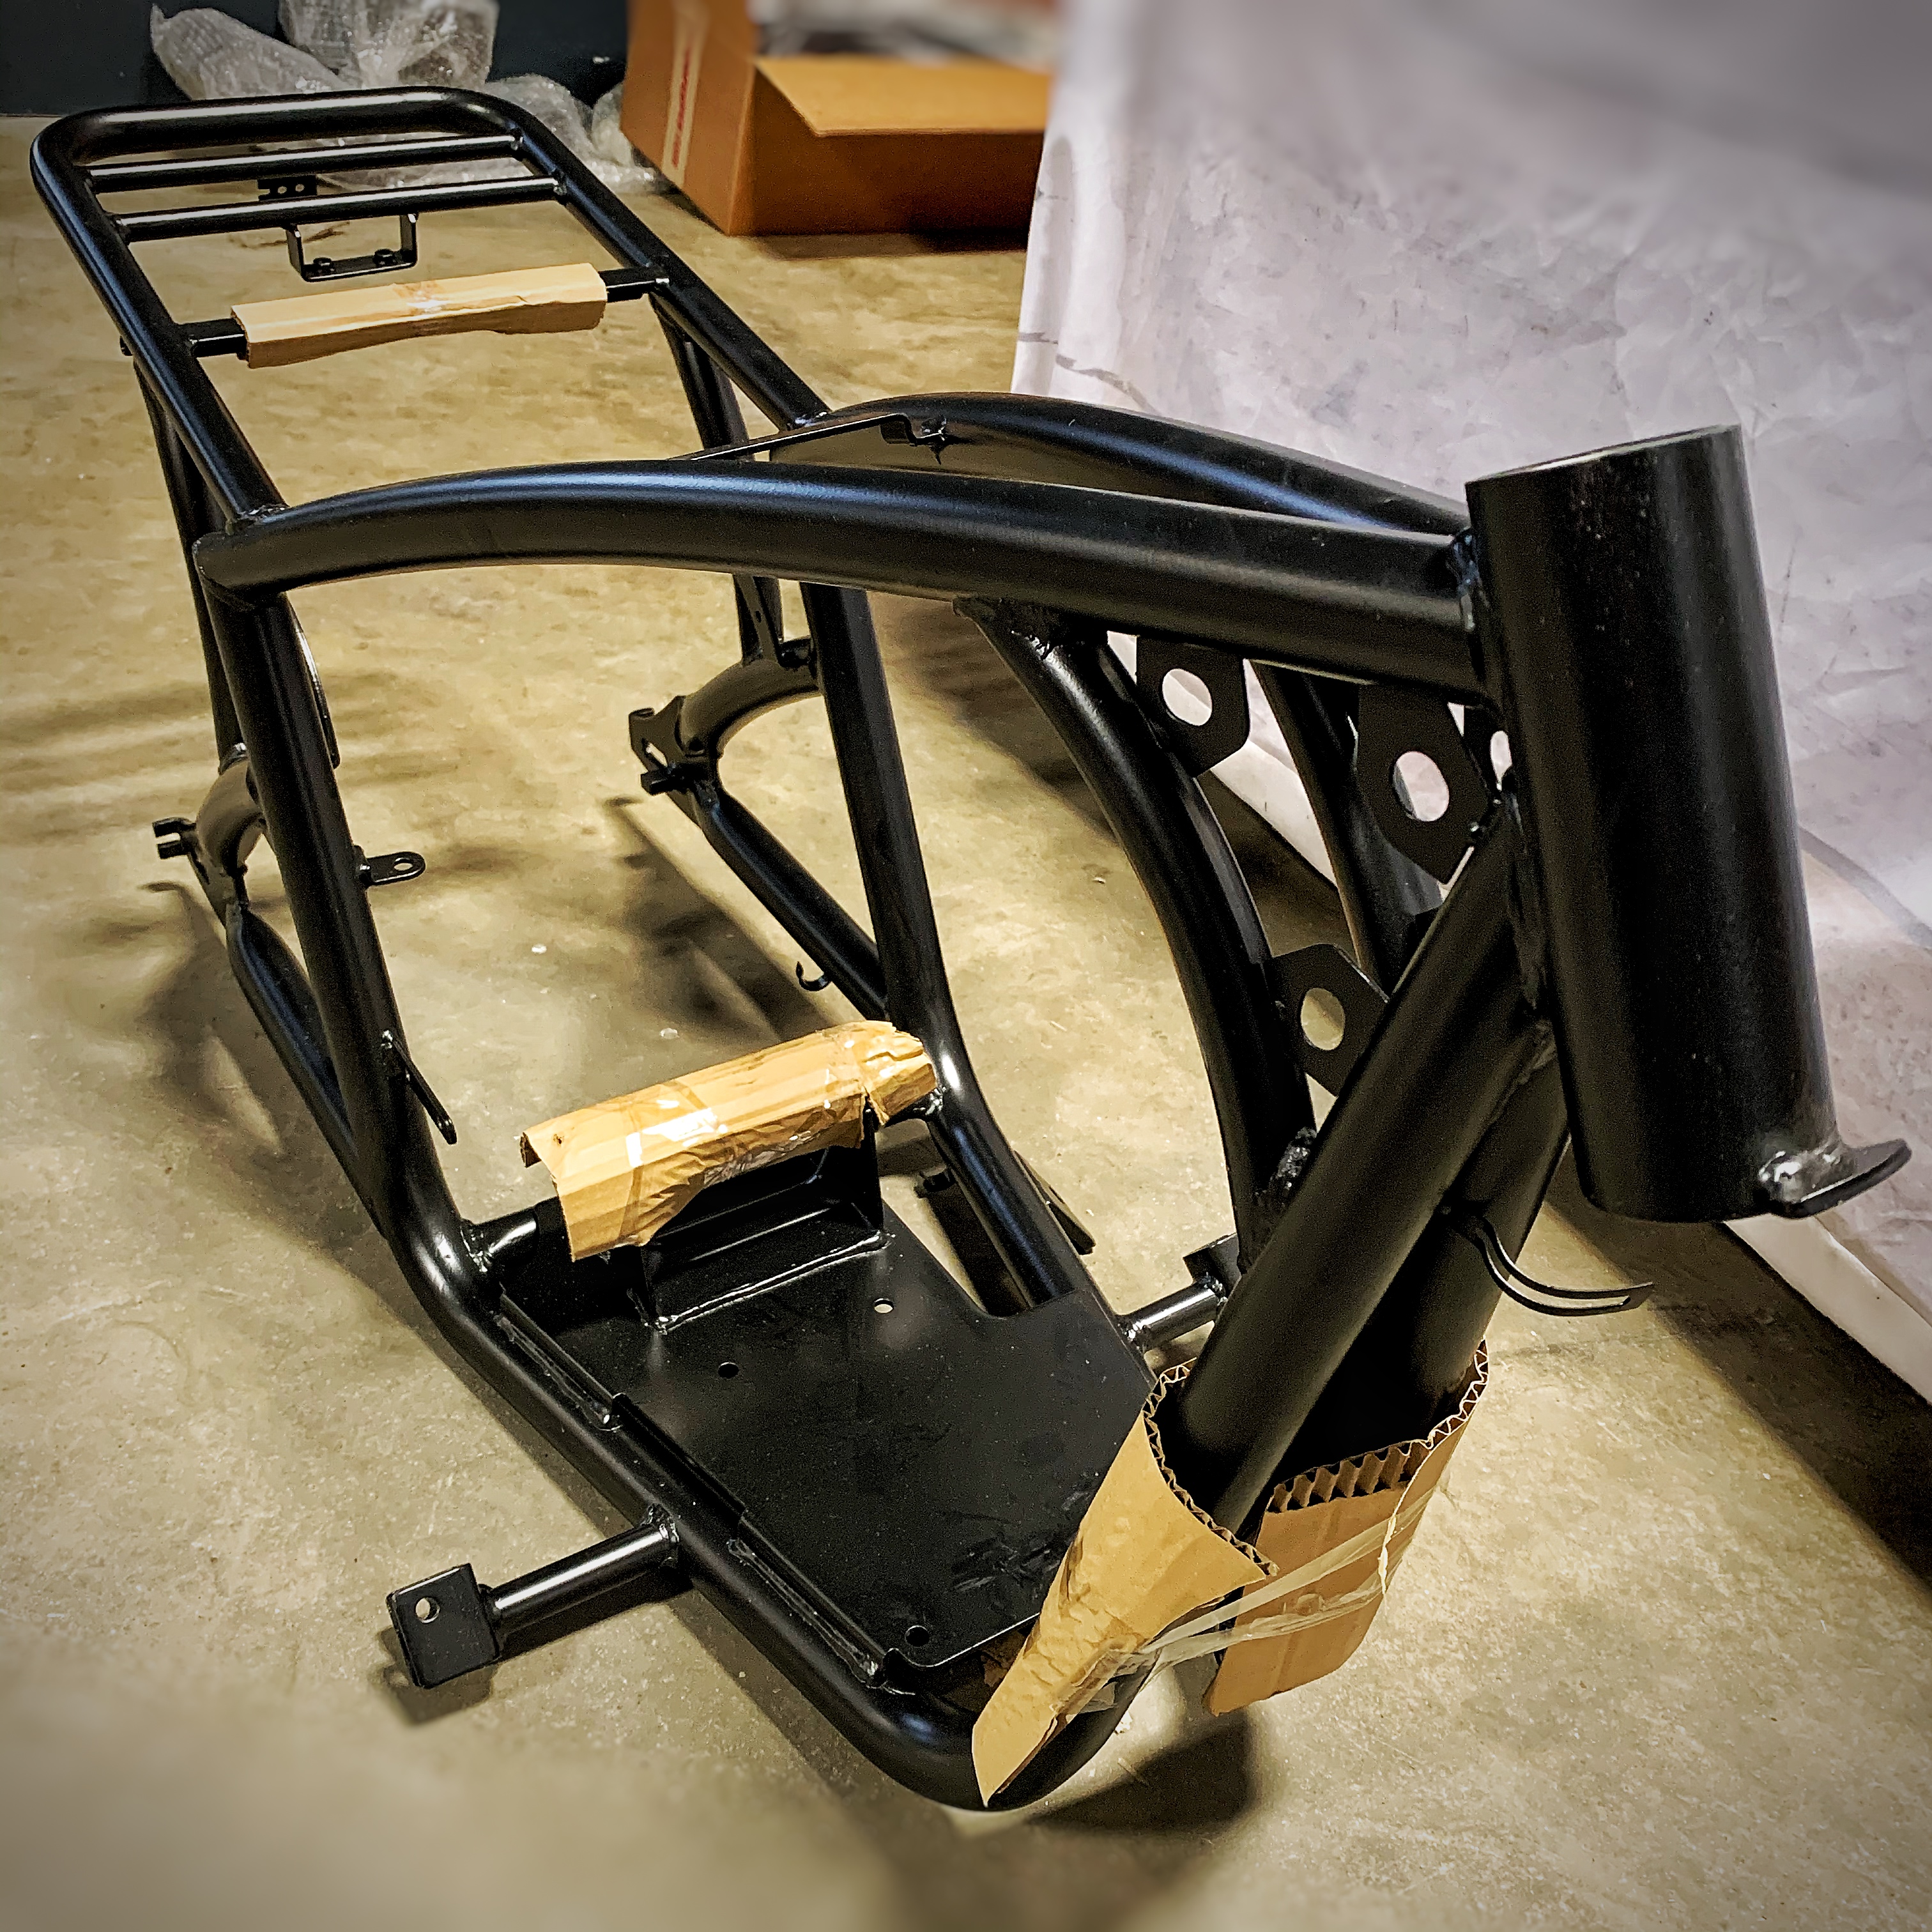
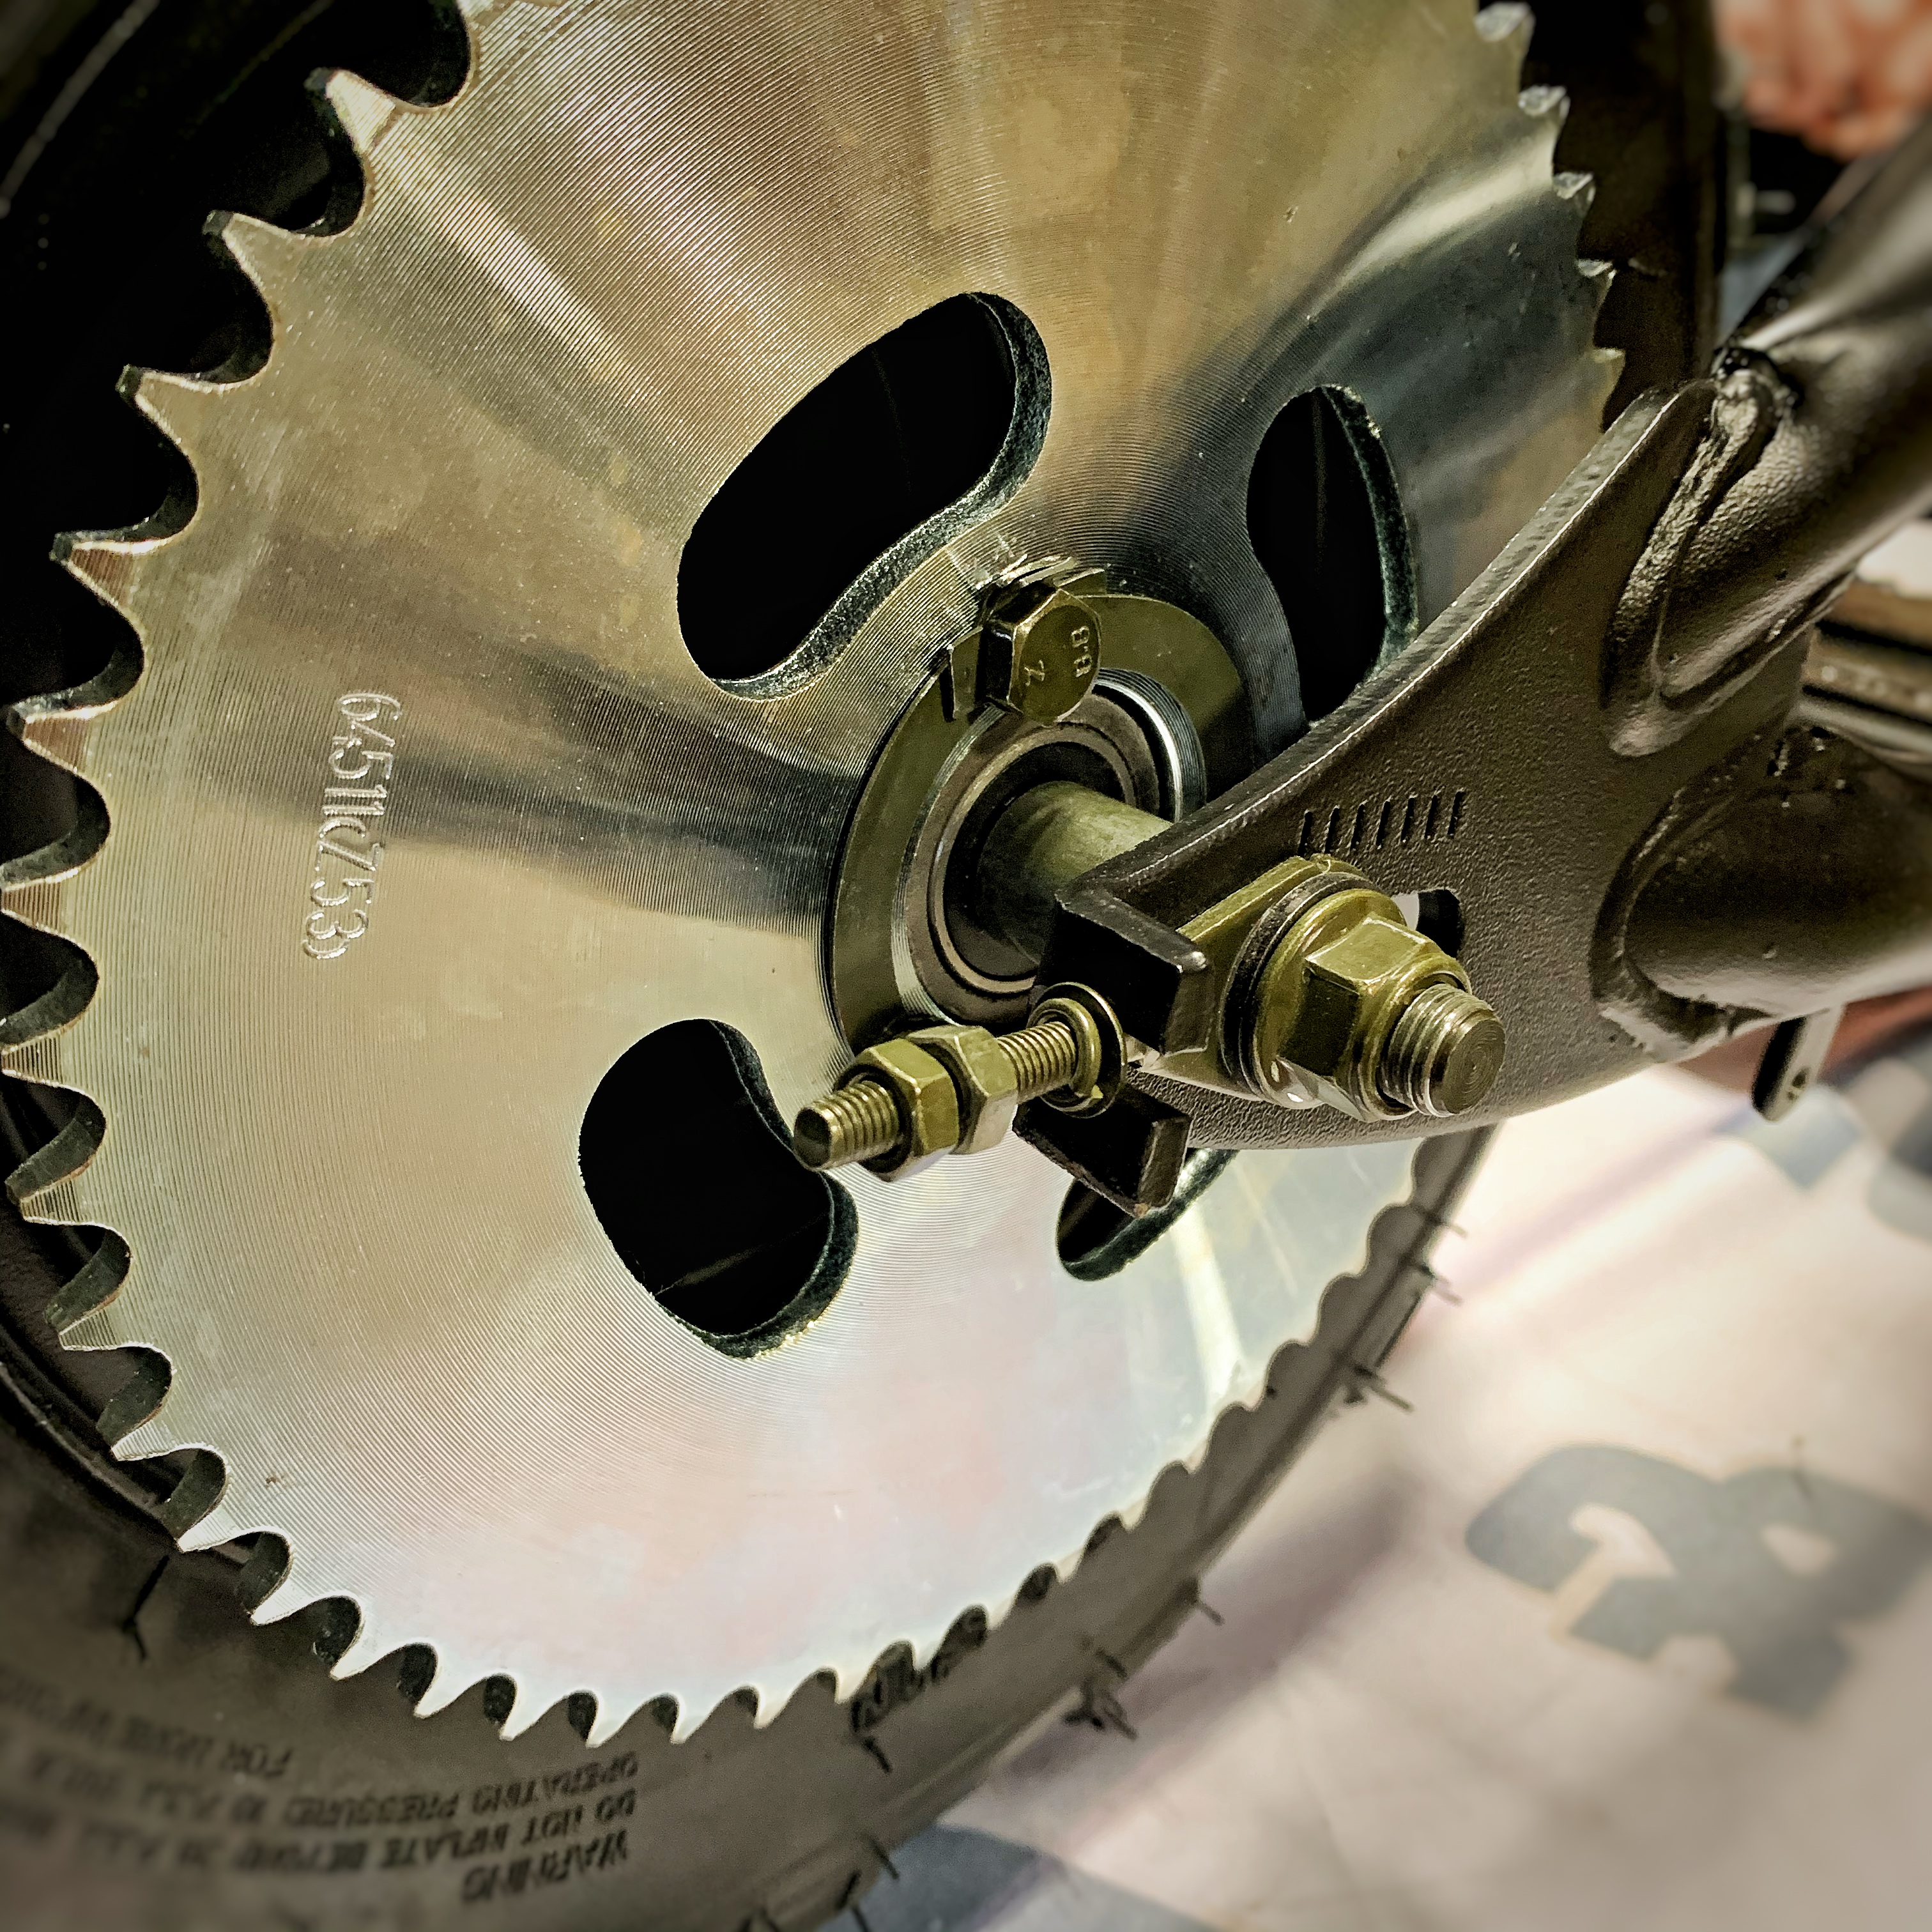
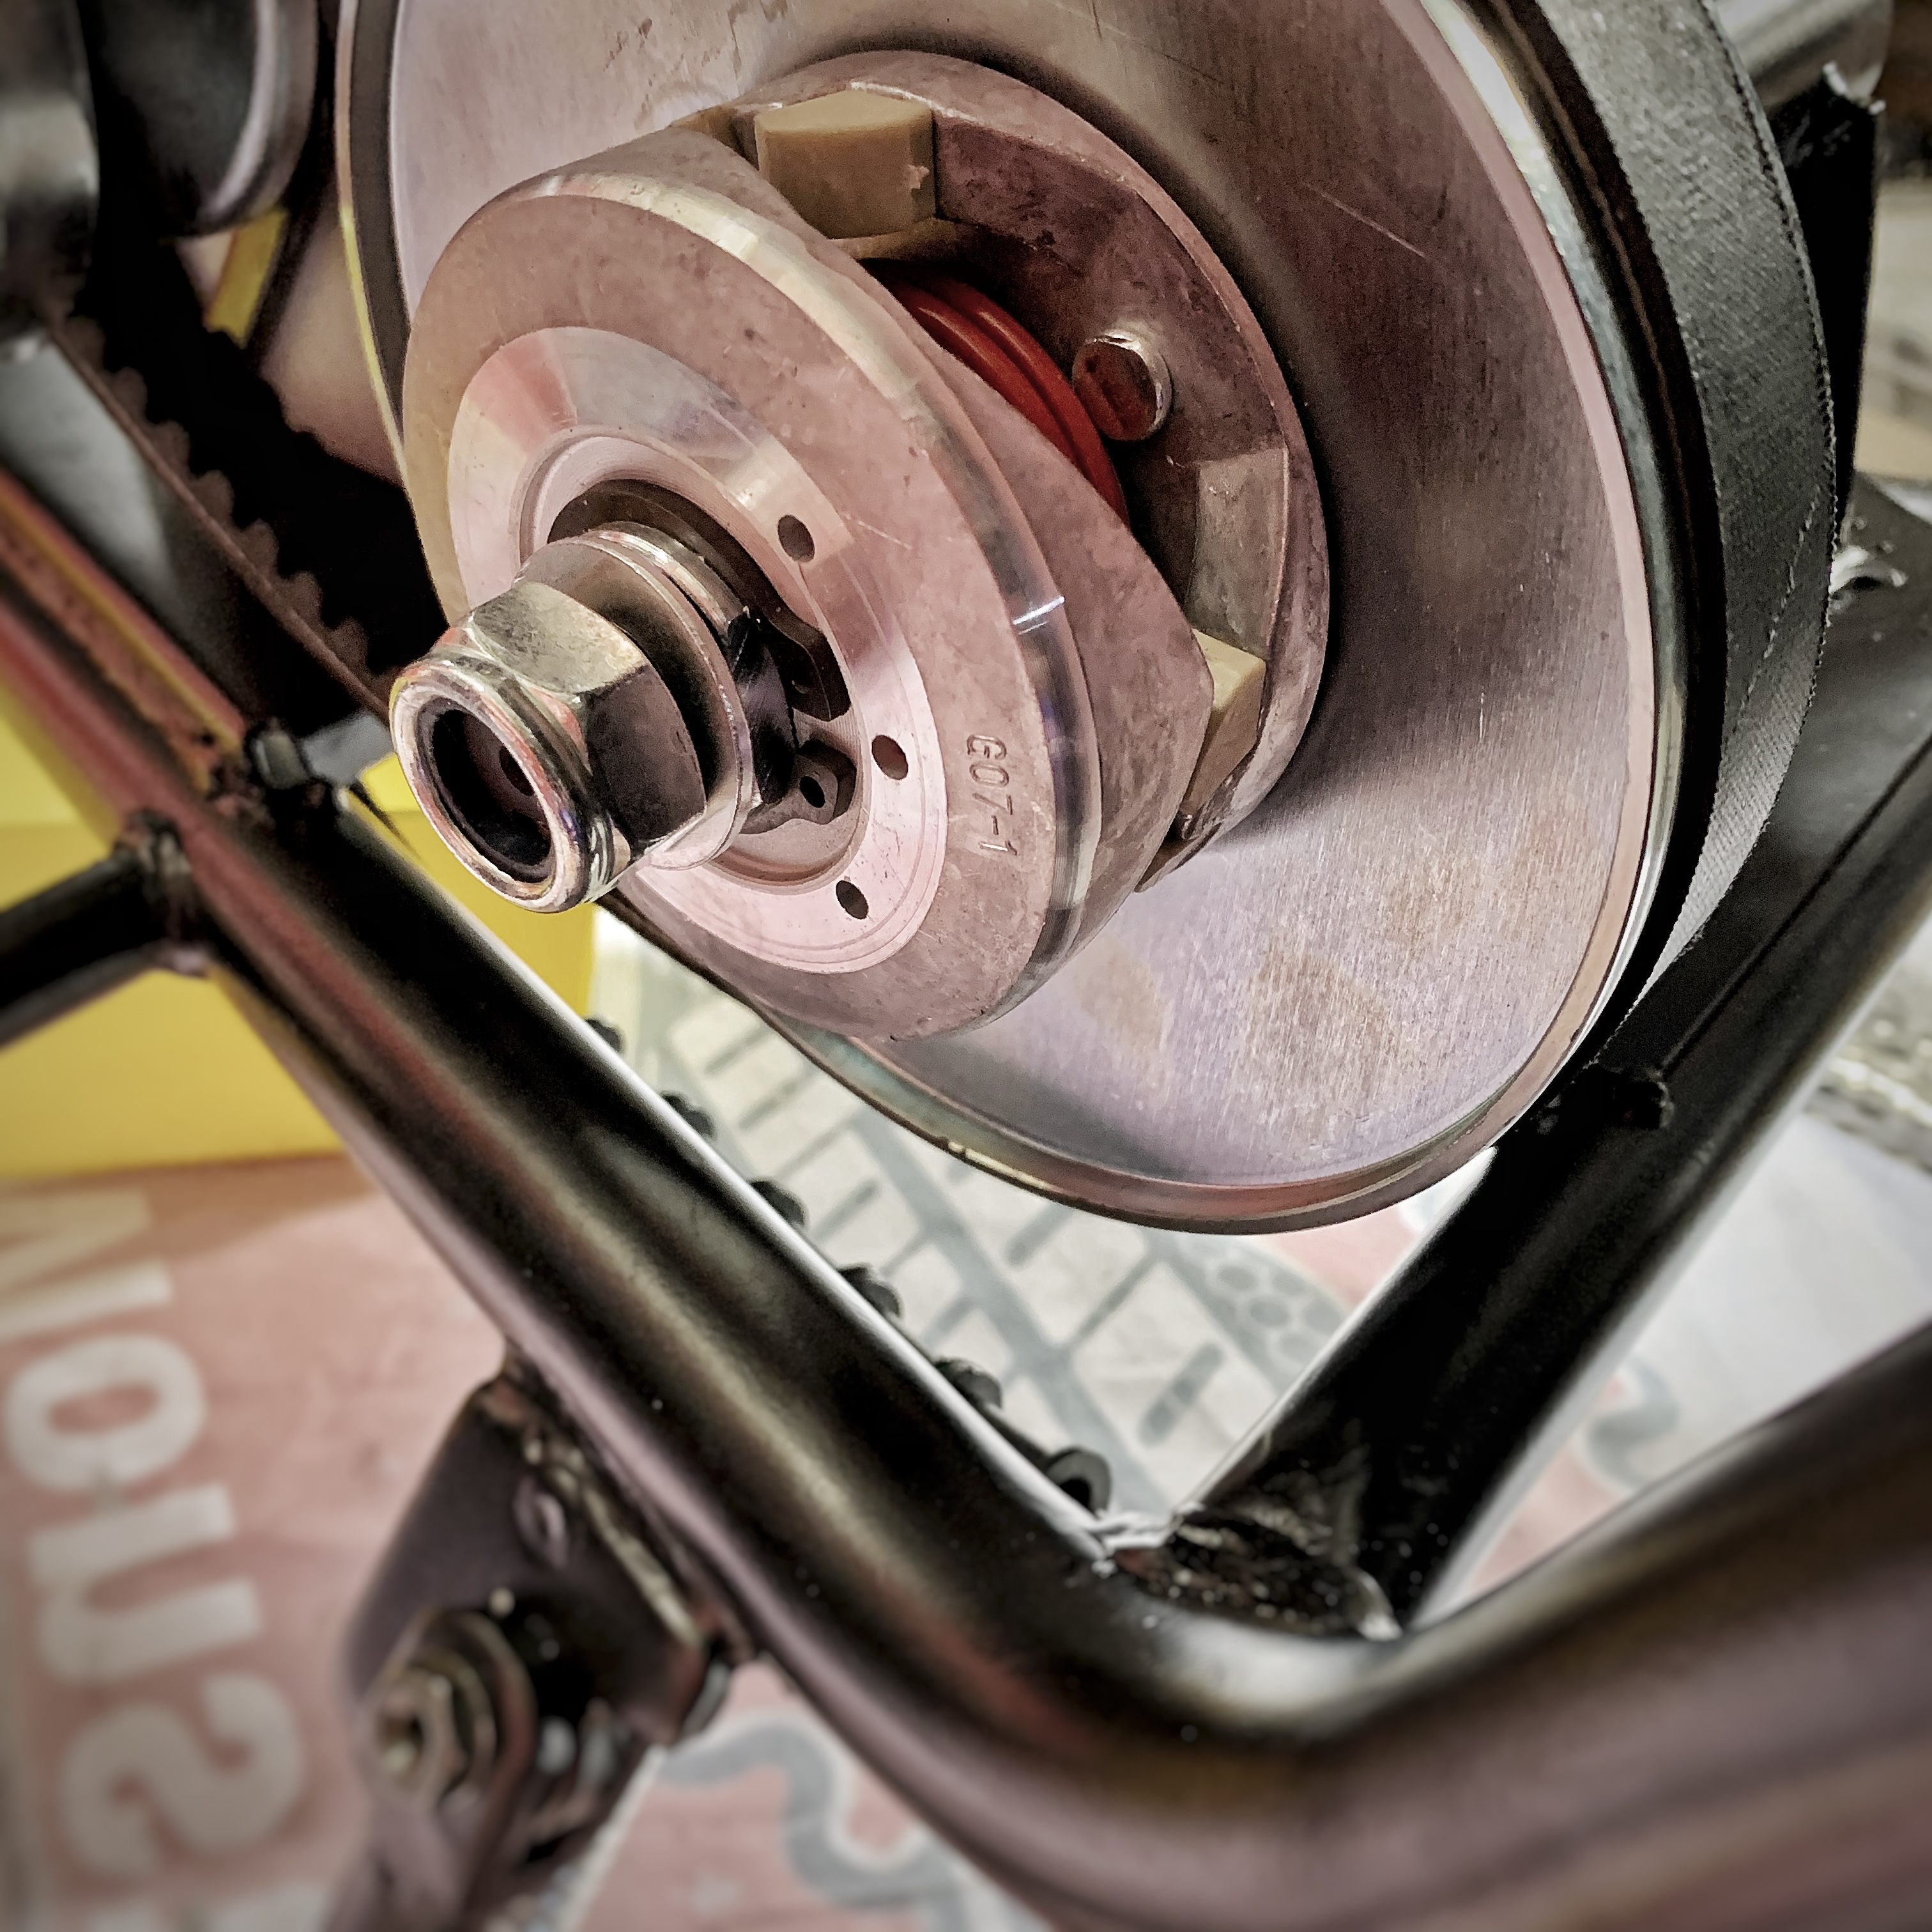
If you bought the Mega Moto 212 Mini Bike Frame Kit, then you most likely received 2 boxes. We will start with the bigger box and take out it's contents. Lay the frame to the side and let's focus on the wheels. Your V-Tread tires are directional, so make sure the point of your V-Treads are facing forward. The Rear Wheel will have flanges on both sides of the rim, one for your brake disc and the other for your sprocket (53T #420 is stock).
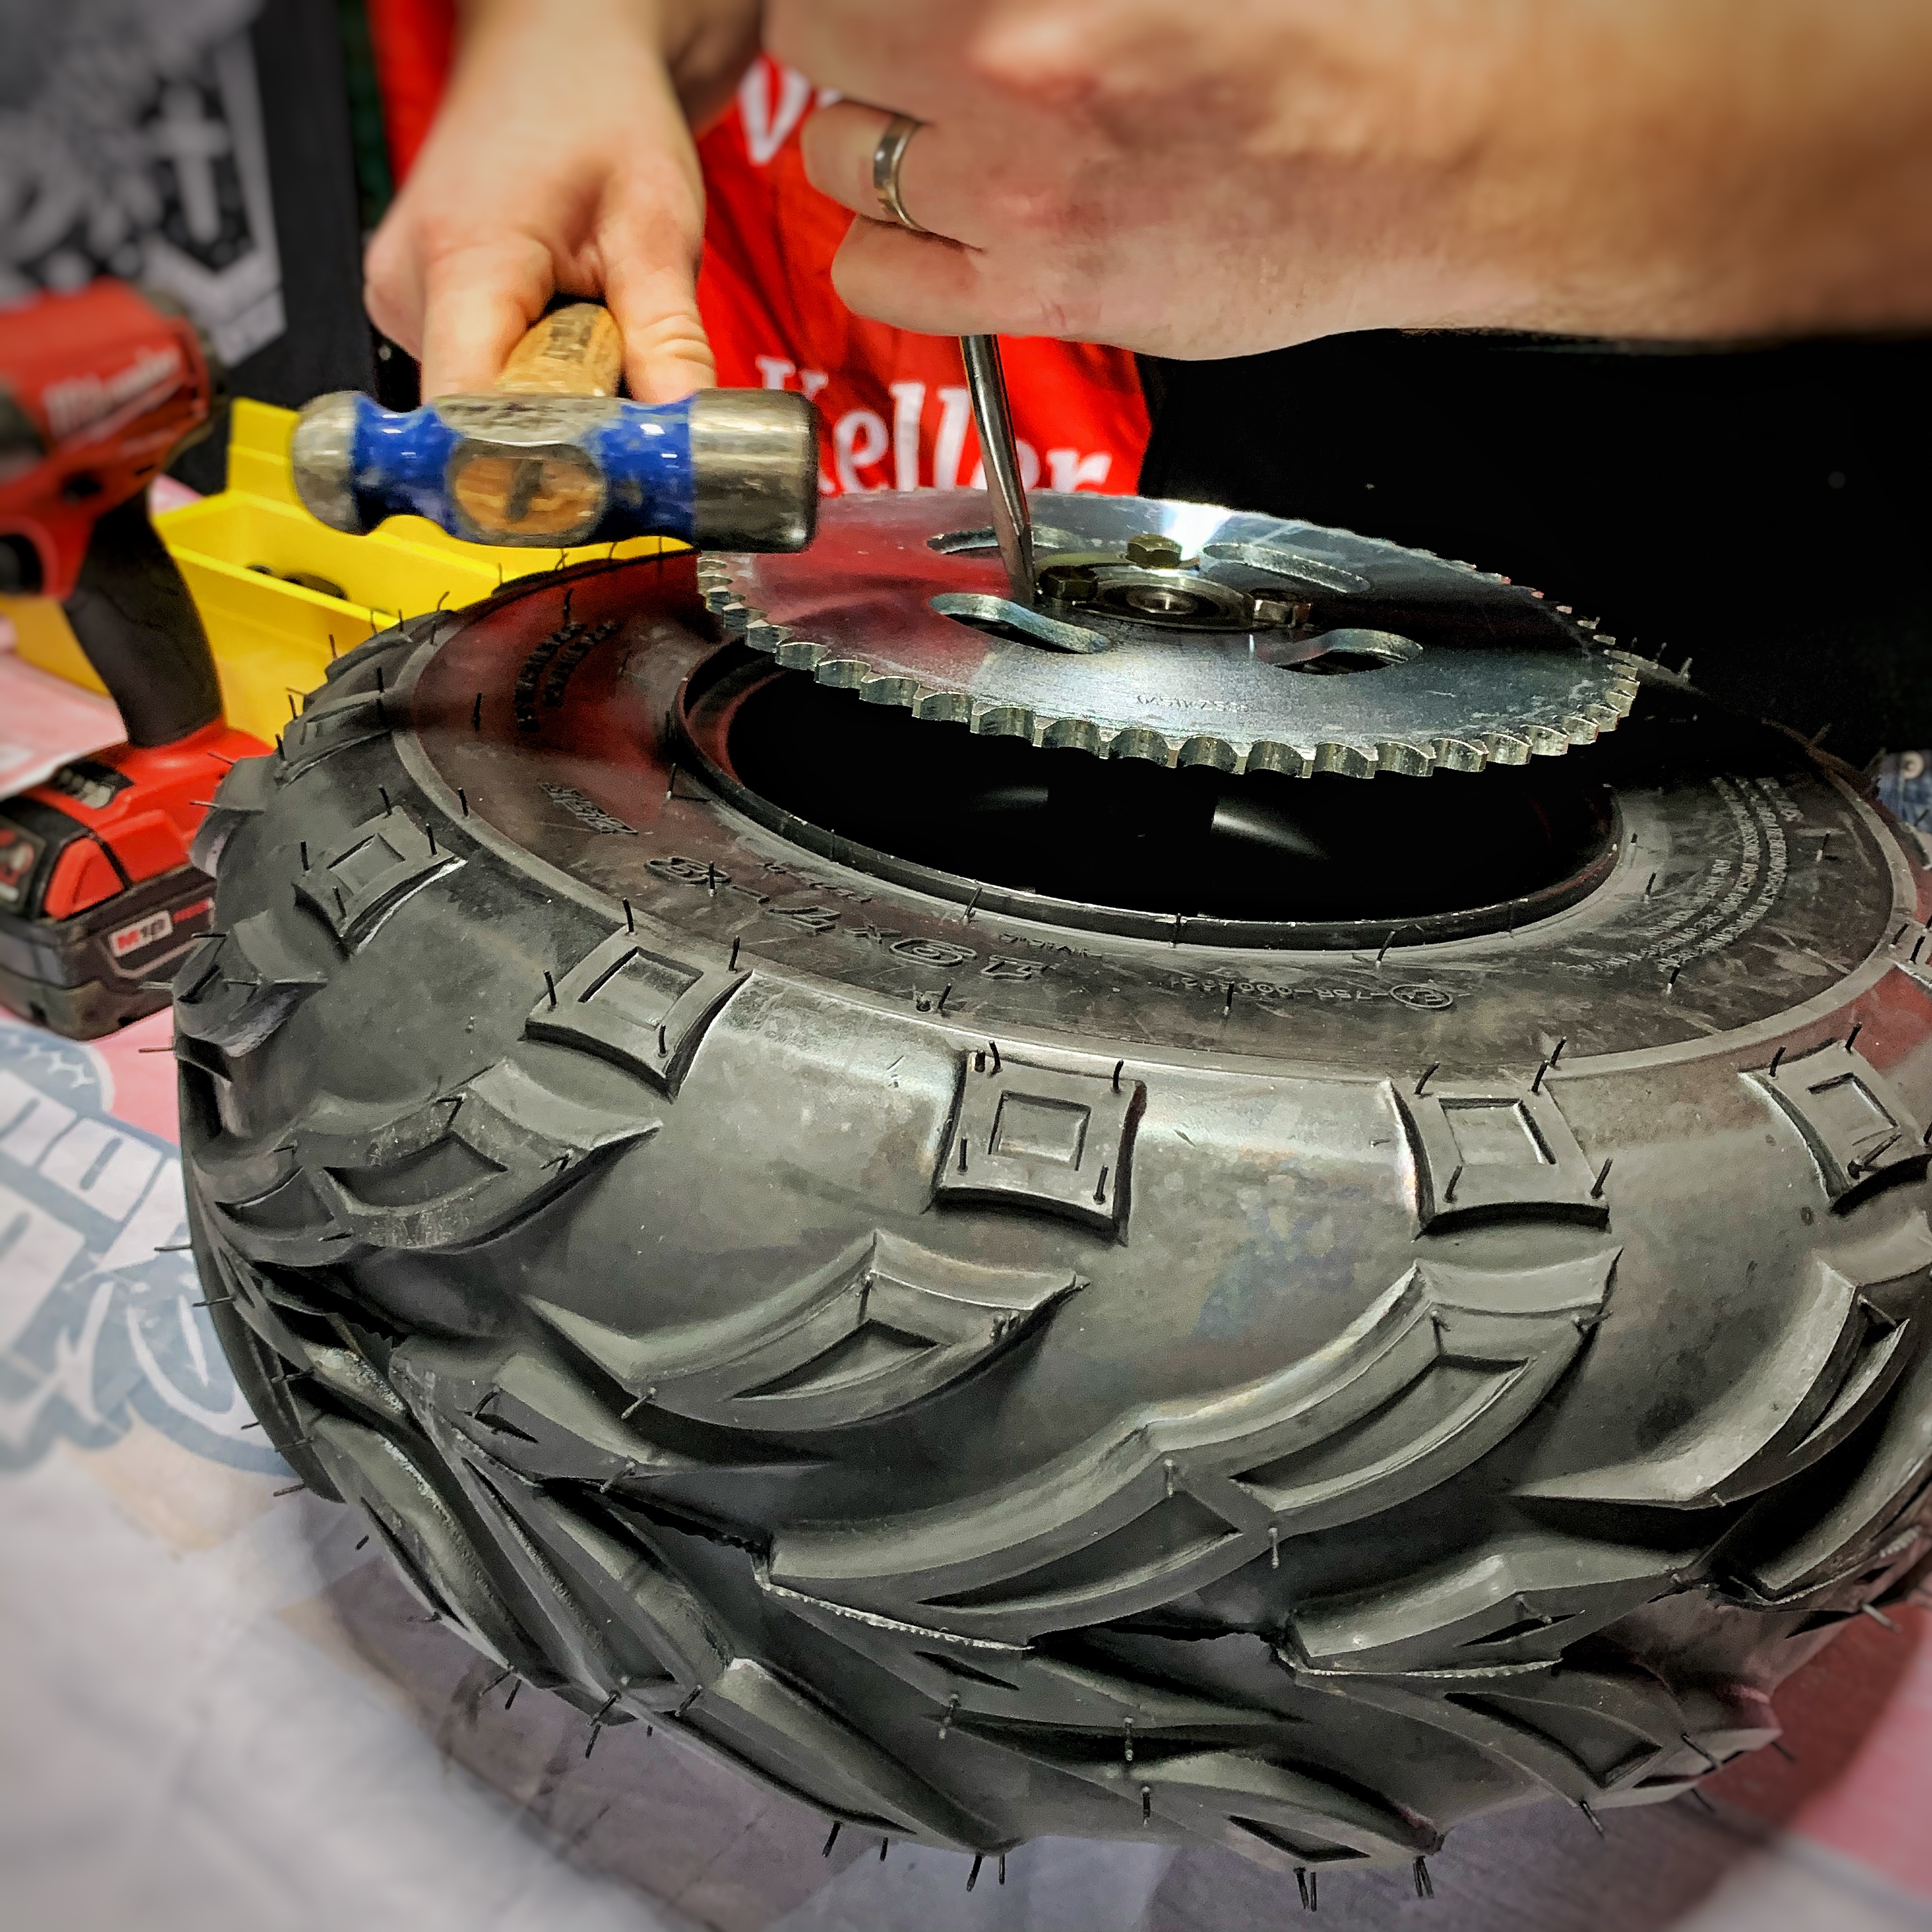
The sprocket is held on by (3) M8x20 Bolts and (2) Lock Plates. Above shows how the Lock Plates are then bent toward the bolt head to keep them from backing out.
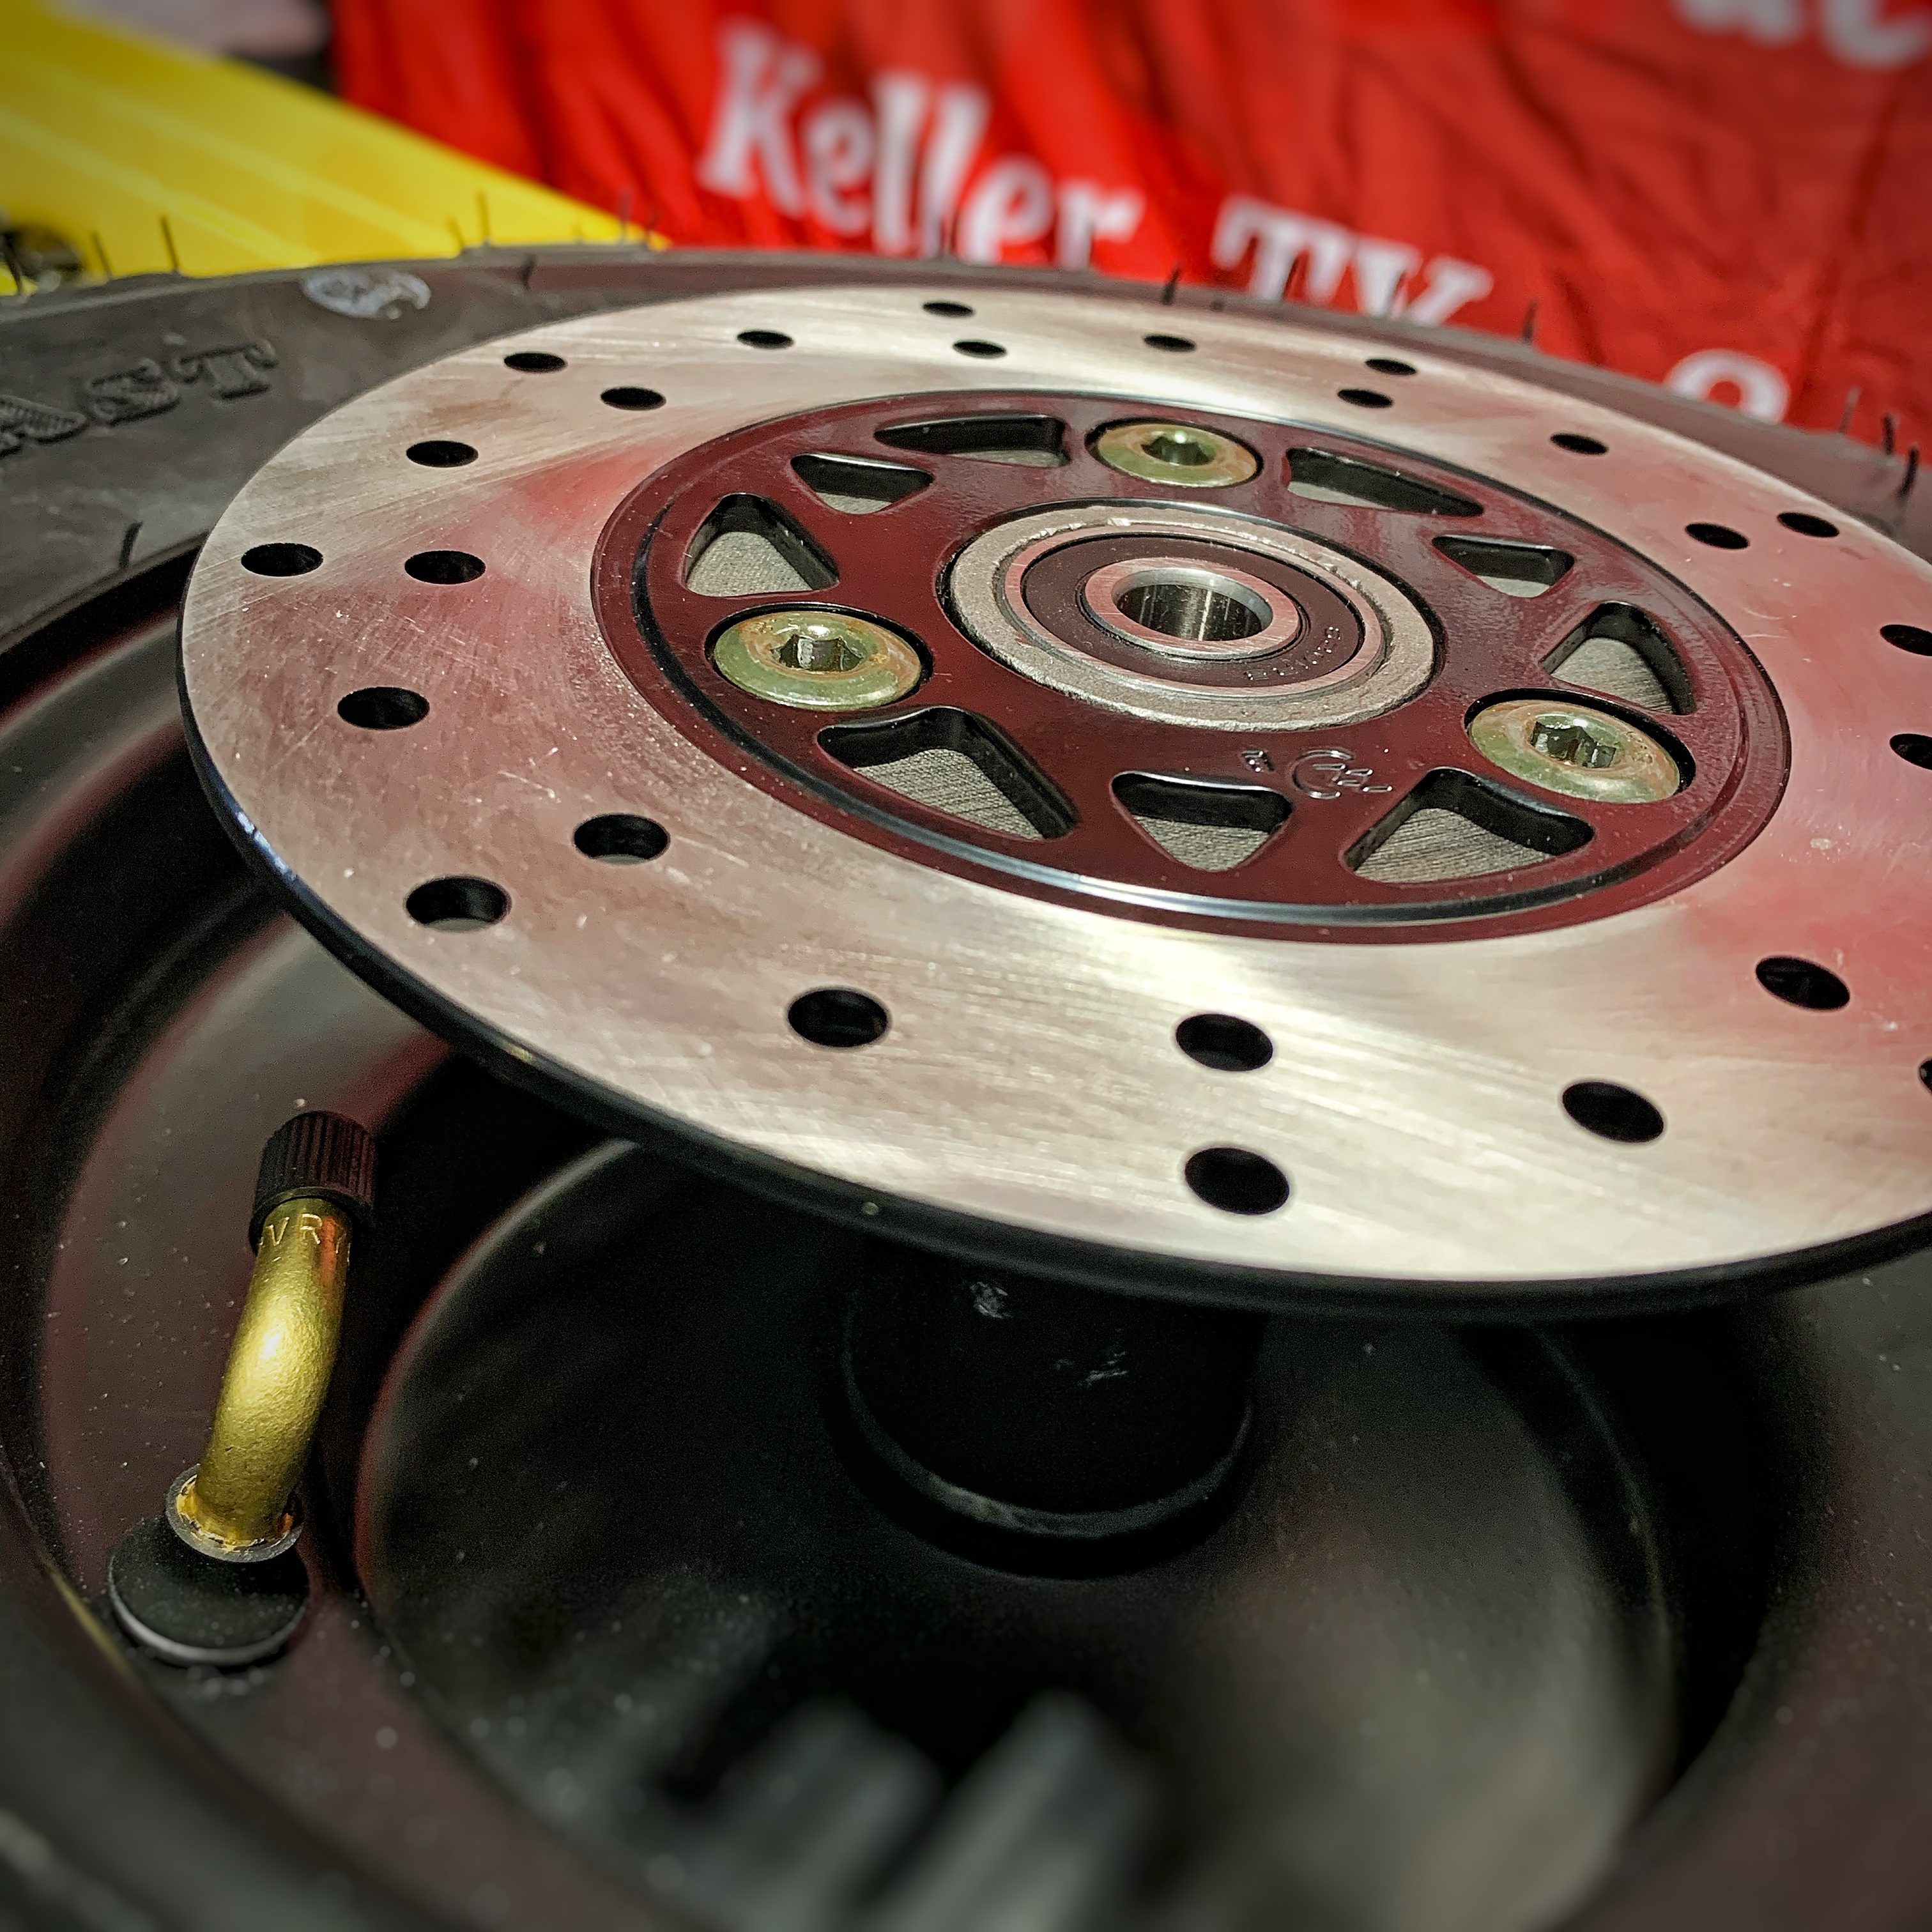
The Brake Discs will then go on the other side the rear wheel and on to your front wheel. These are fastened to the wheel by (3) M8 Button Head Bolts. Set both Tire & Wheel Assemblies to the side and install the front suspension.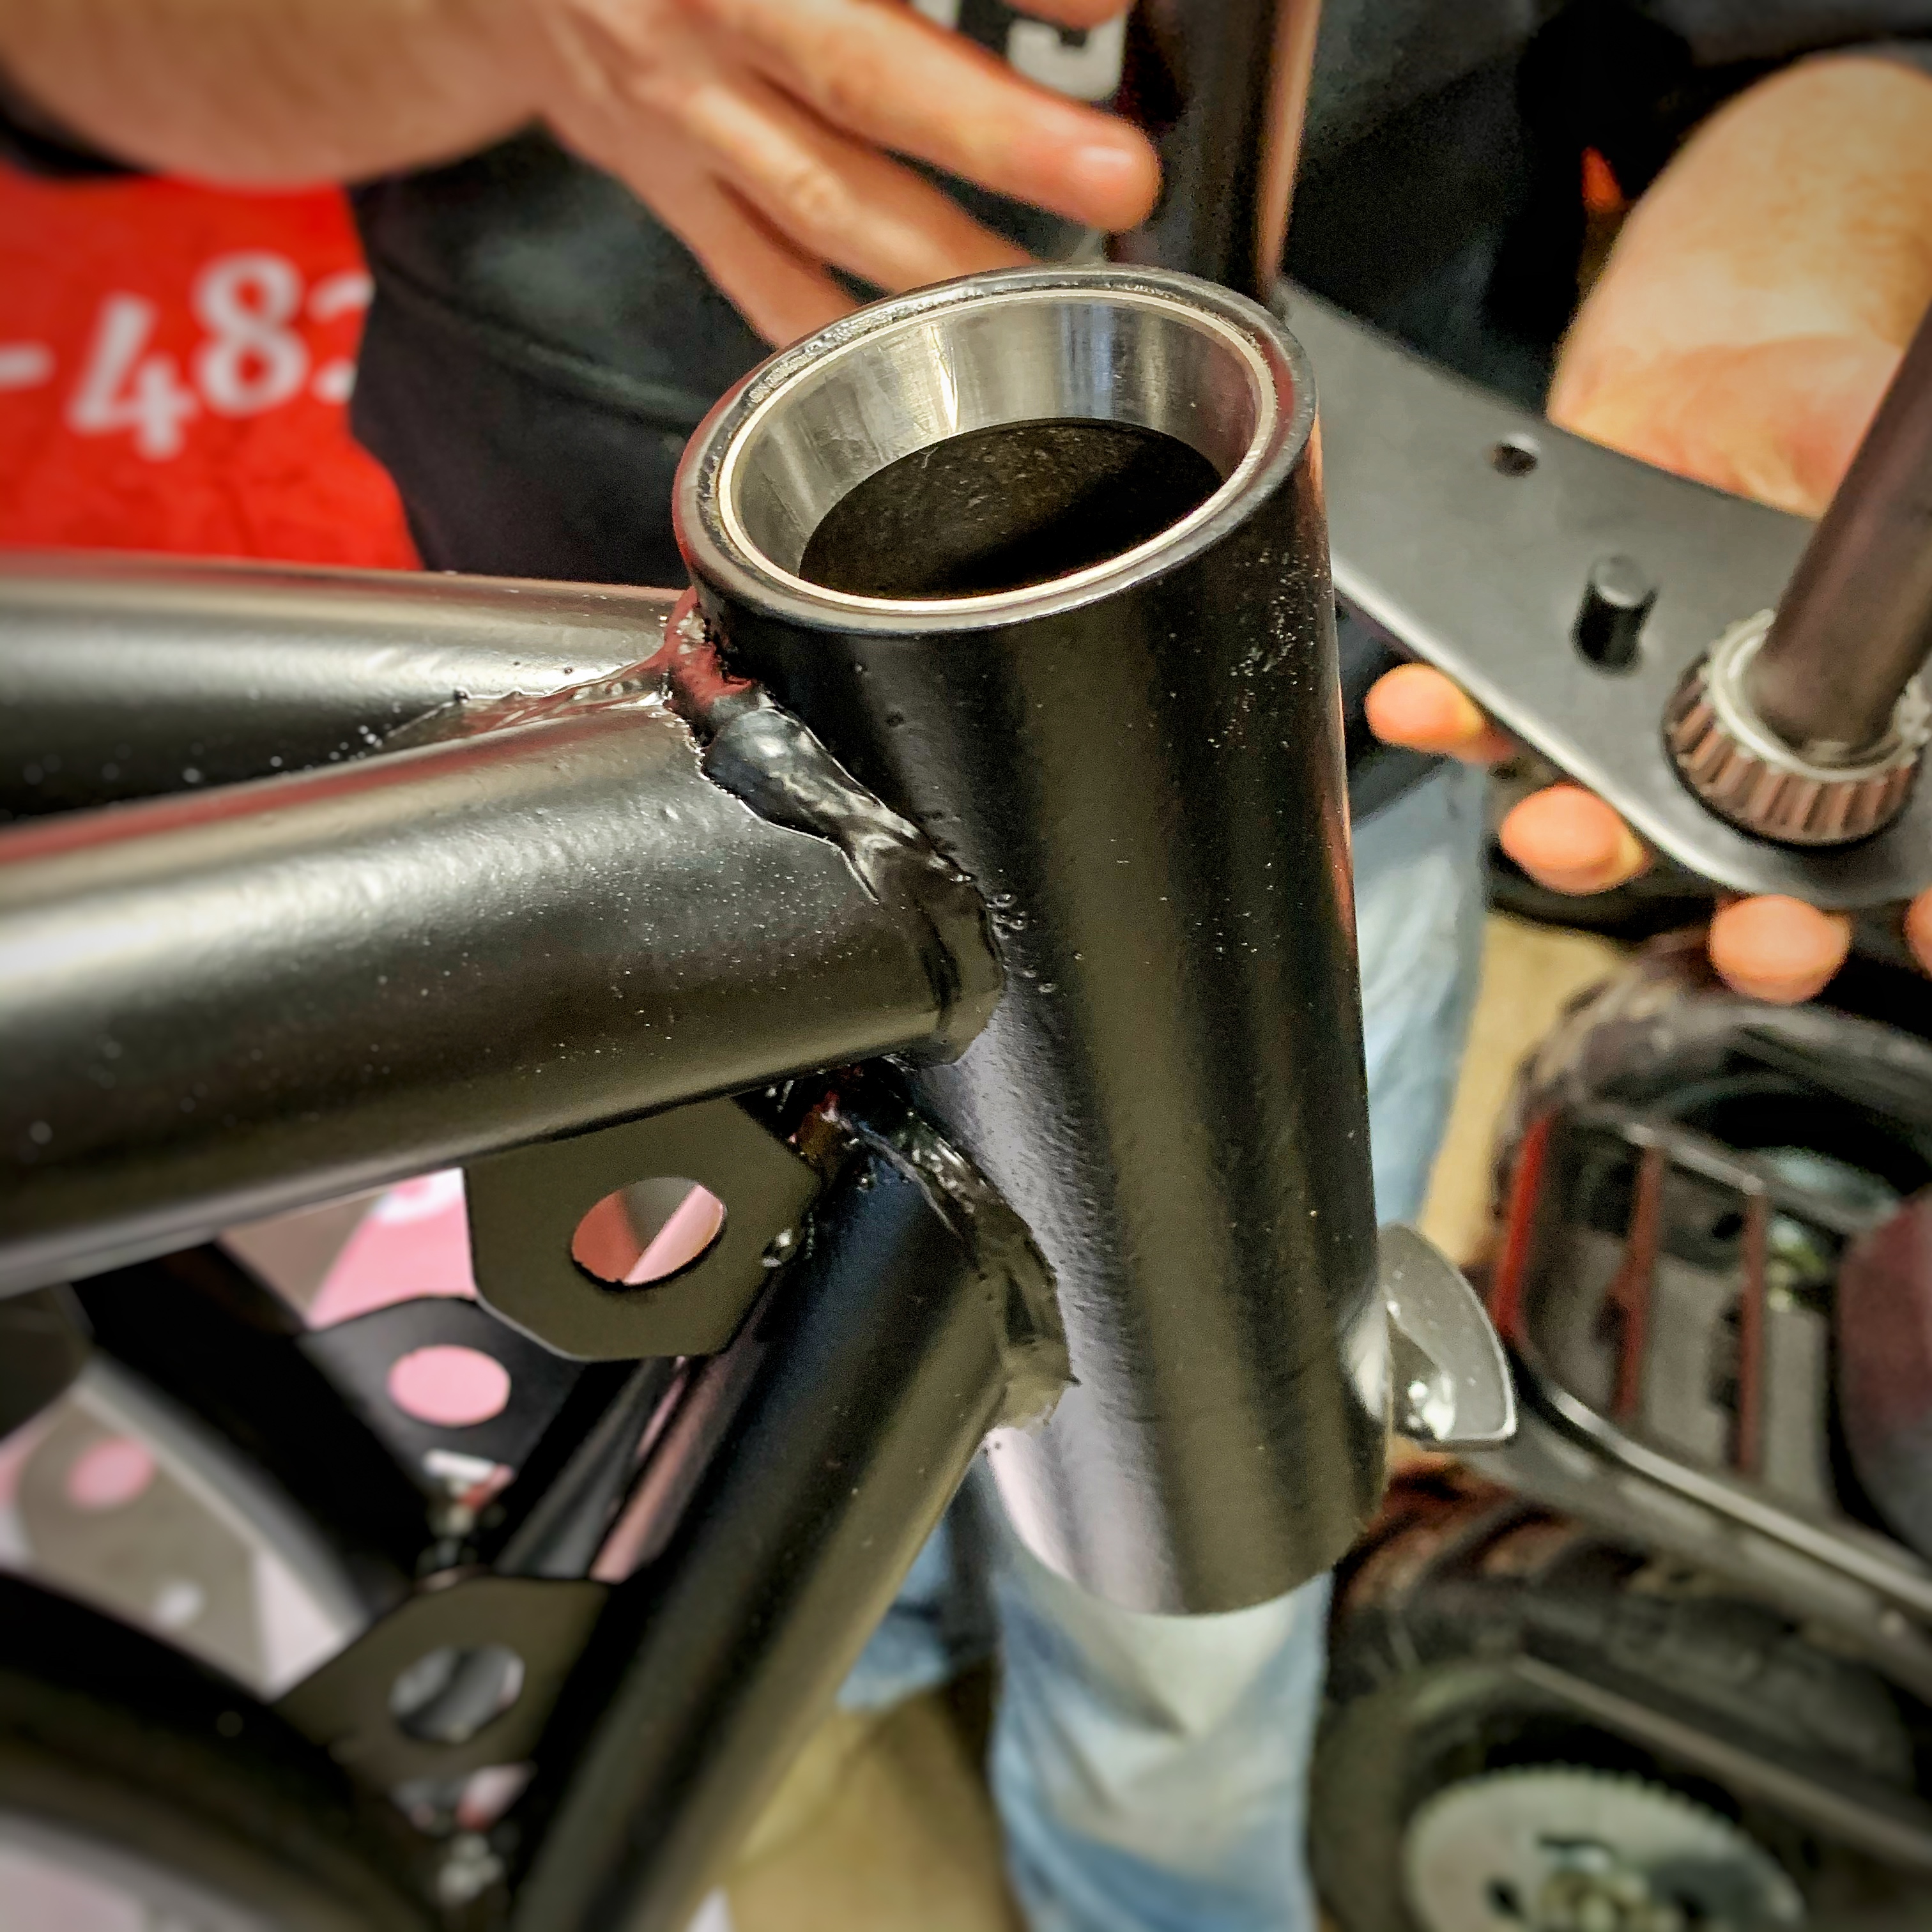
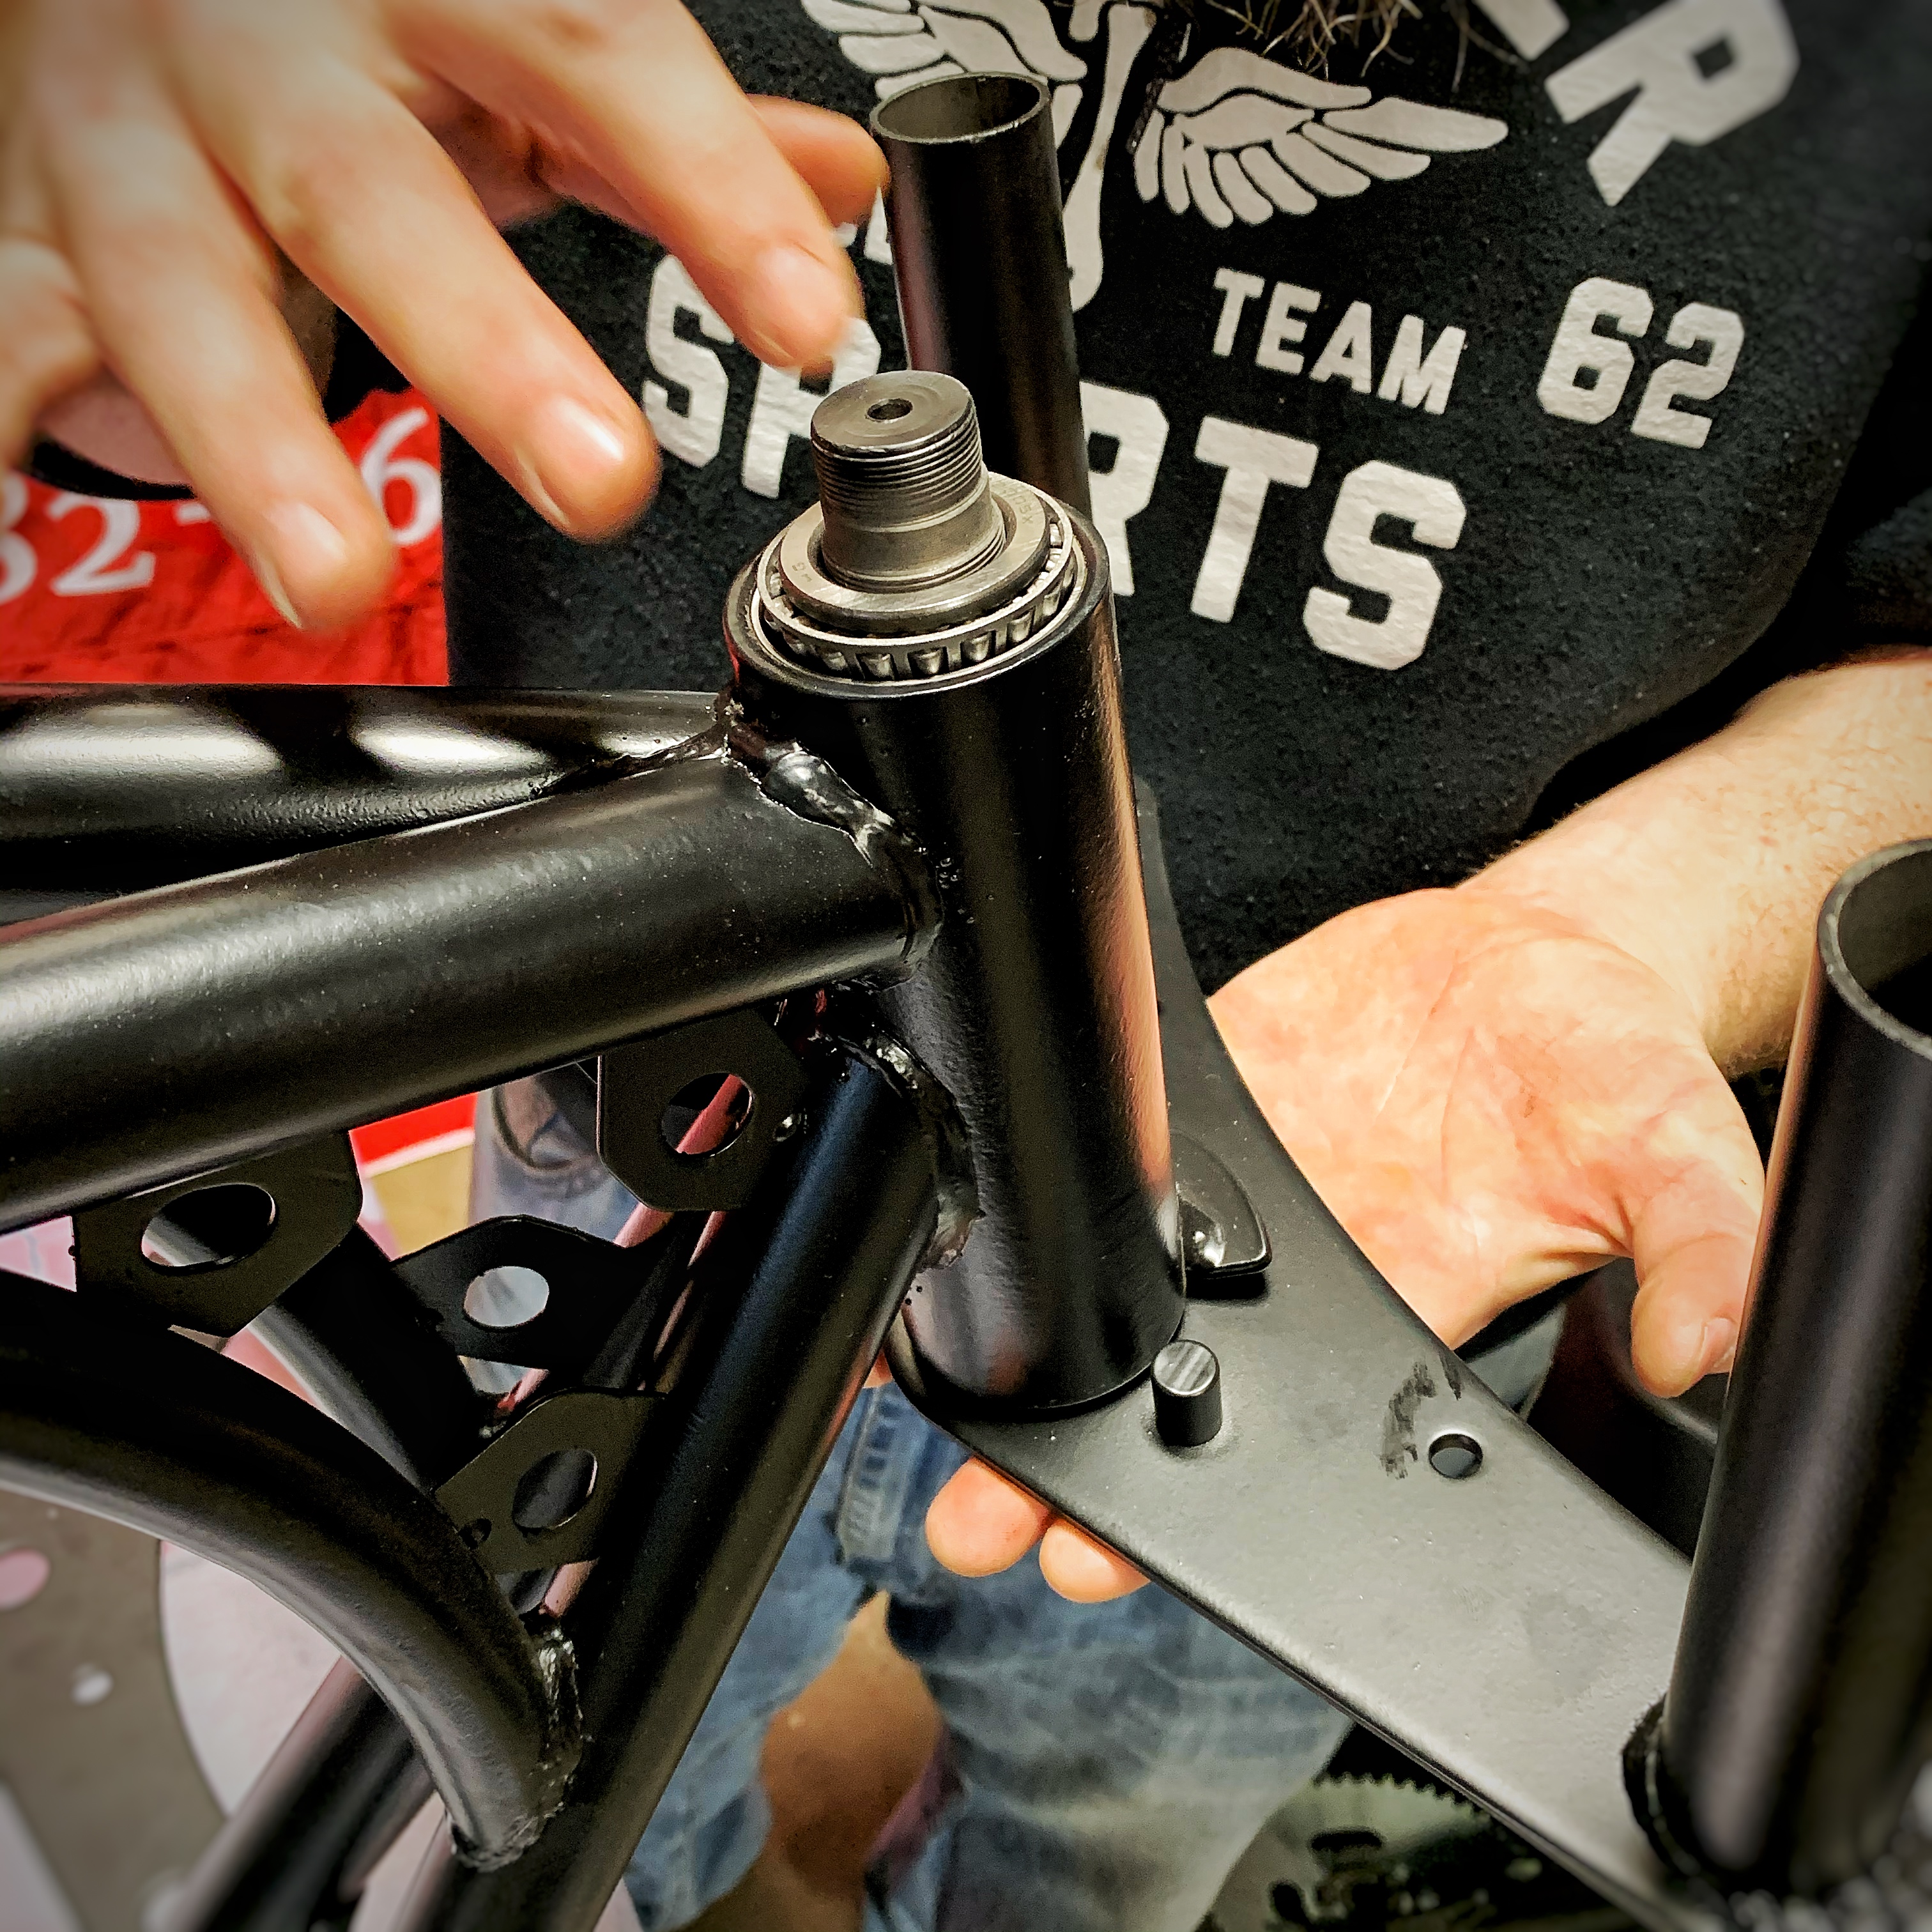
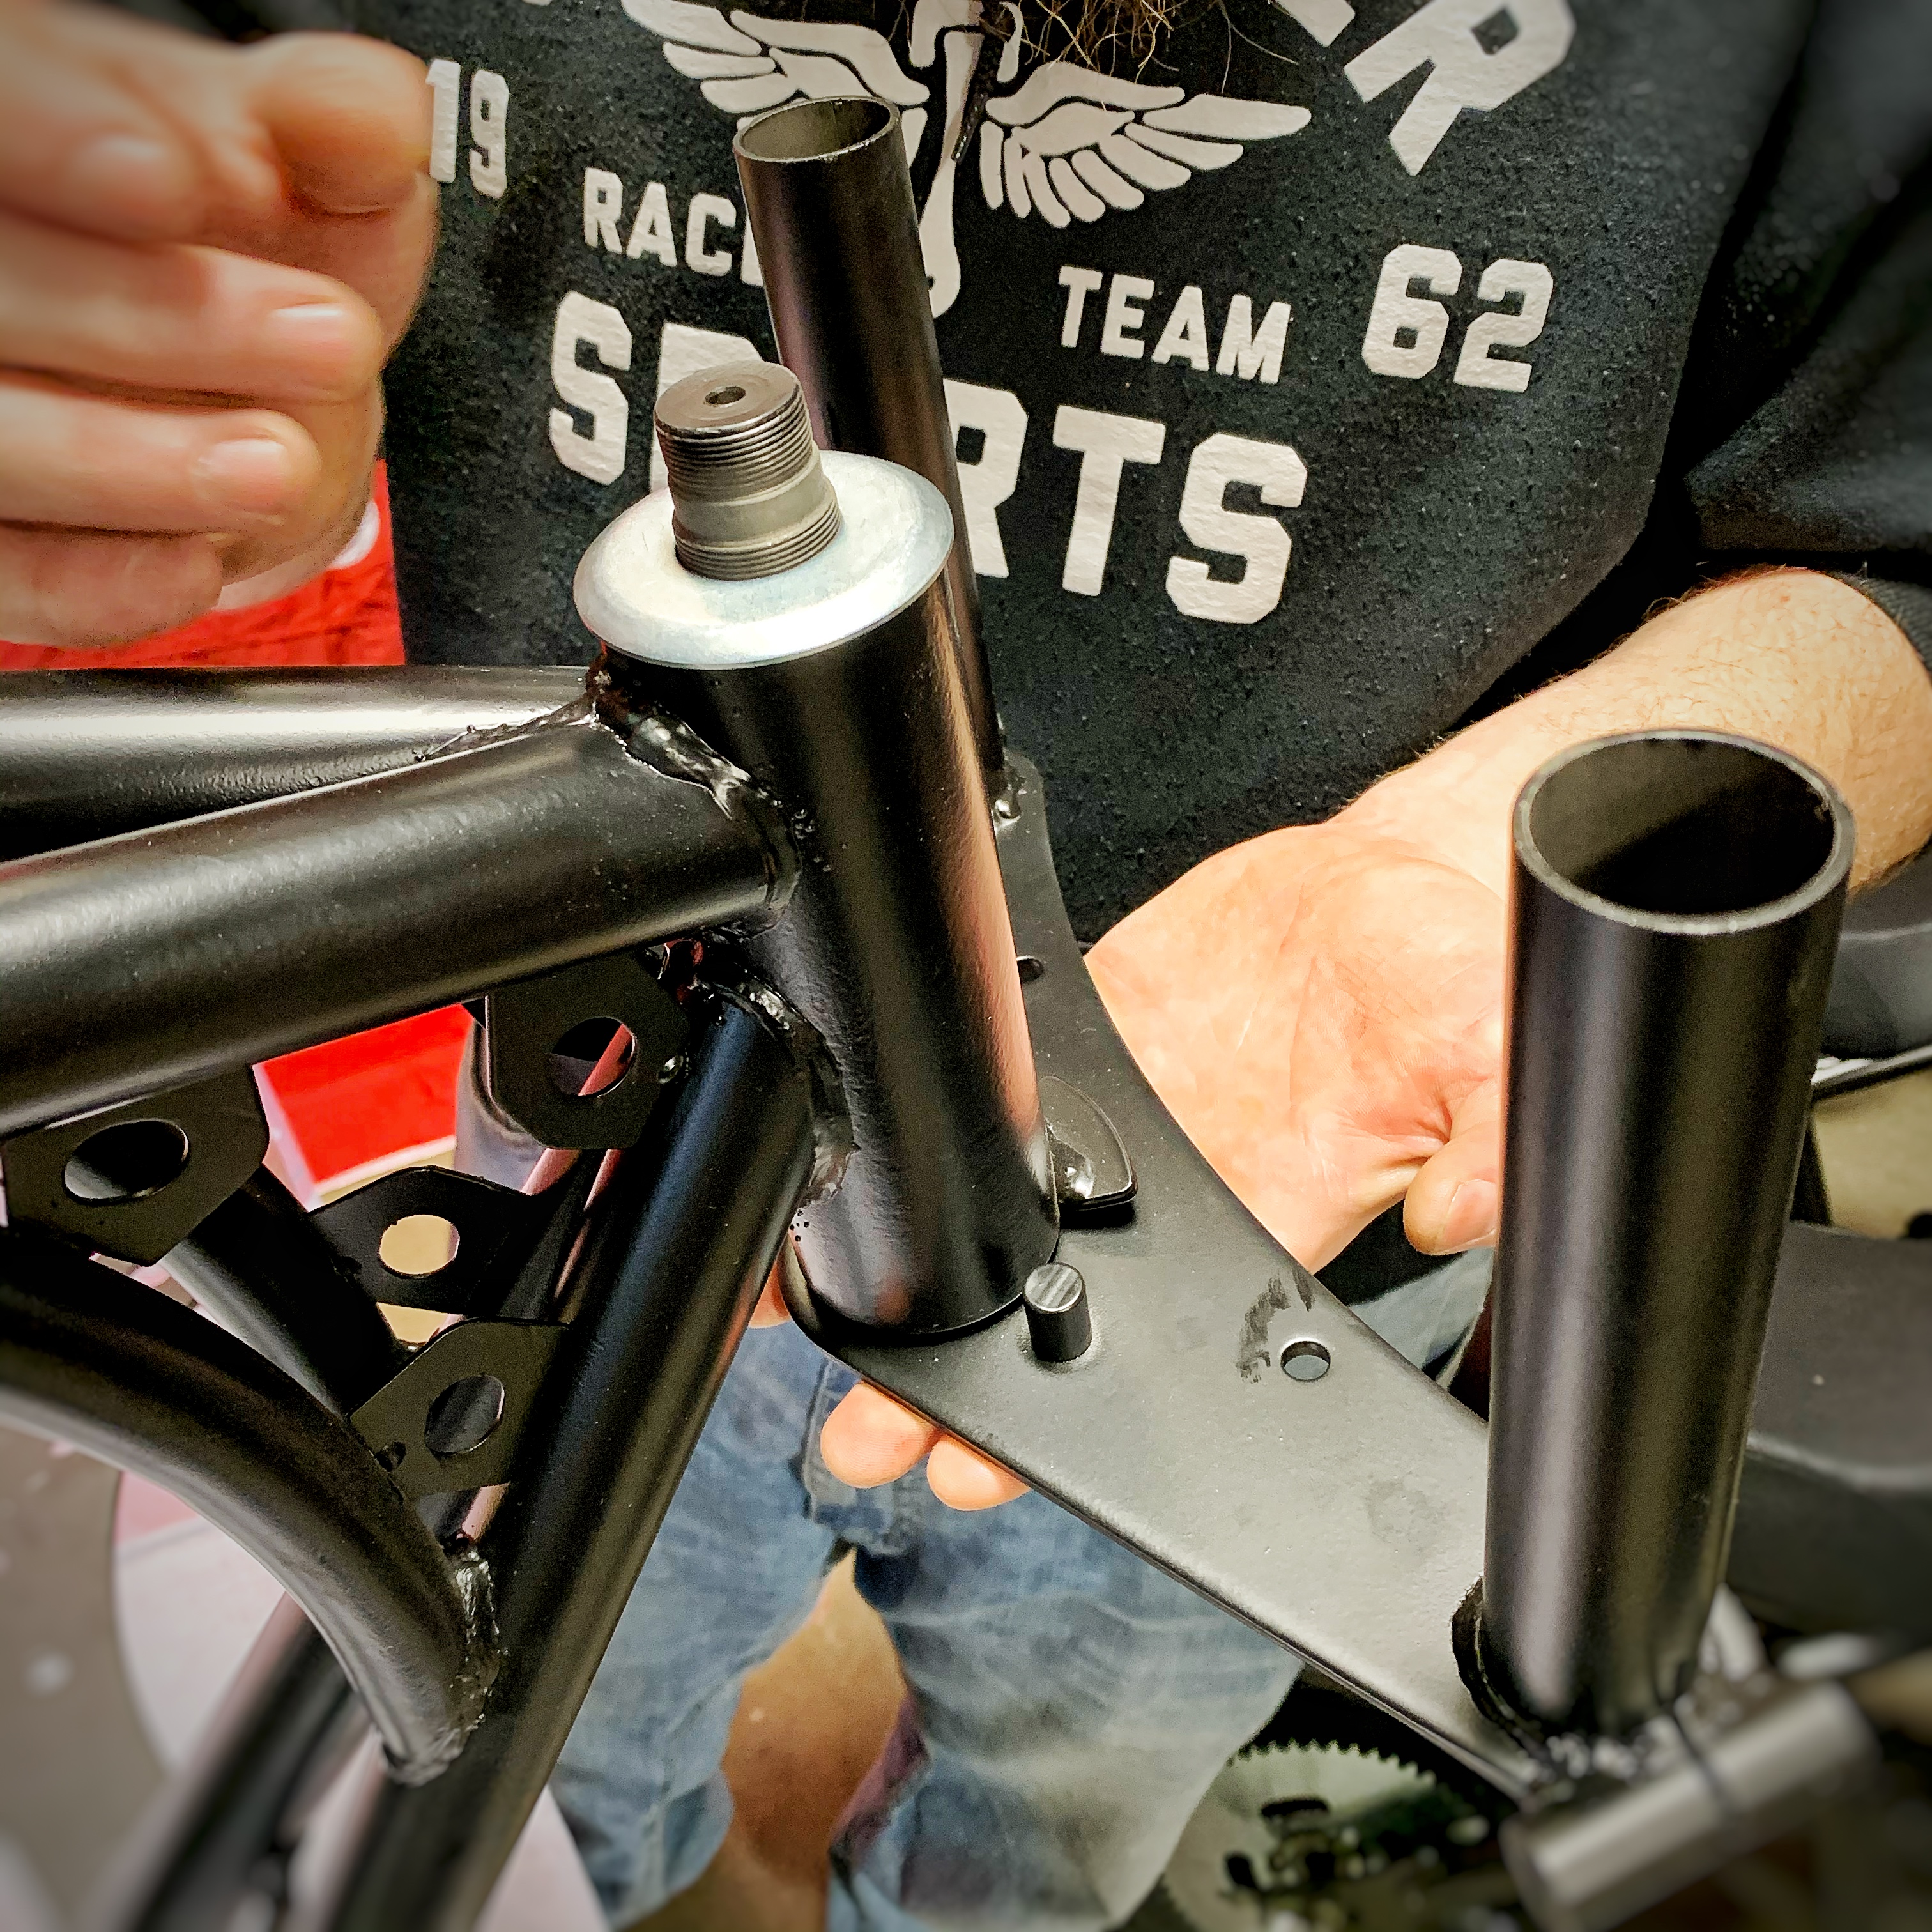
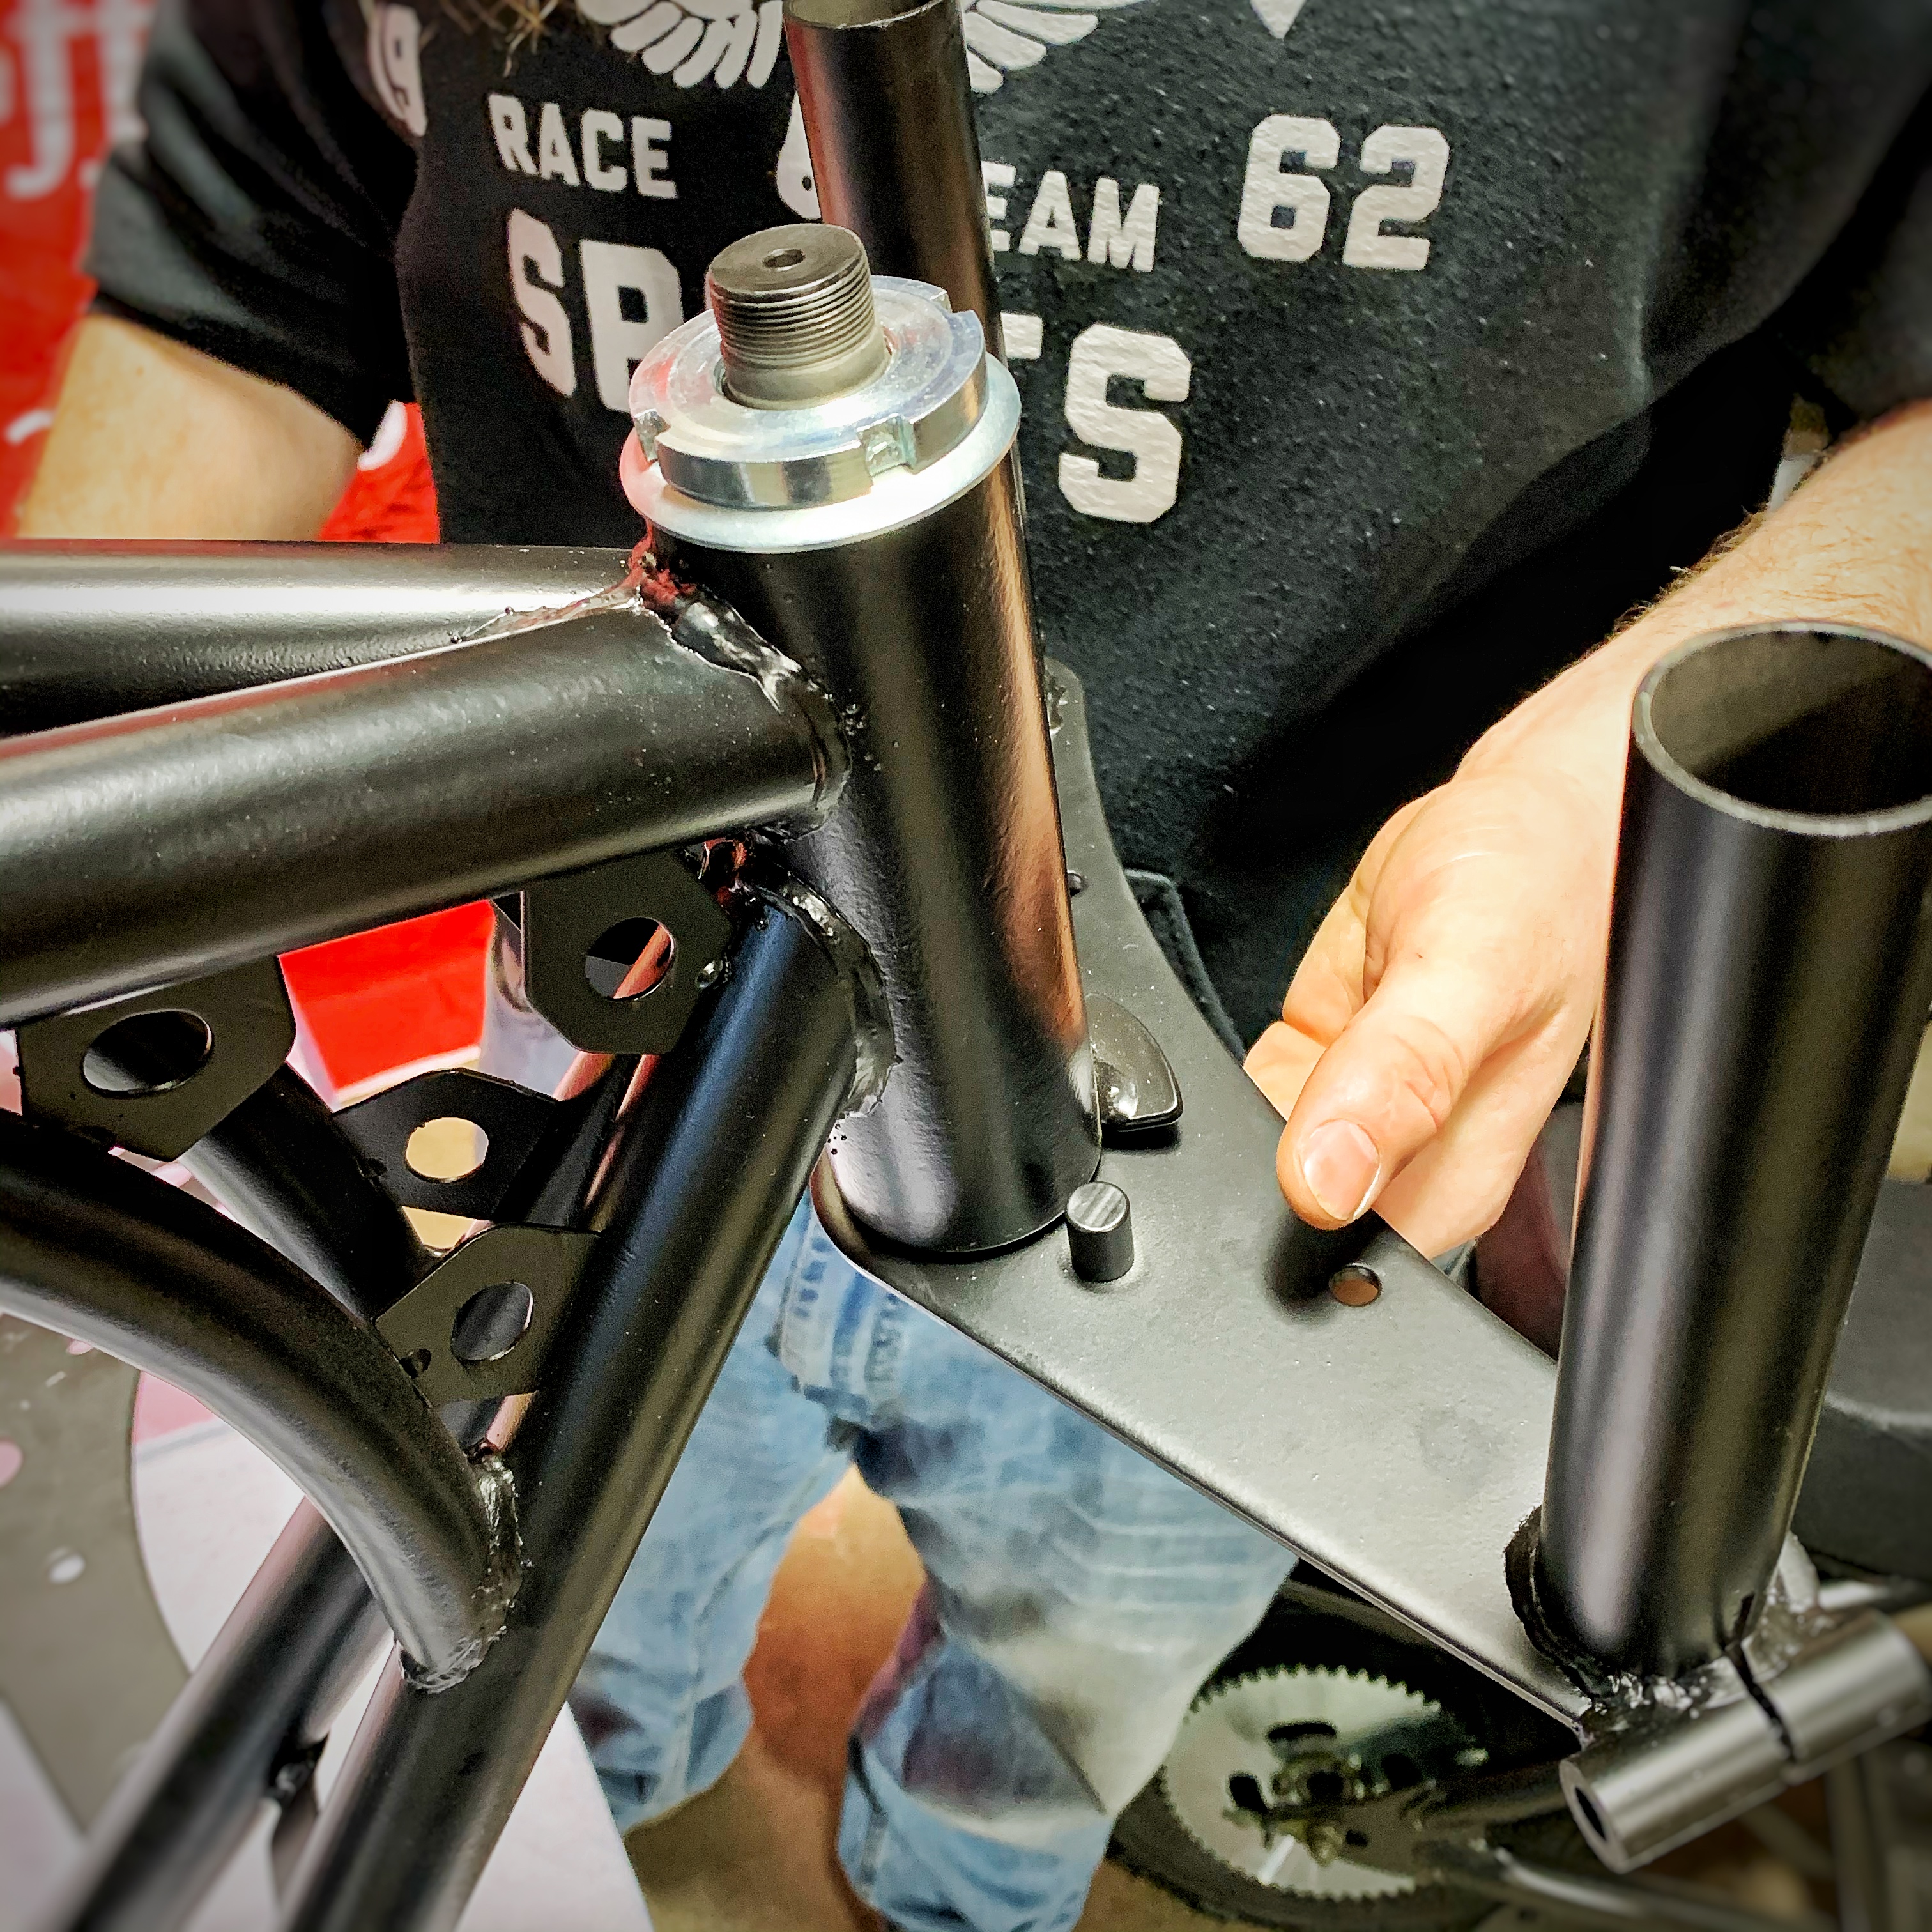
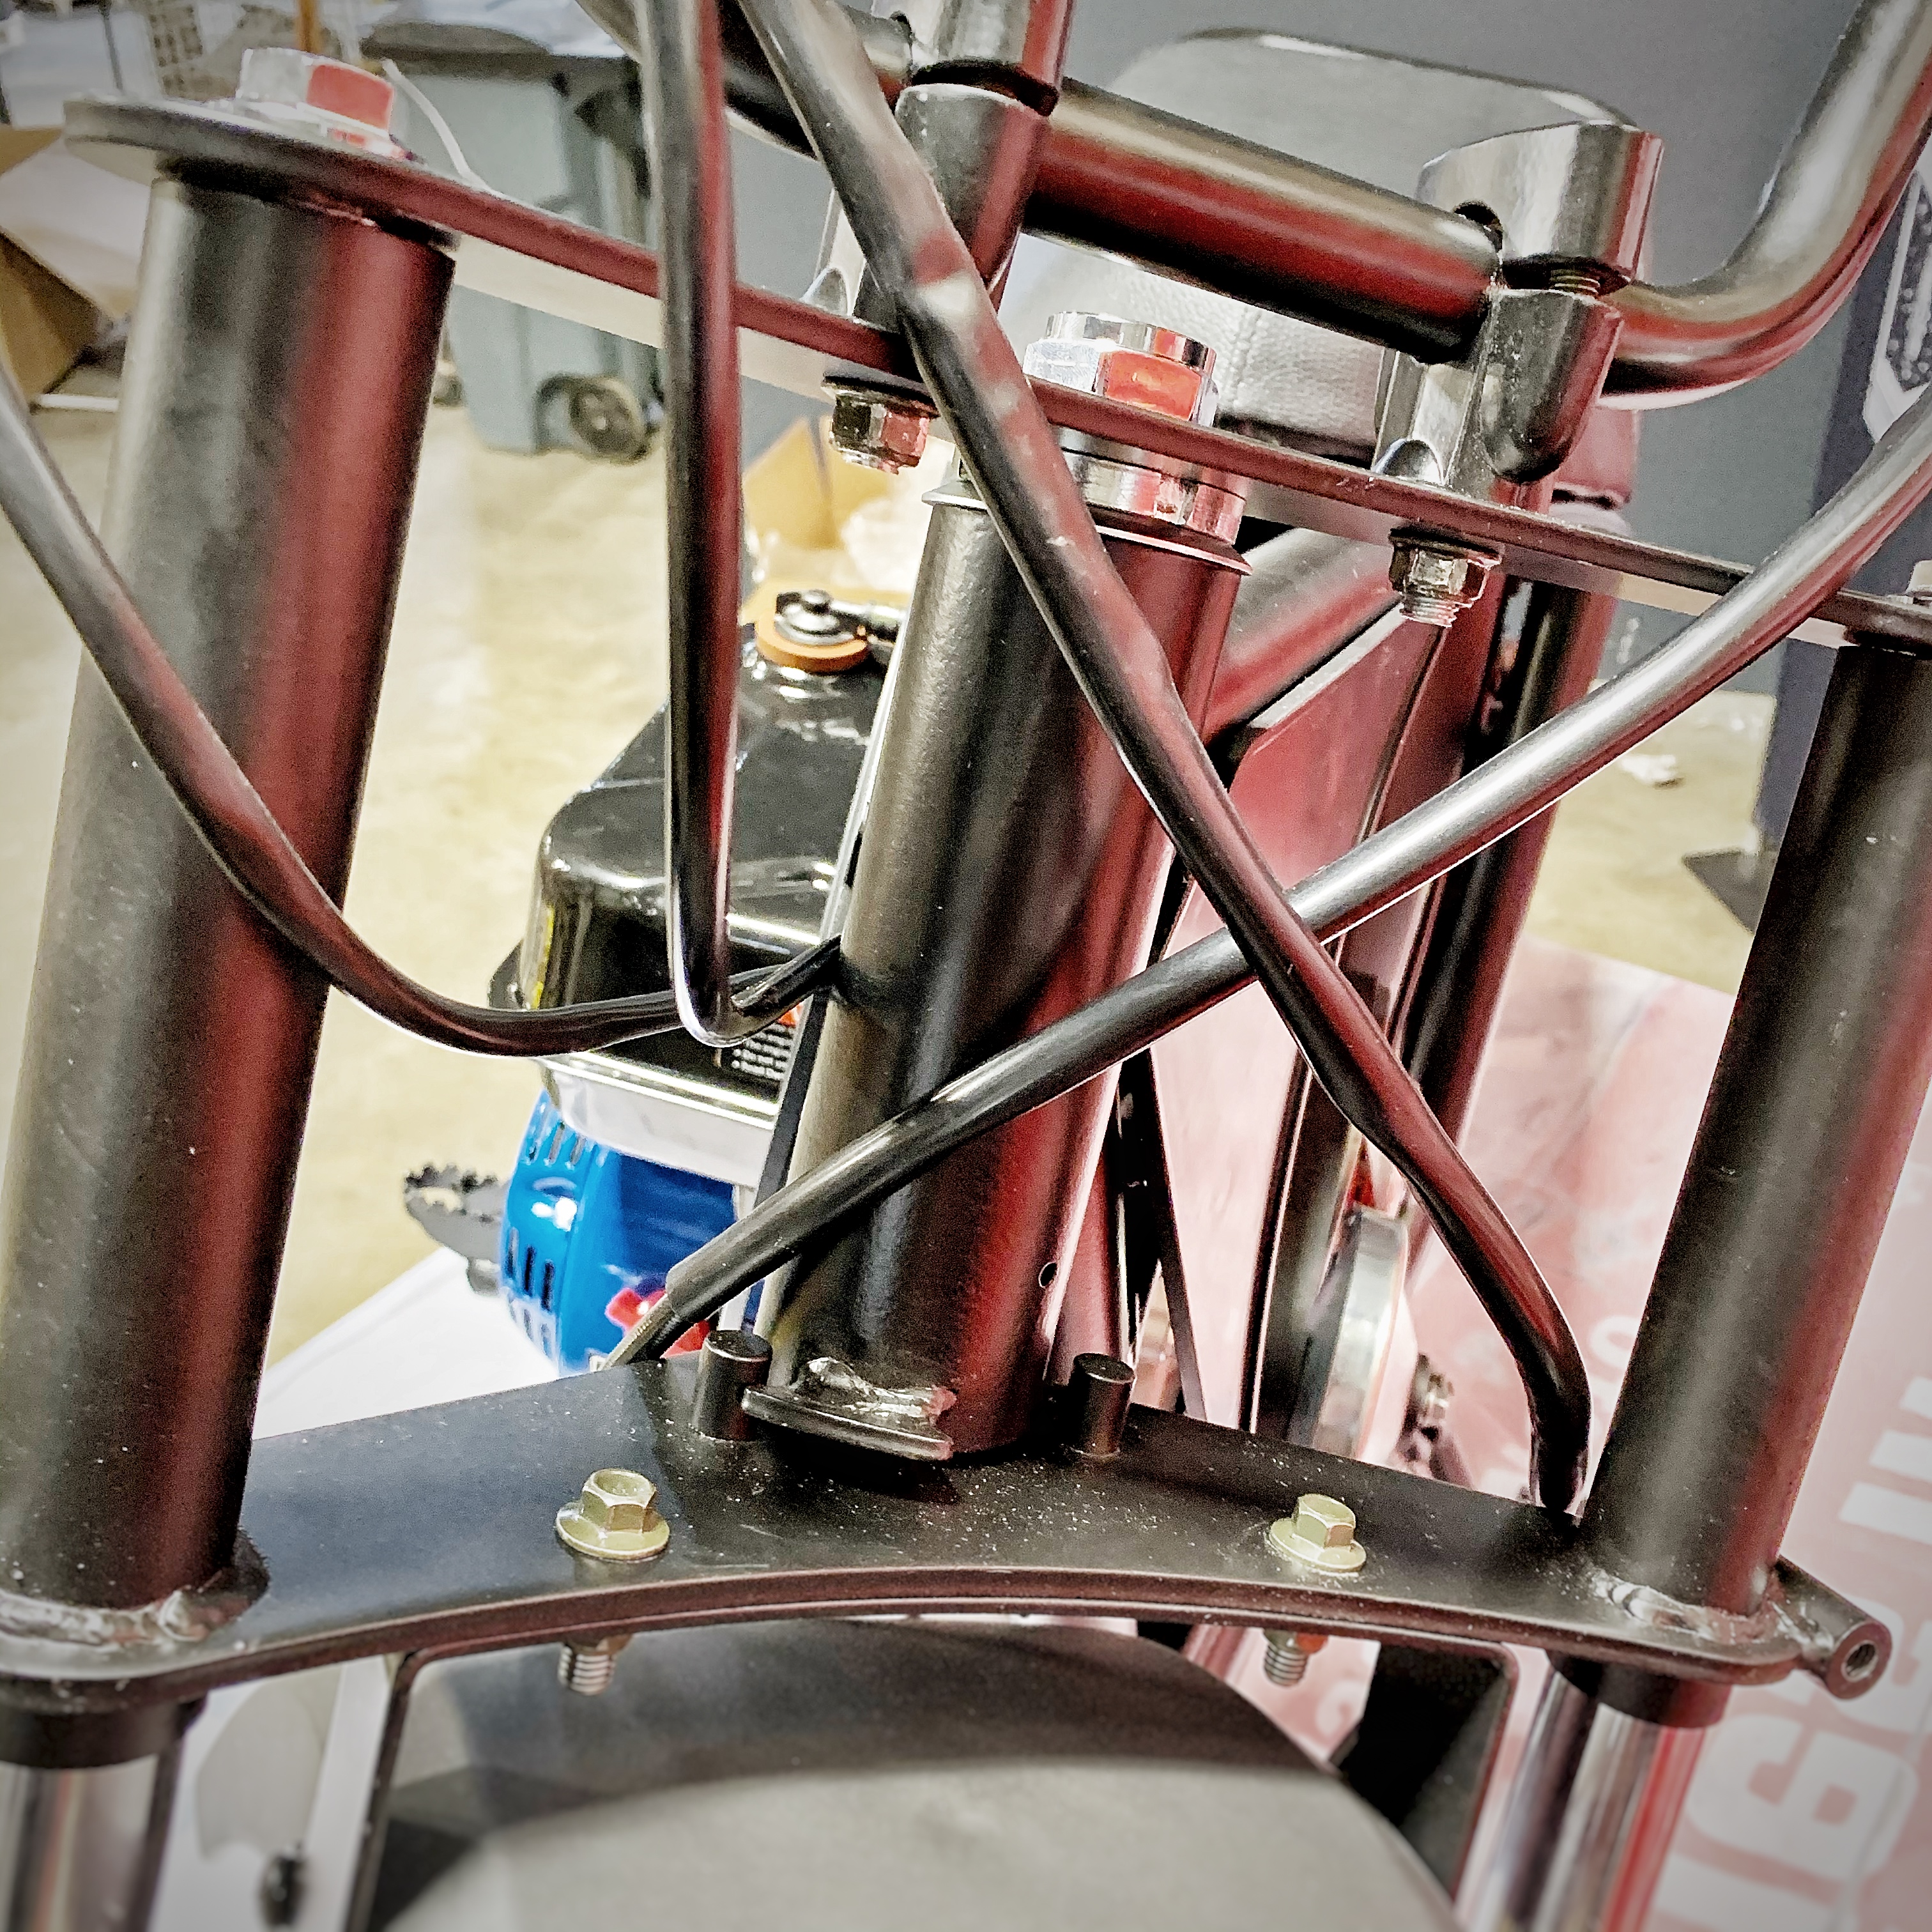
Sequence for the Steering Stem Bearing install:
- Place Bottom Tapered Bearing on Lower Triple Clamp
- Insert the Lower Triple Clamp through the Frame's Stem
- Tapered Bearing
- Steering Stem Washer
- Steering Stem Nut
- Upper Triple Tree
- Steering Nut Washer (smaller)
- Steering Stem Cap Nut (Chrome)
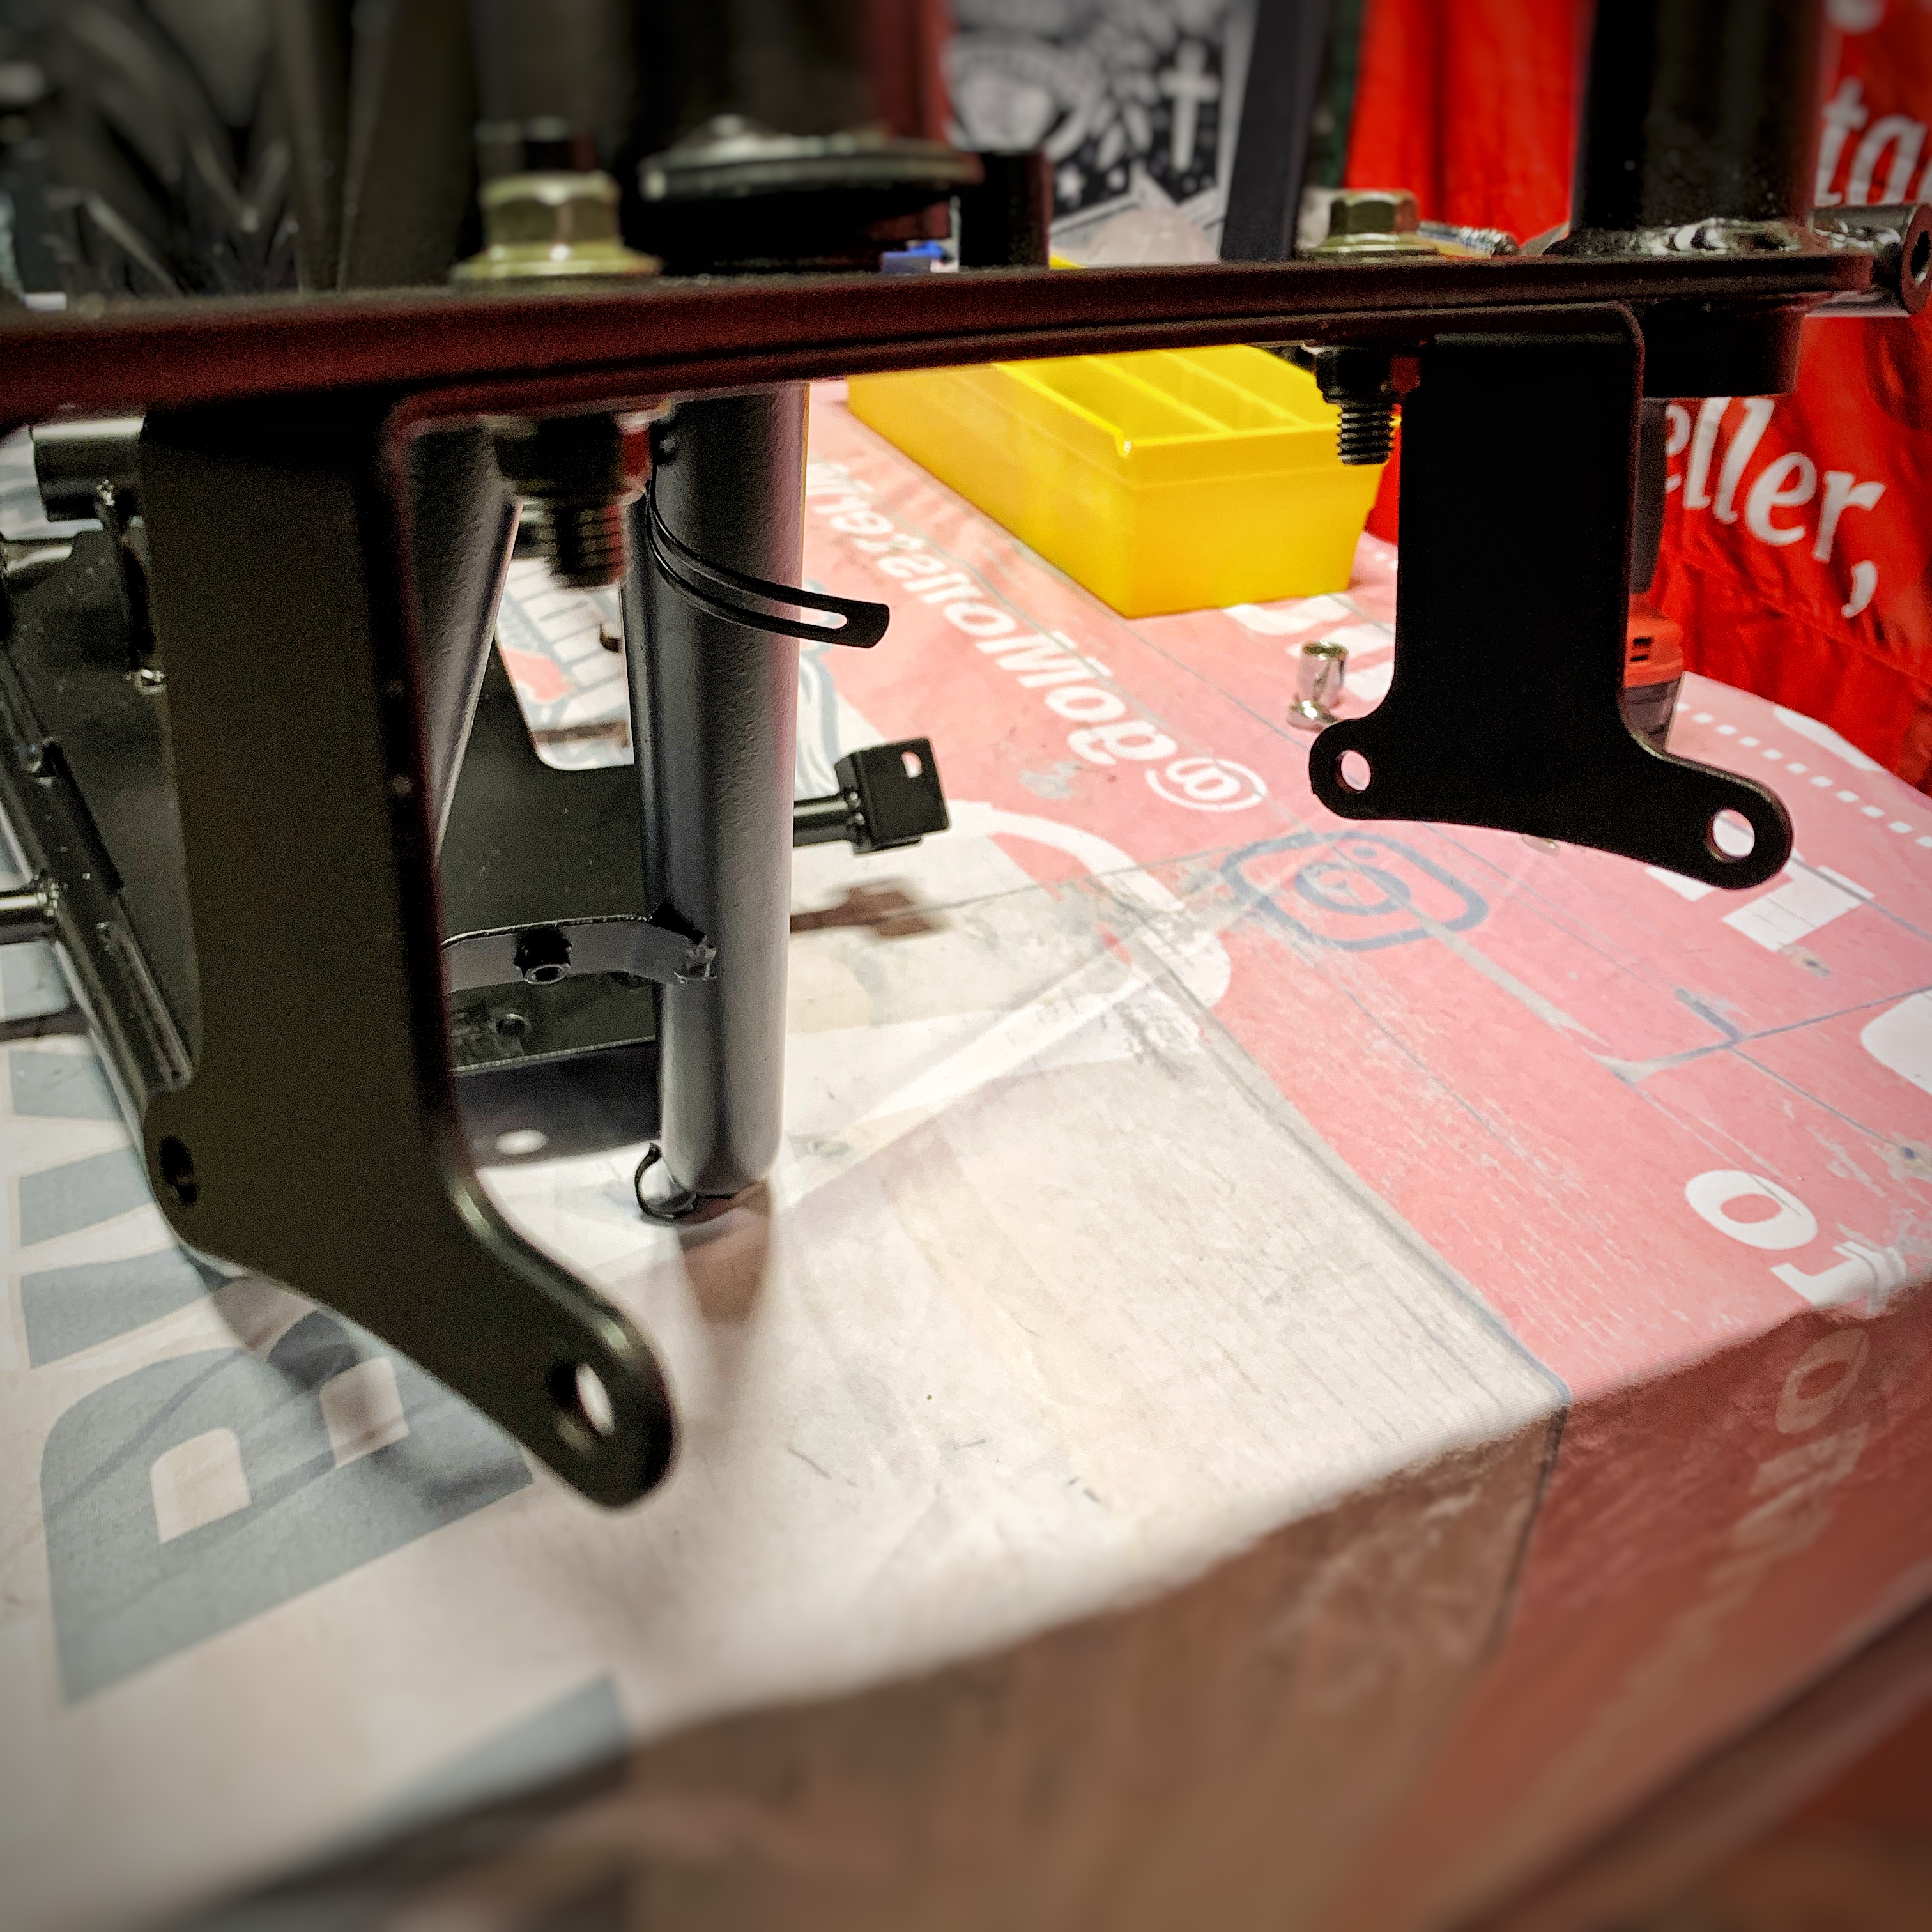
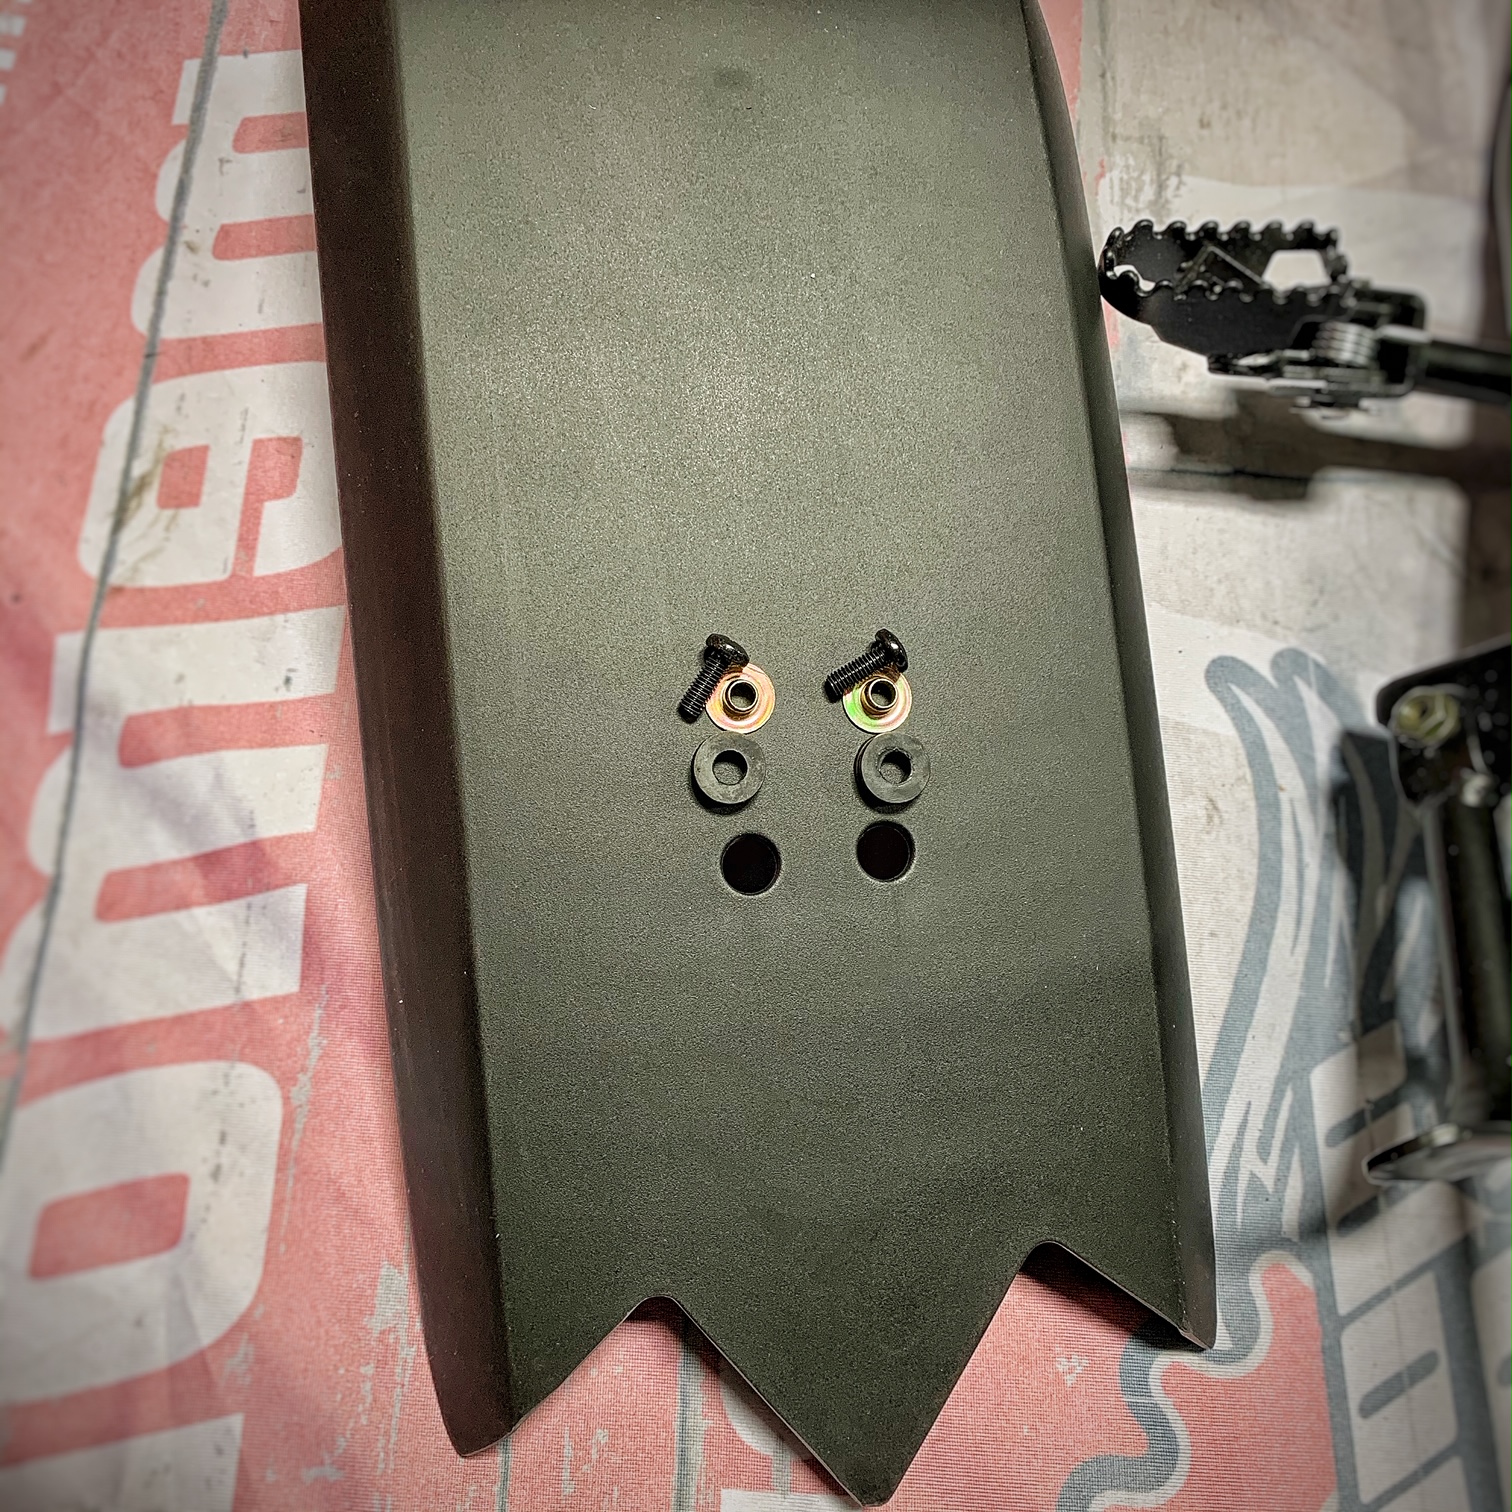
Install the Front Fender Bracket with (2)M8x25 Bolts and (2)M8 Nuts.

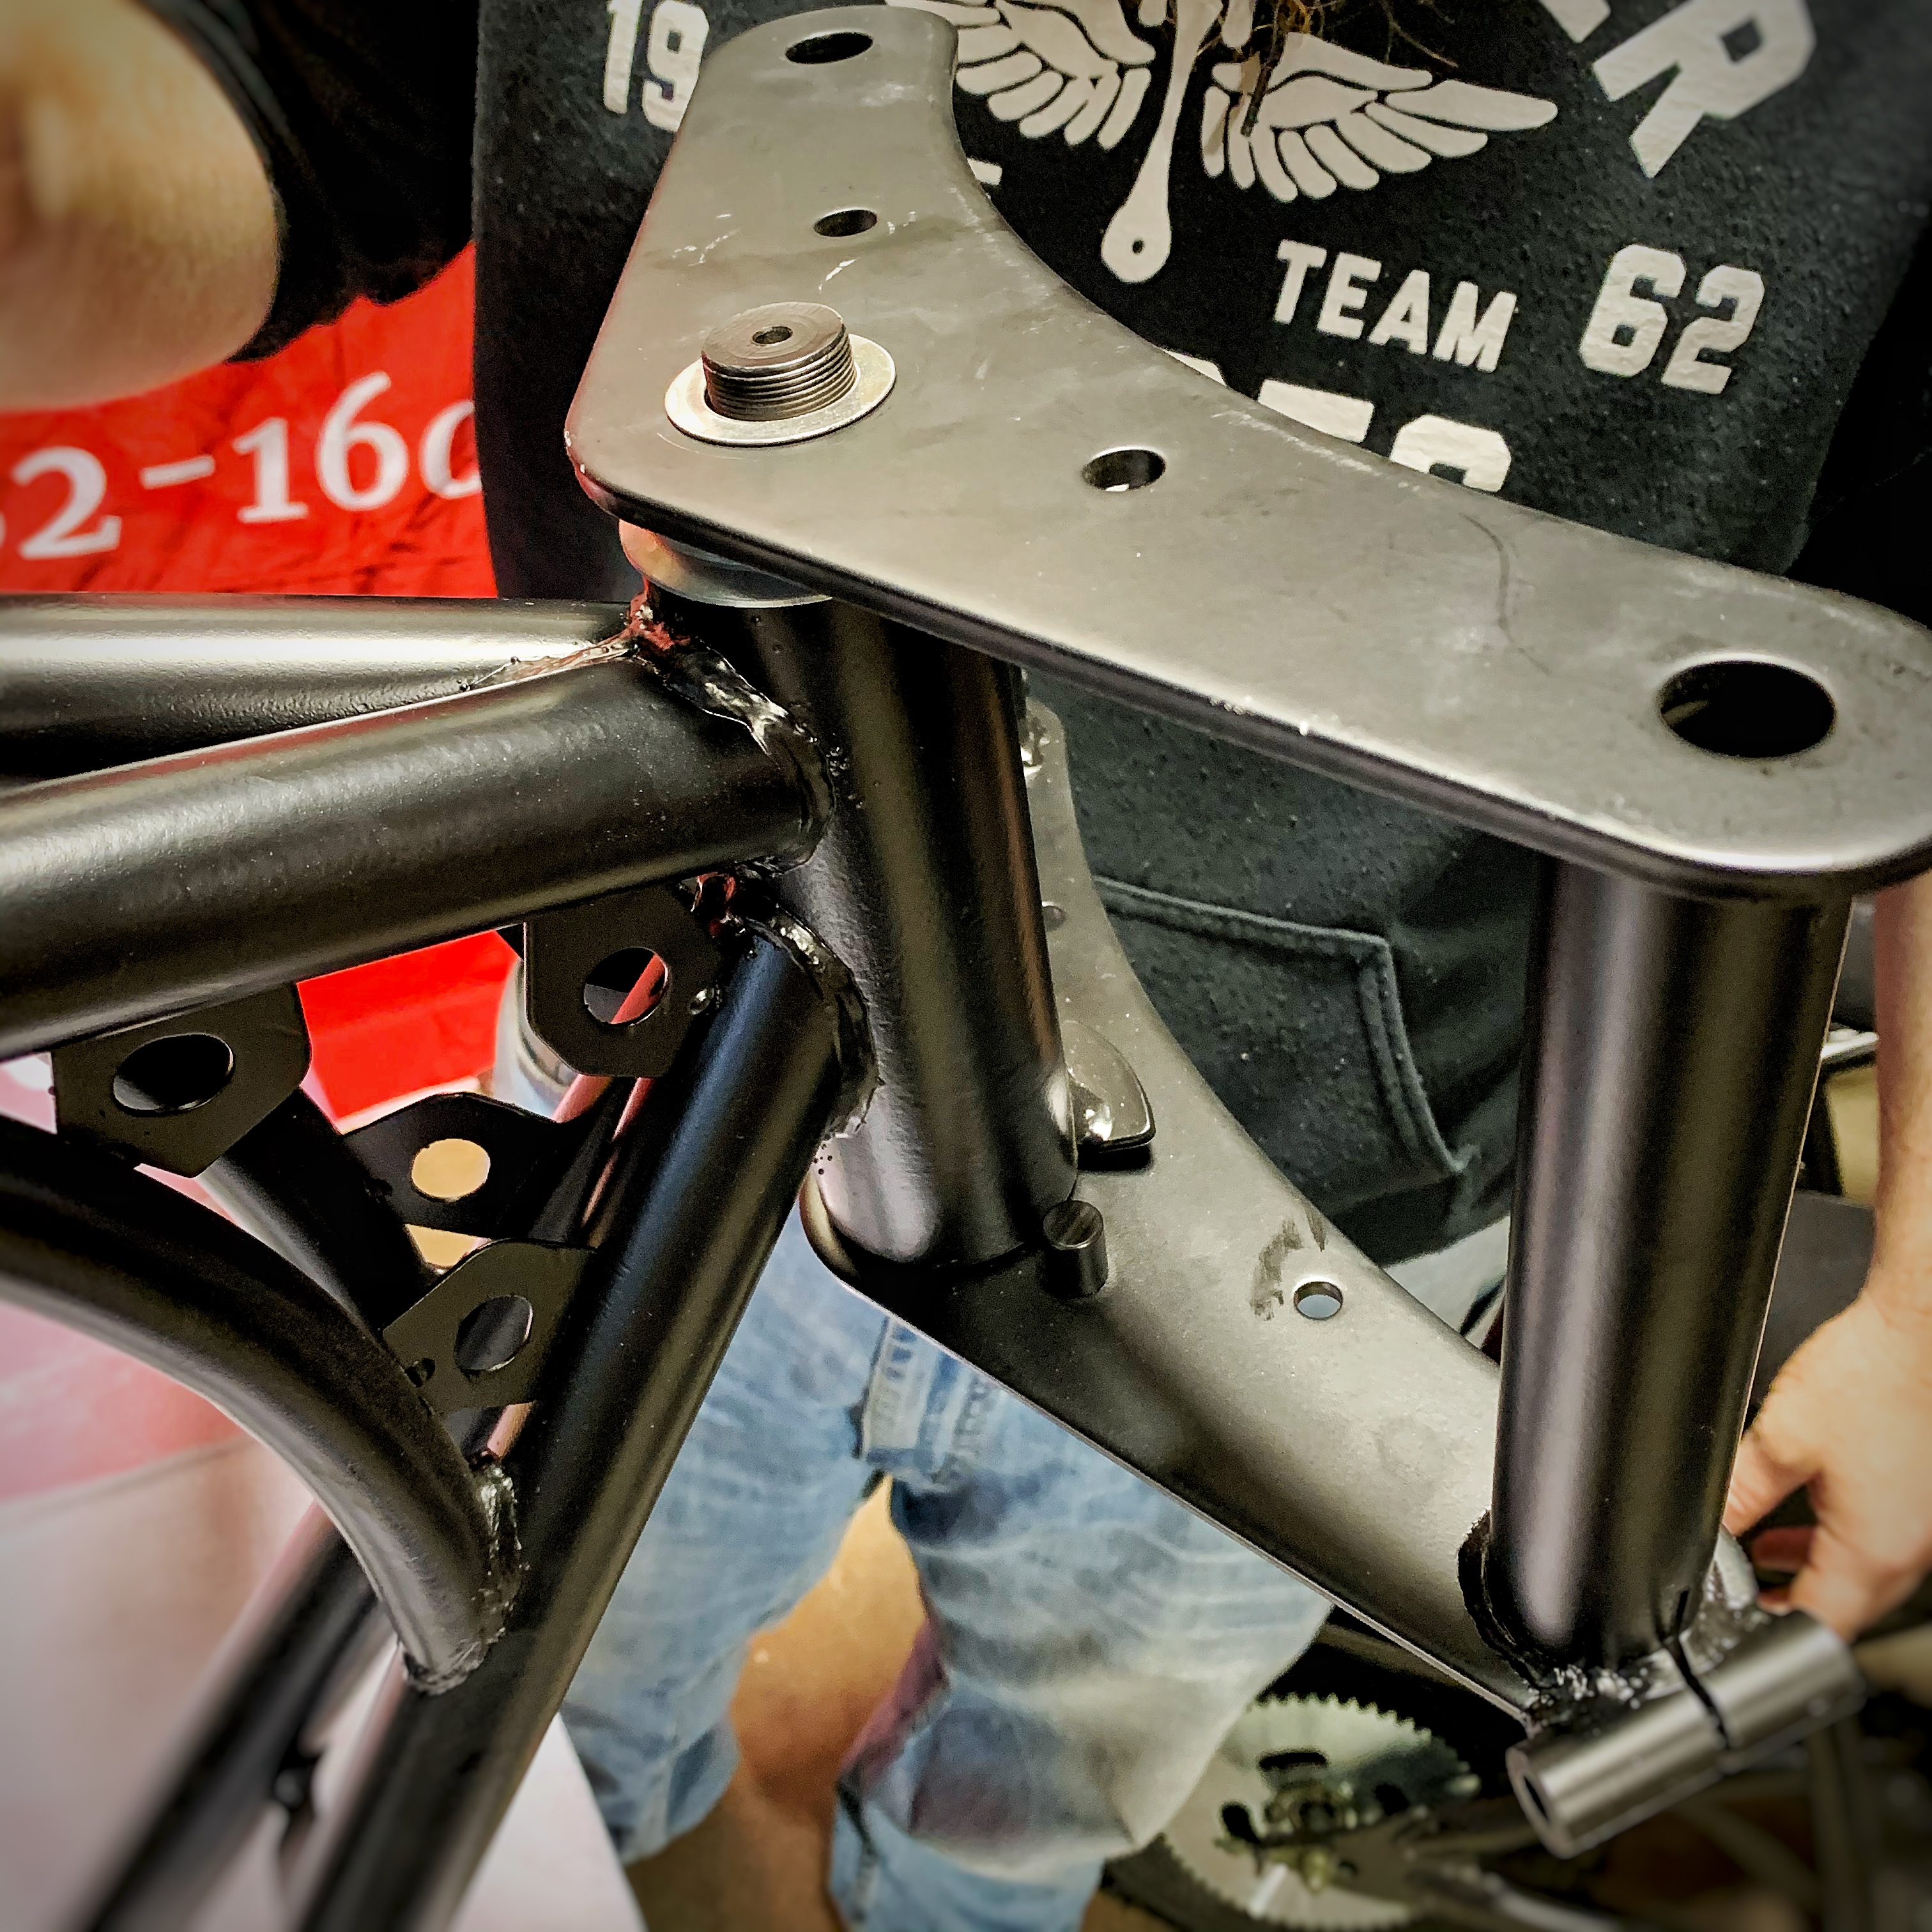
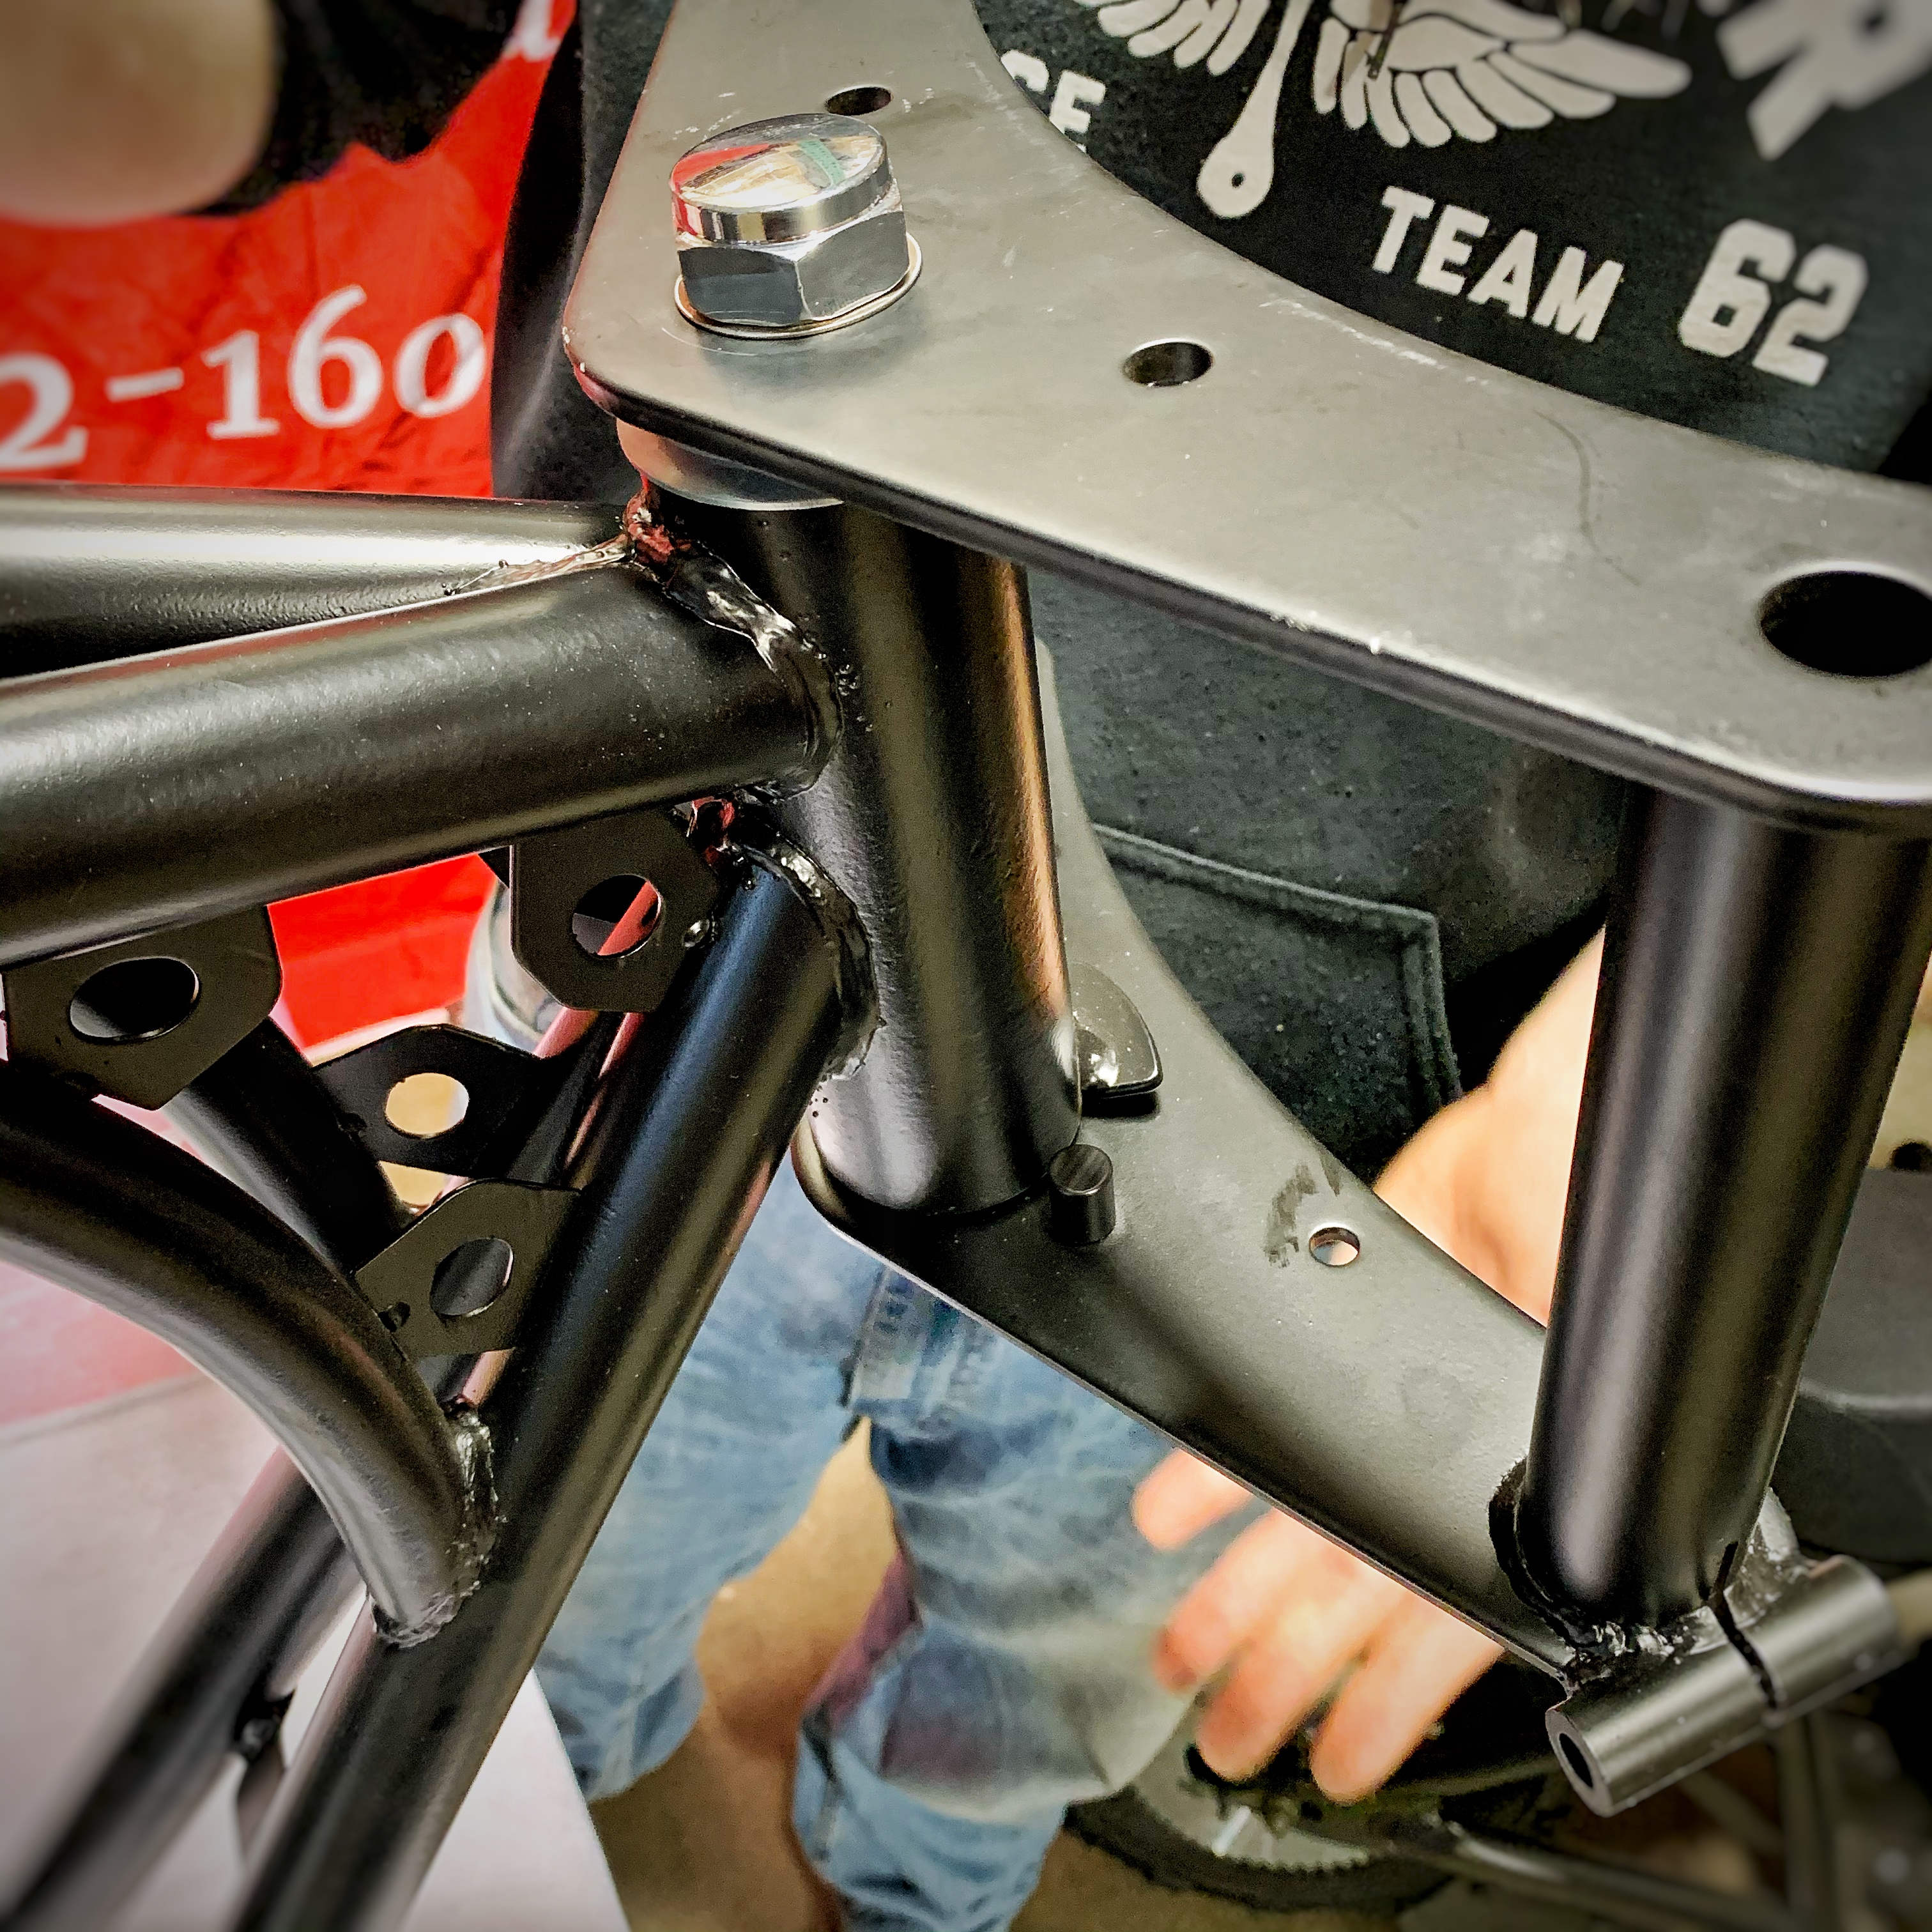
The above Front Suspension photo shows us a few things.
- The shock with the caliper mounting tabs will be on the left side (when sitting on the bike).
- The (2) M8x1.25x50 Flanged Bolts will enter from the back of the shocks, not the front.
Tighten the Shock Absorbers to the Top Triple Tree with the chrome bolts that are already attached to the shocks.
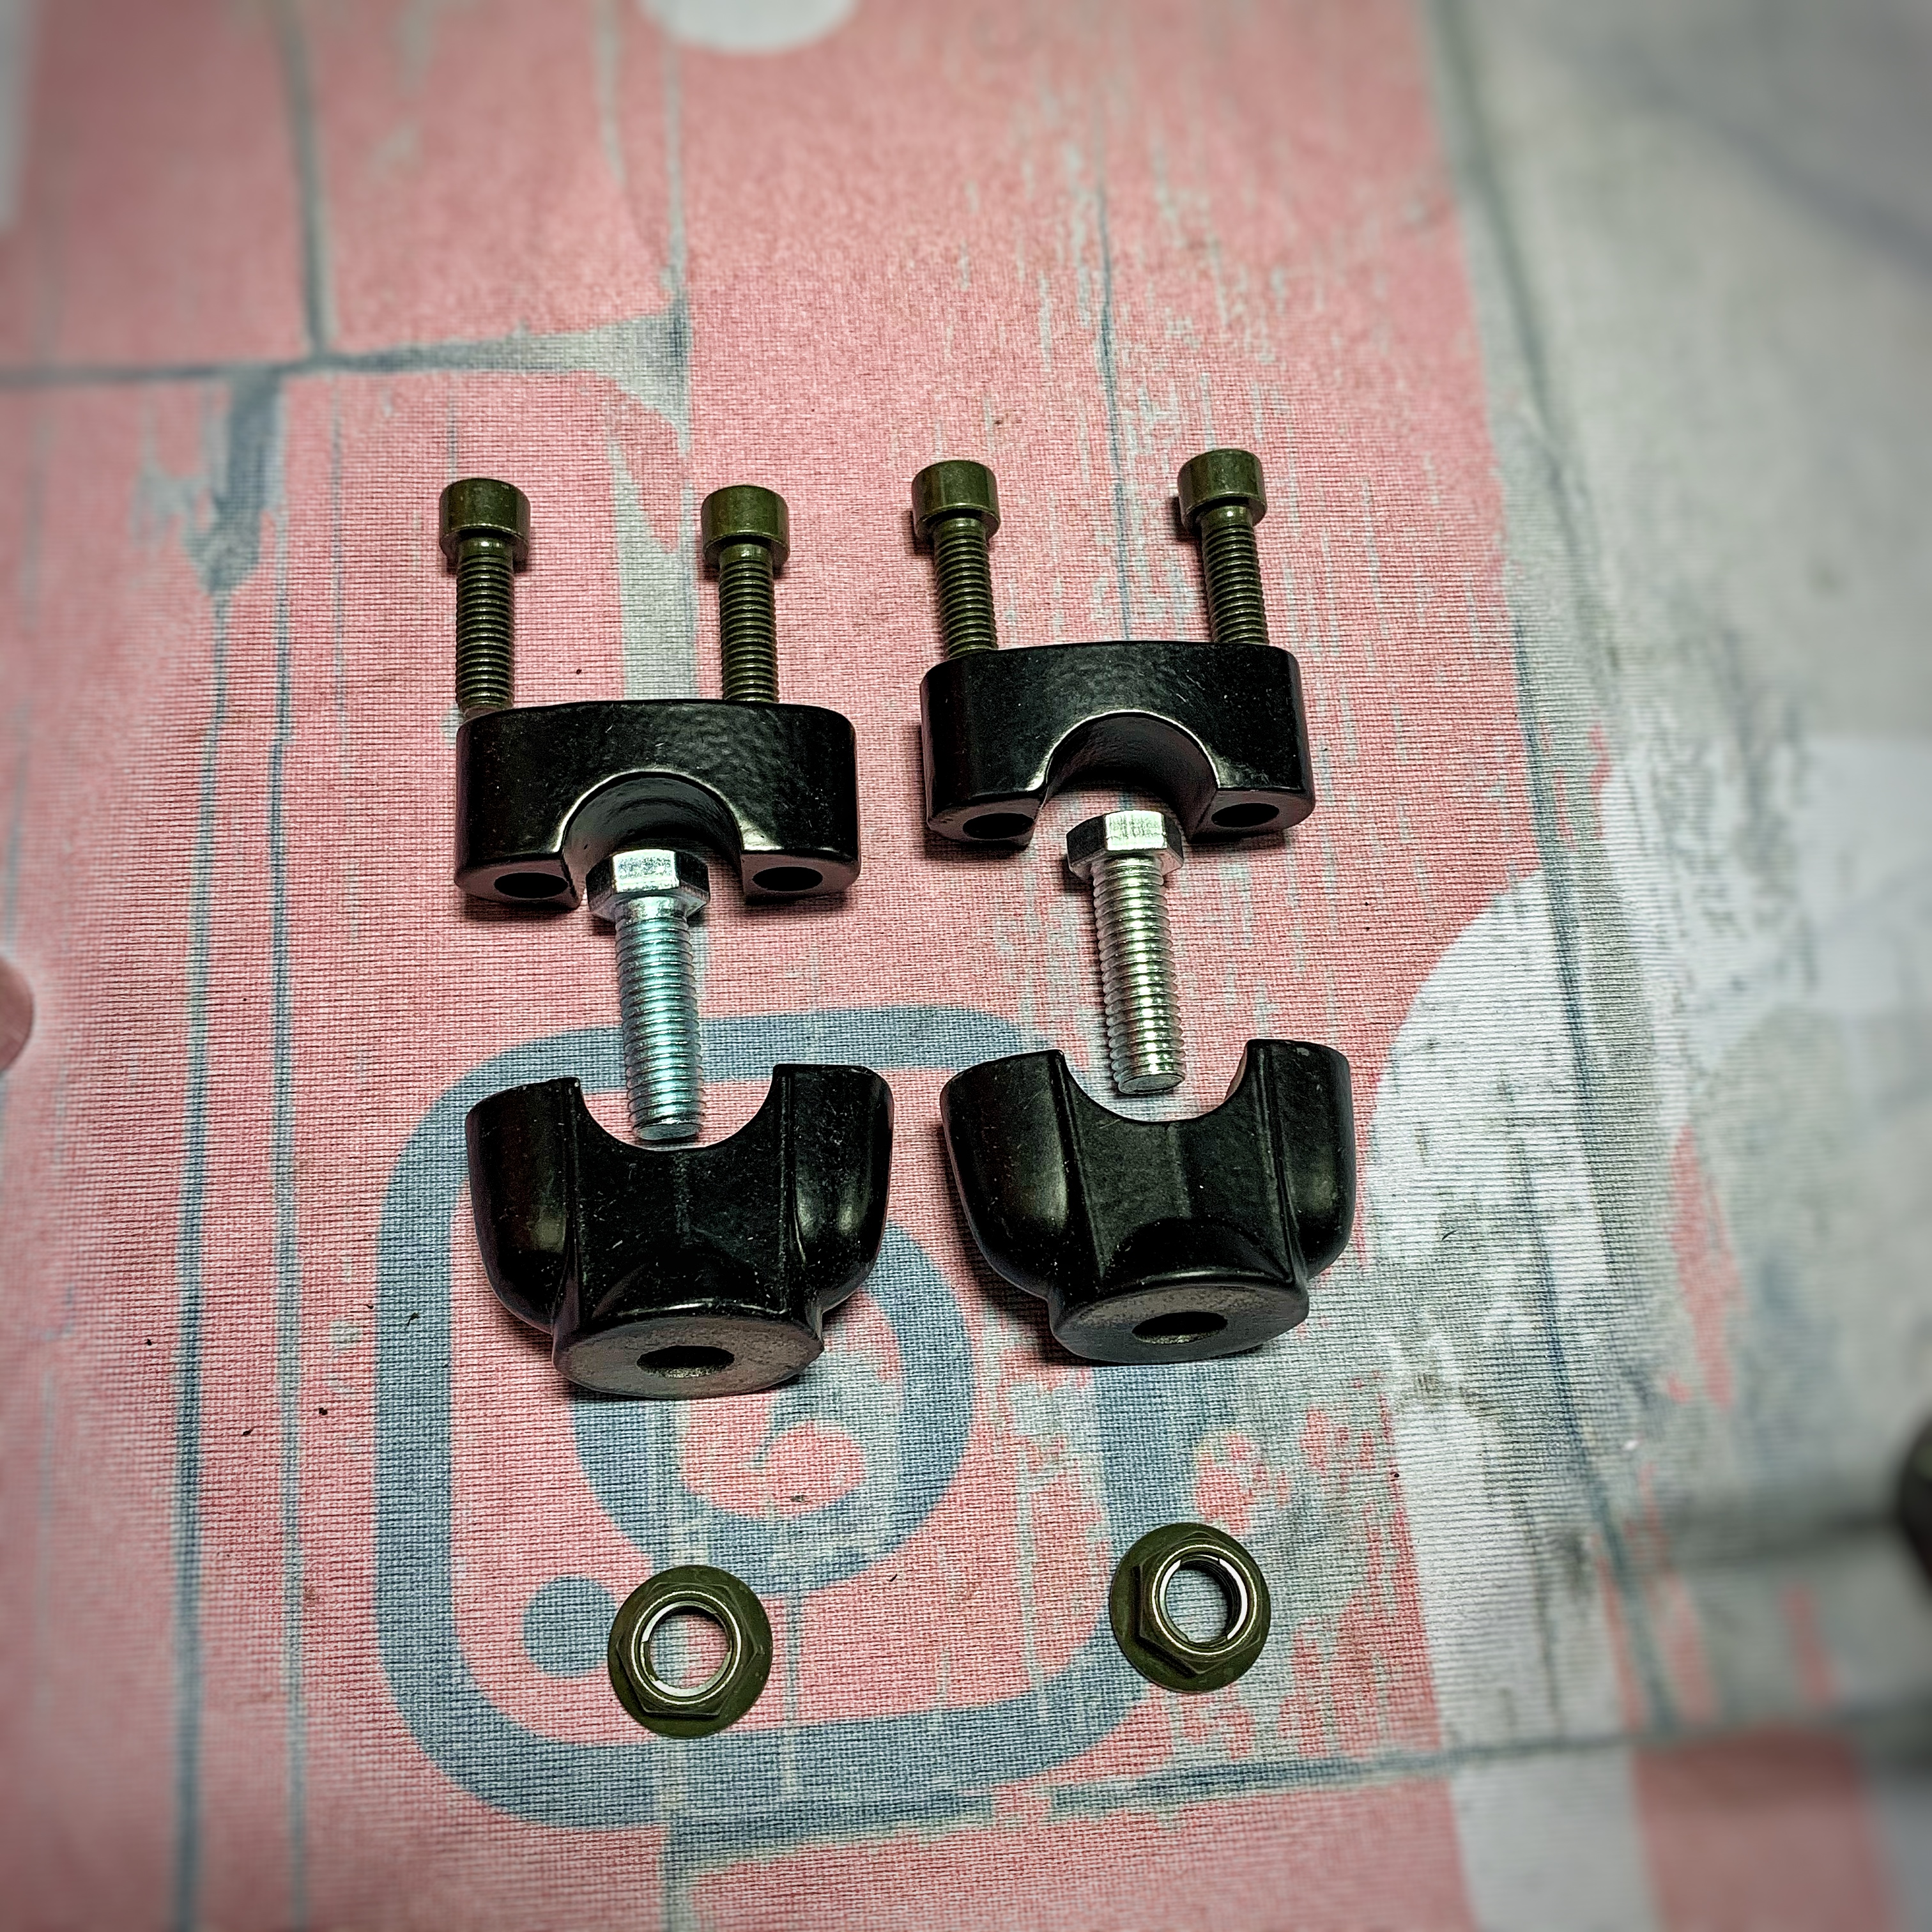
Attach the bottom half of your Handlebar Riser Clamps to your Top Triple Tree. After the bottom halves are fastened down, you may insert the Handlebar and finish with the top half of the Handle Bar Risers Clamps. It is best to snug these (4) M8x25 Bolts down evenly.
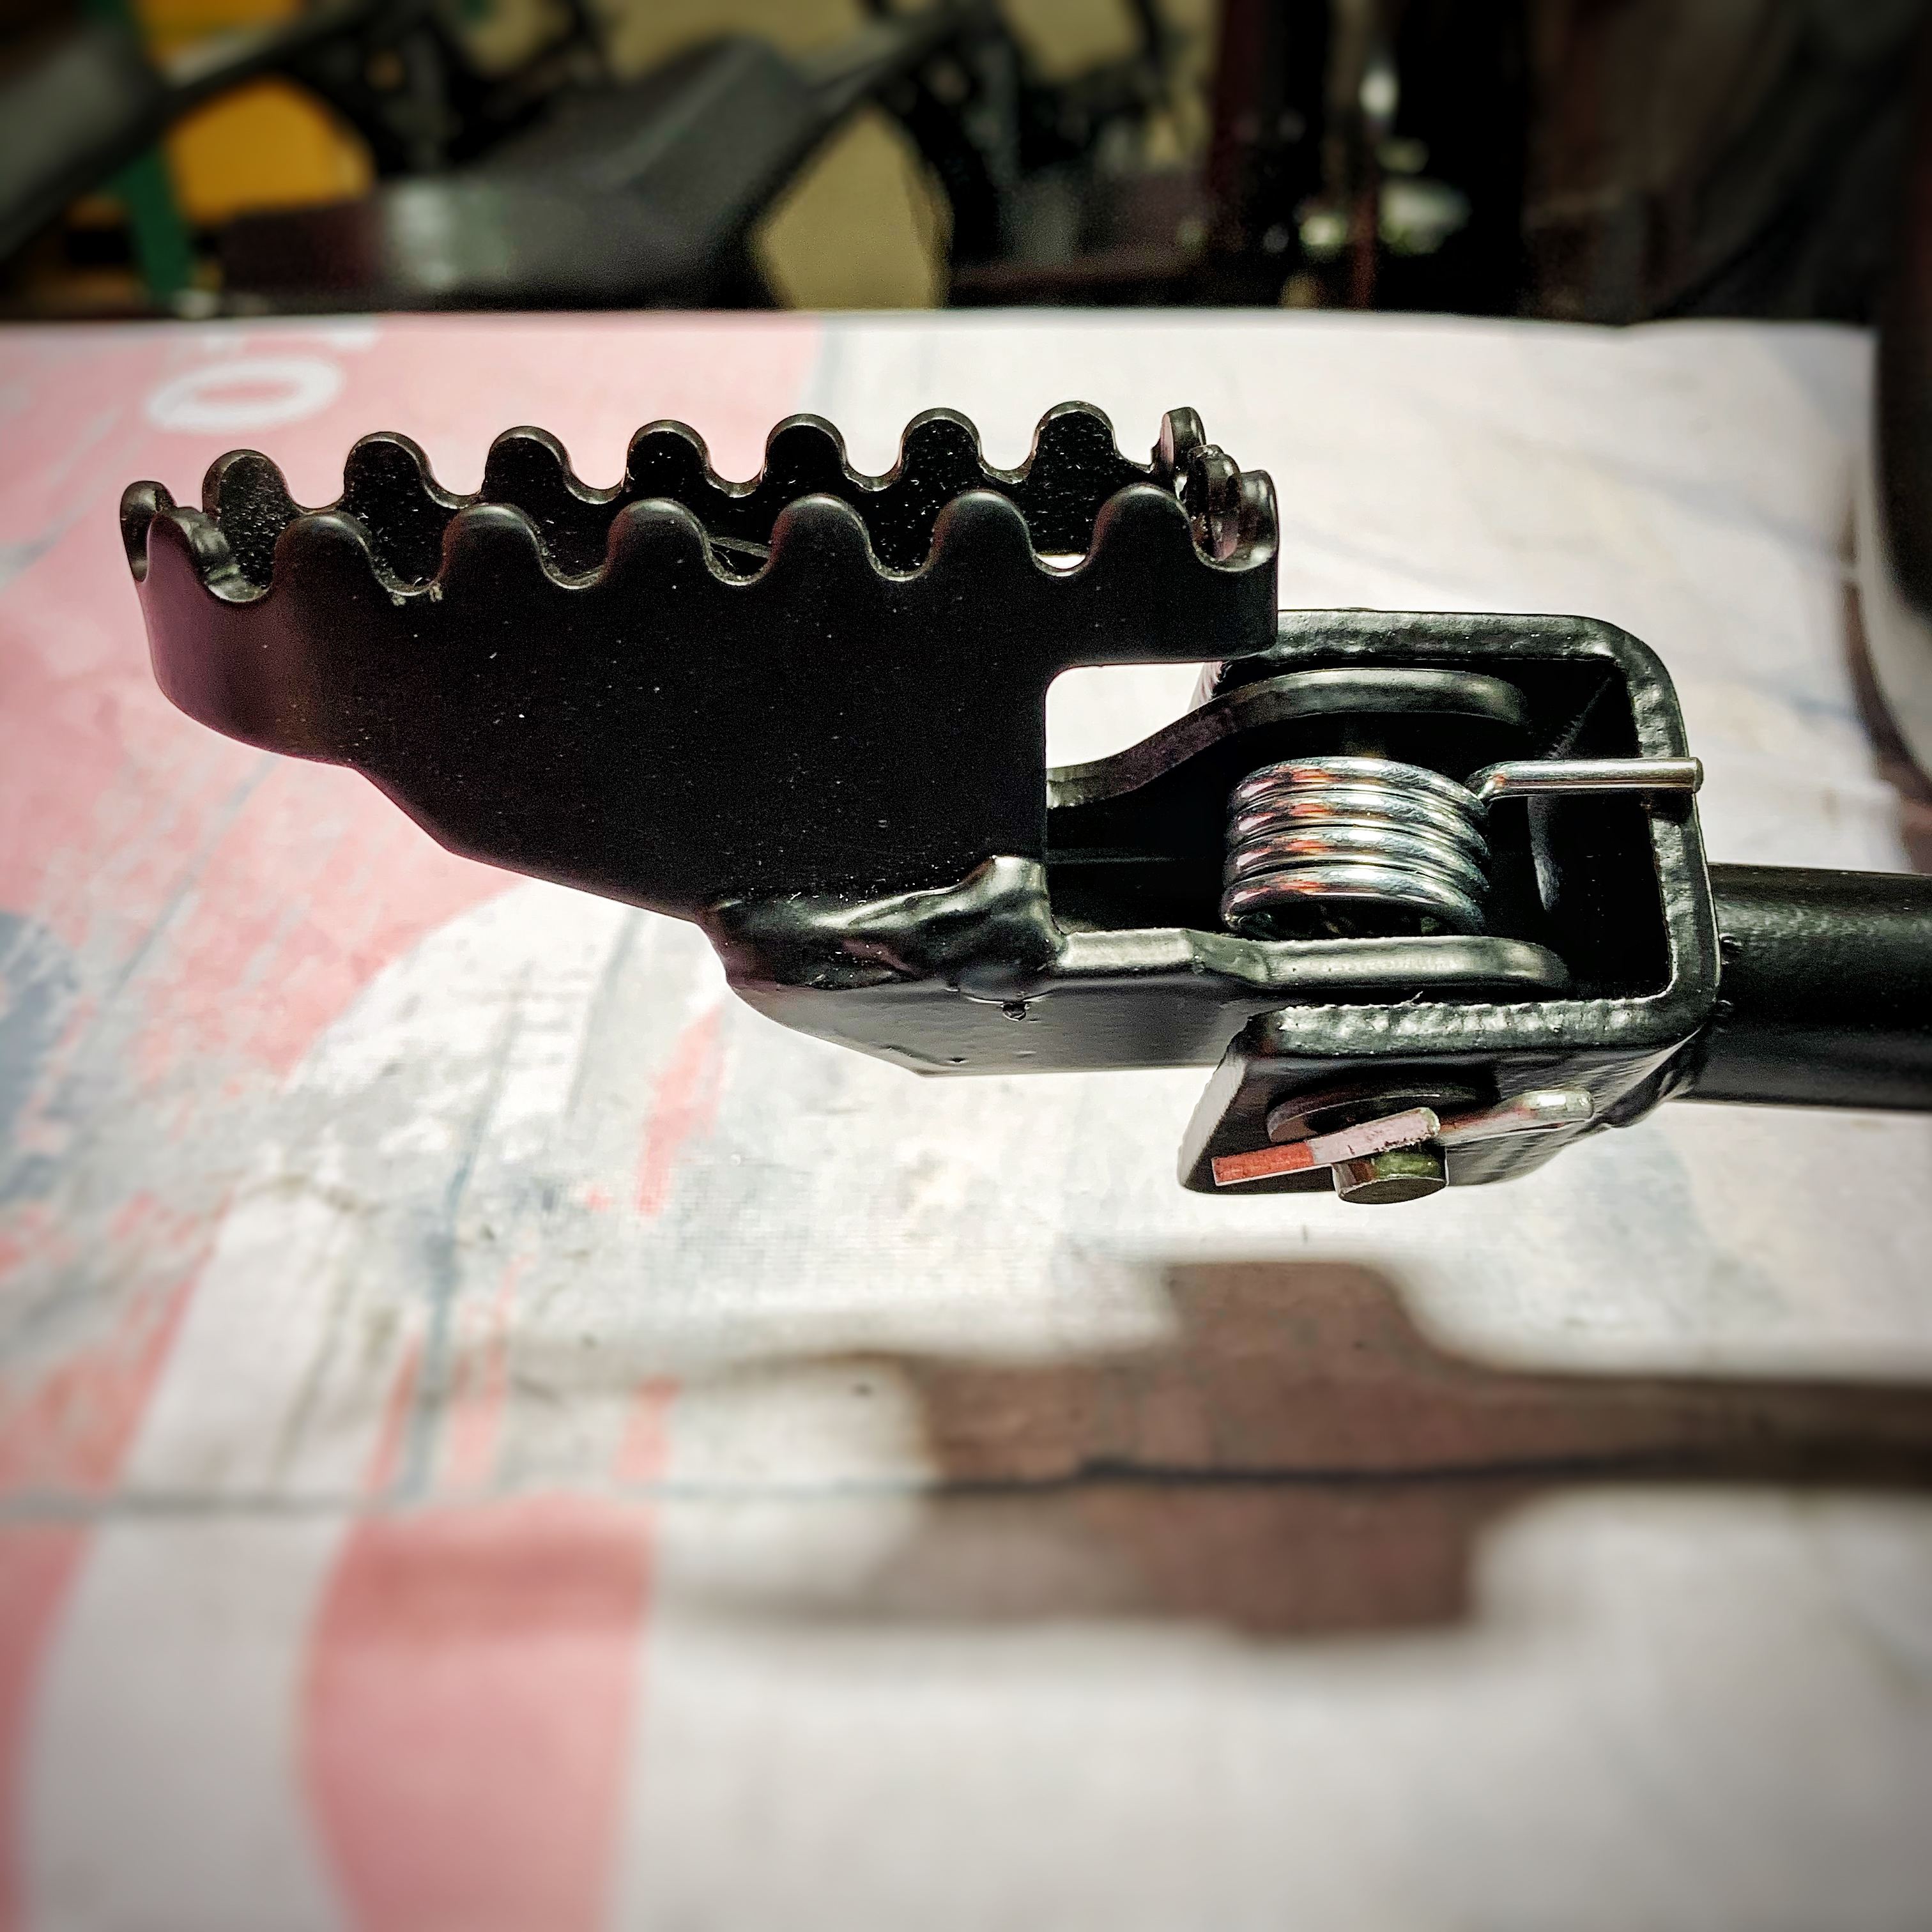
Install both foot pegs. (1)M8 Clevis Pen, (1)Return Spring, (1)M8 Washer, and (1) M3.2 Cotter Pin per each assembly.
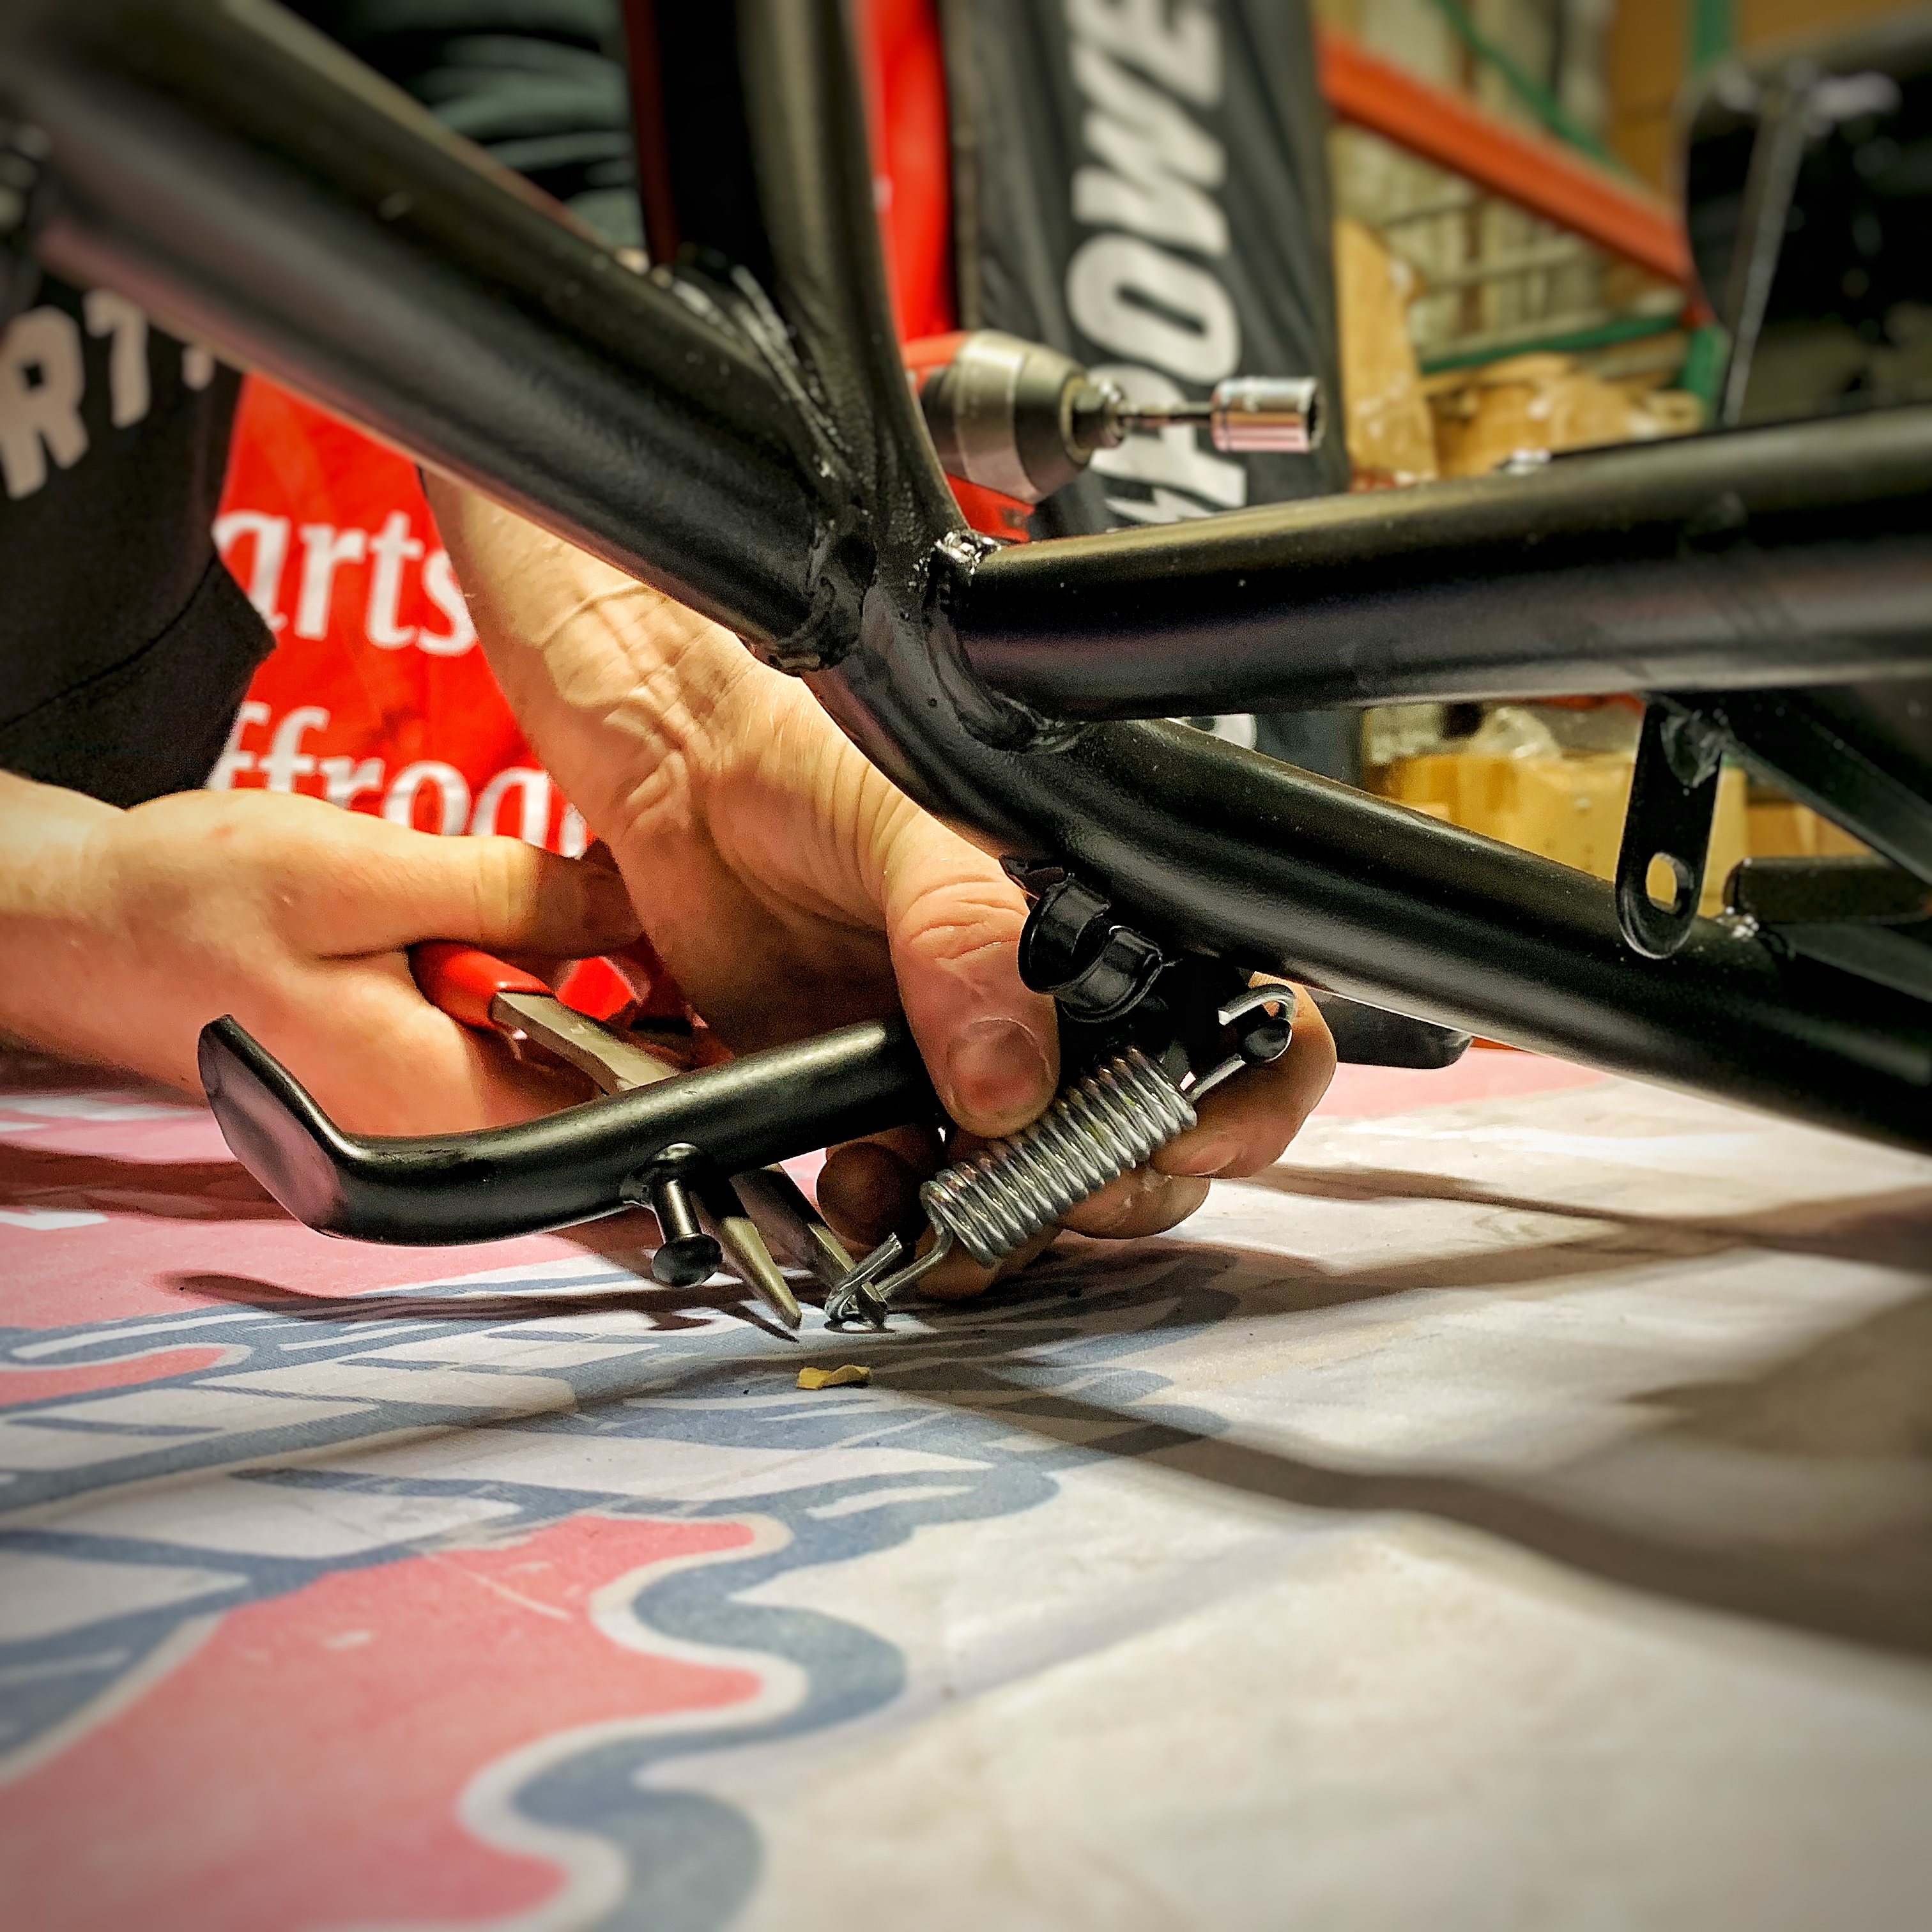
Assemble the kickstand. (1)Special Side Stand Bolt will thread into the welded nut on the frame. Then use some elbow grease to stretch the spring over both the spring tabs.
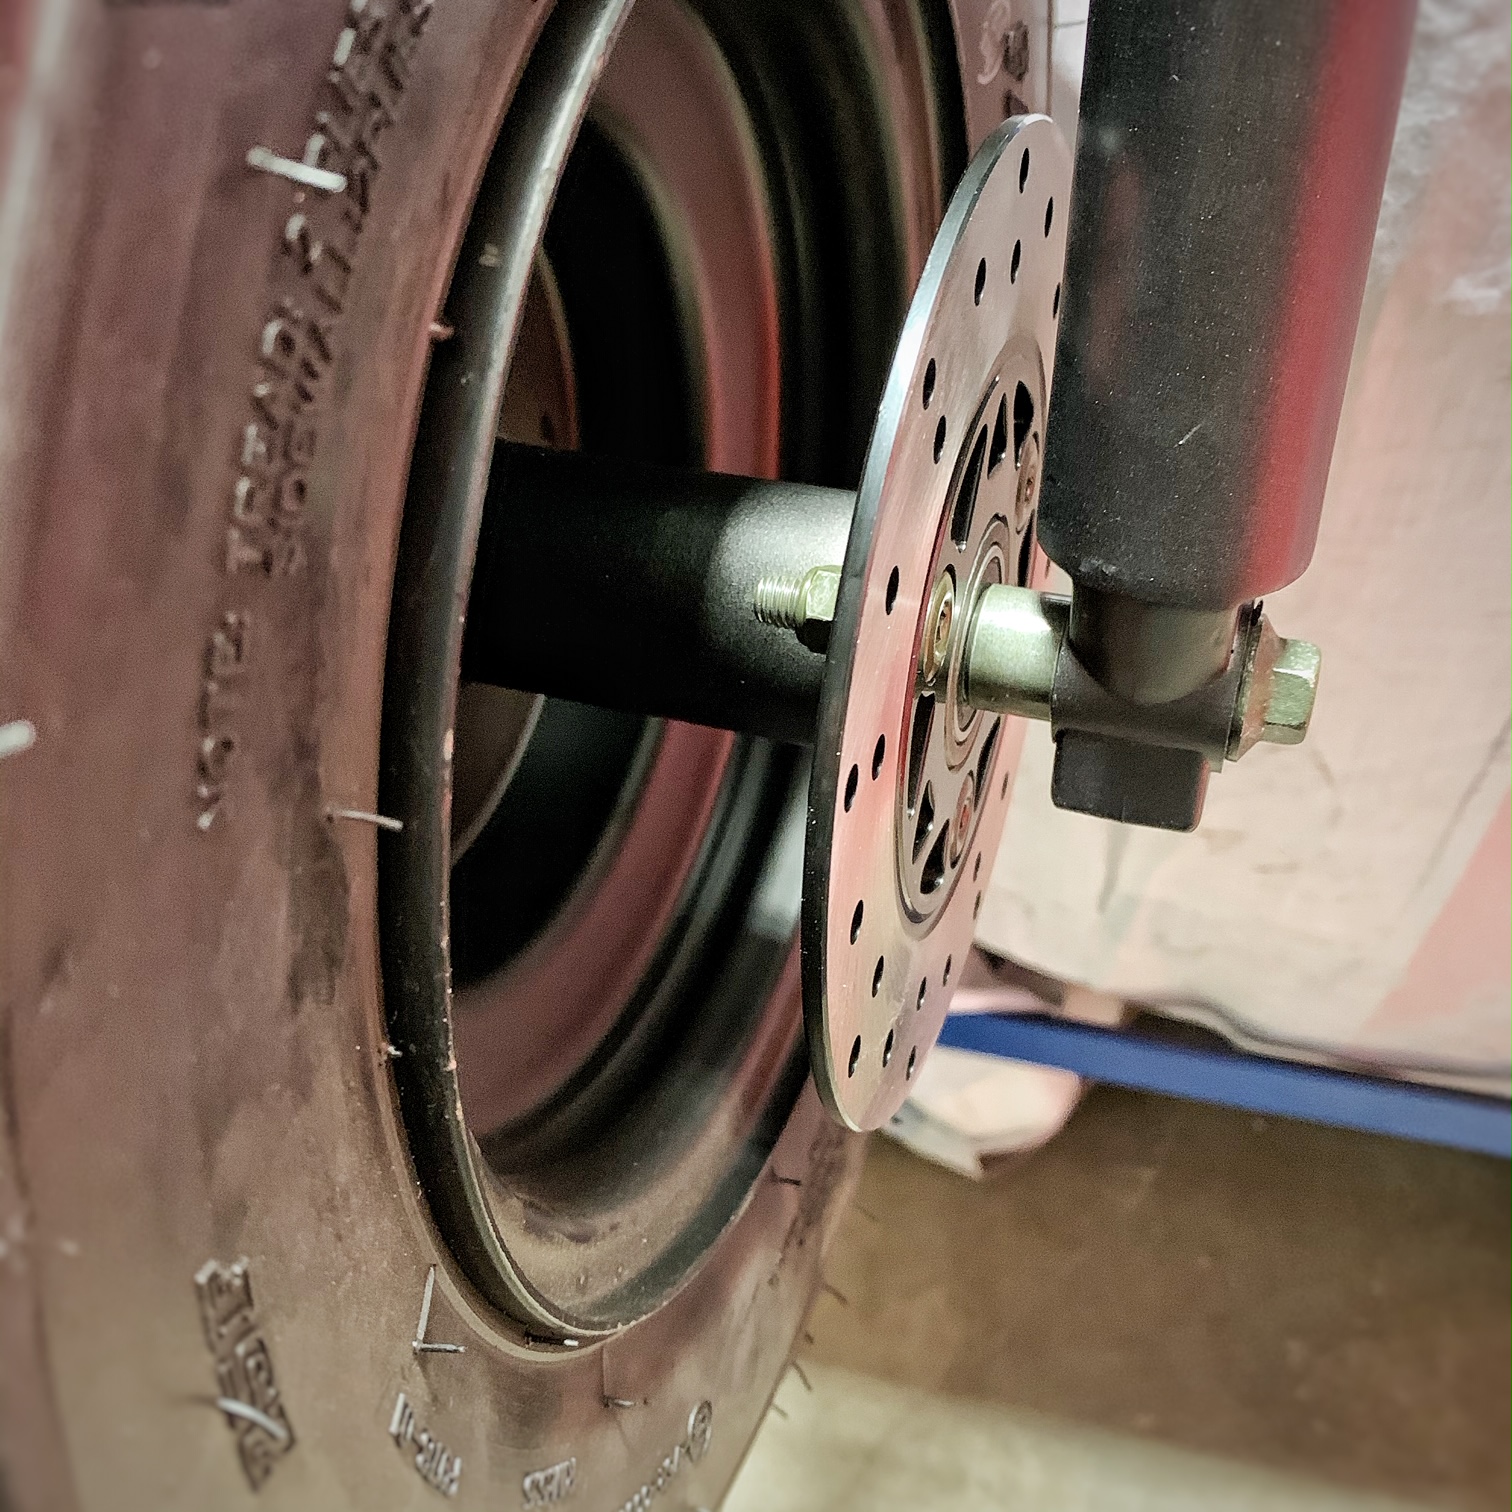
Mount the Front Wheel Assembly. There will be a spacer on each side of the wheel assembly. Use the shorter M12x1.25x312mm Front Axle Bolt. The brake disc will face the shock with the Caliper Mounting Bracket on it (left side).
Mount the Rear Wheel Assembly. Sprocket will be on the right side (when sitting on the bike). The Rear Axle M12x320 Bolt will be the longer than the front axle. Be sure to install both of the Chain Eyelet Adjusters. These Chain Eyelet Adjusters have cutouts on the top so that you may match the notches on both sides of the wheel. This helps make sure your wheel is straight. For now, push the wheel as far forward as it can go. This allows you to wrap your pre-cut chain around both sprockets and then you can adjust the wheel back to get 3/8" of chain play.
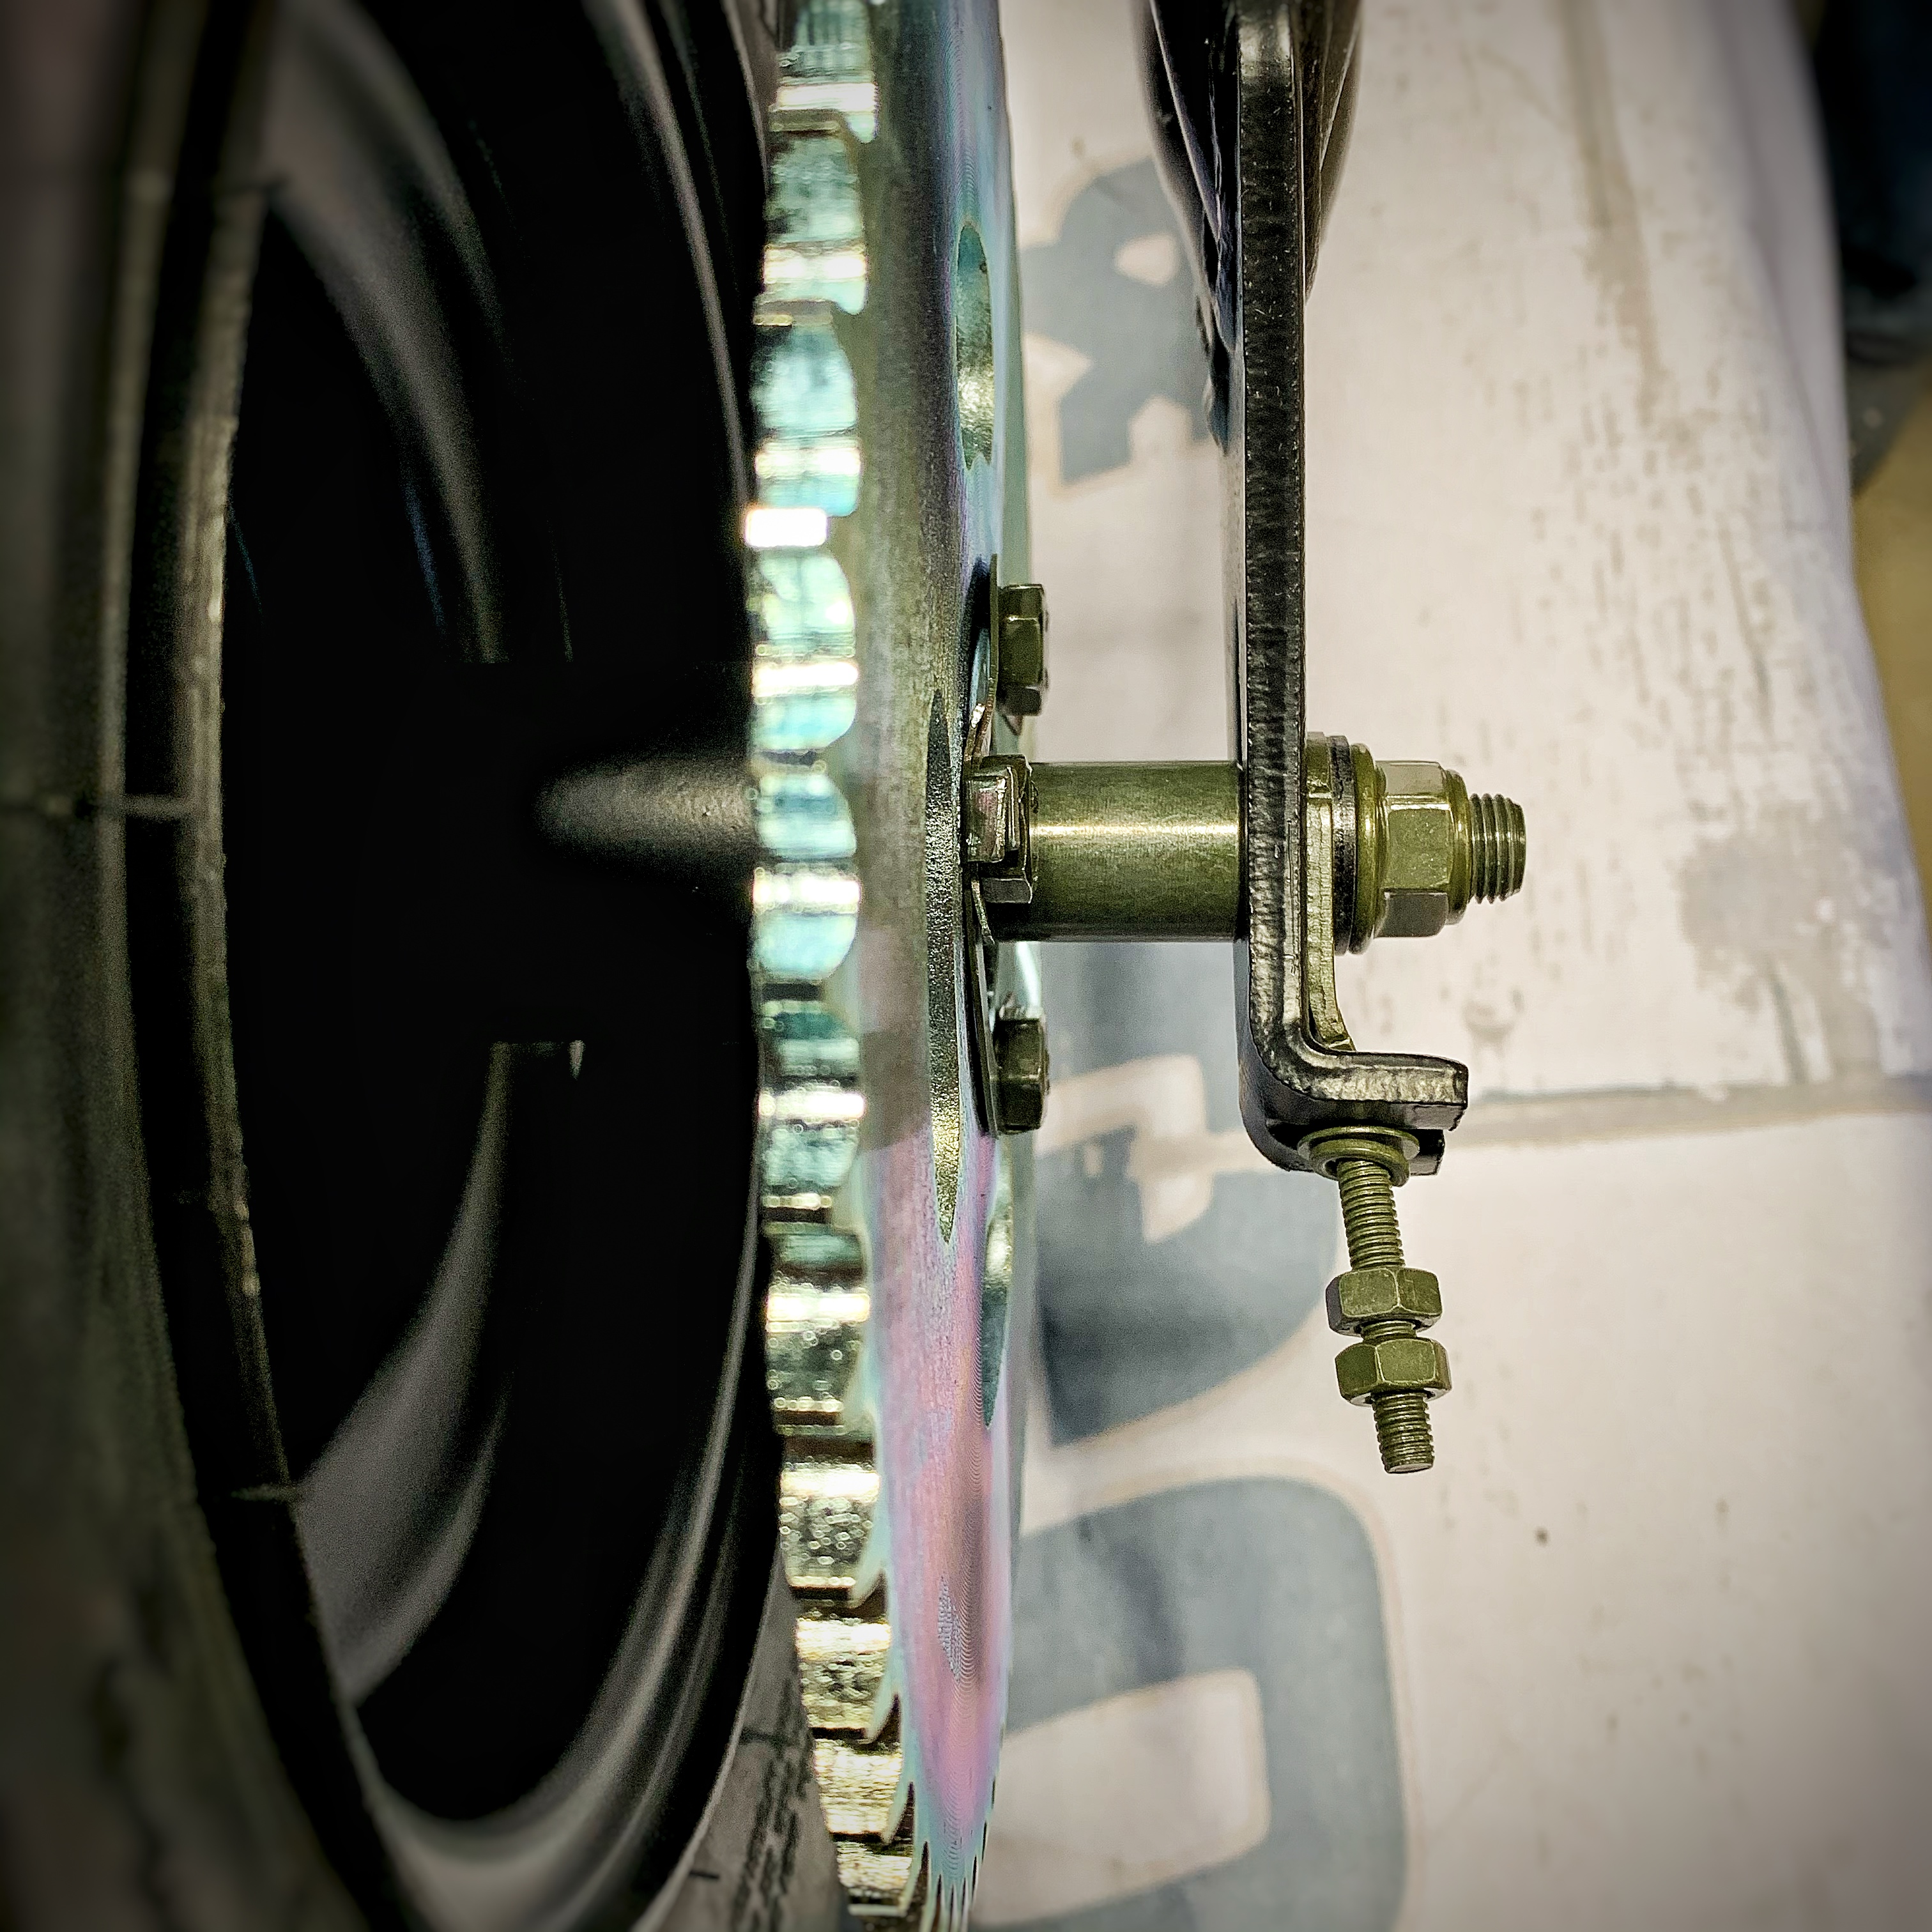
Notice above how the Chain Eyelet Adjusters are not completely flat. The eyelet part needs to be flush with the frame. If not flush, flip it around. There is also a spacer between the bearing and right side of the frame.
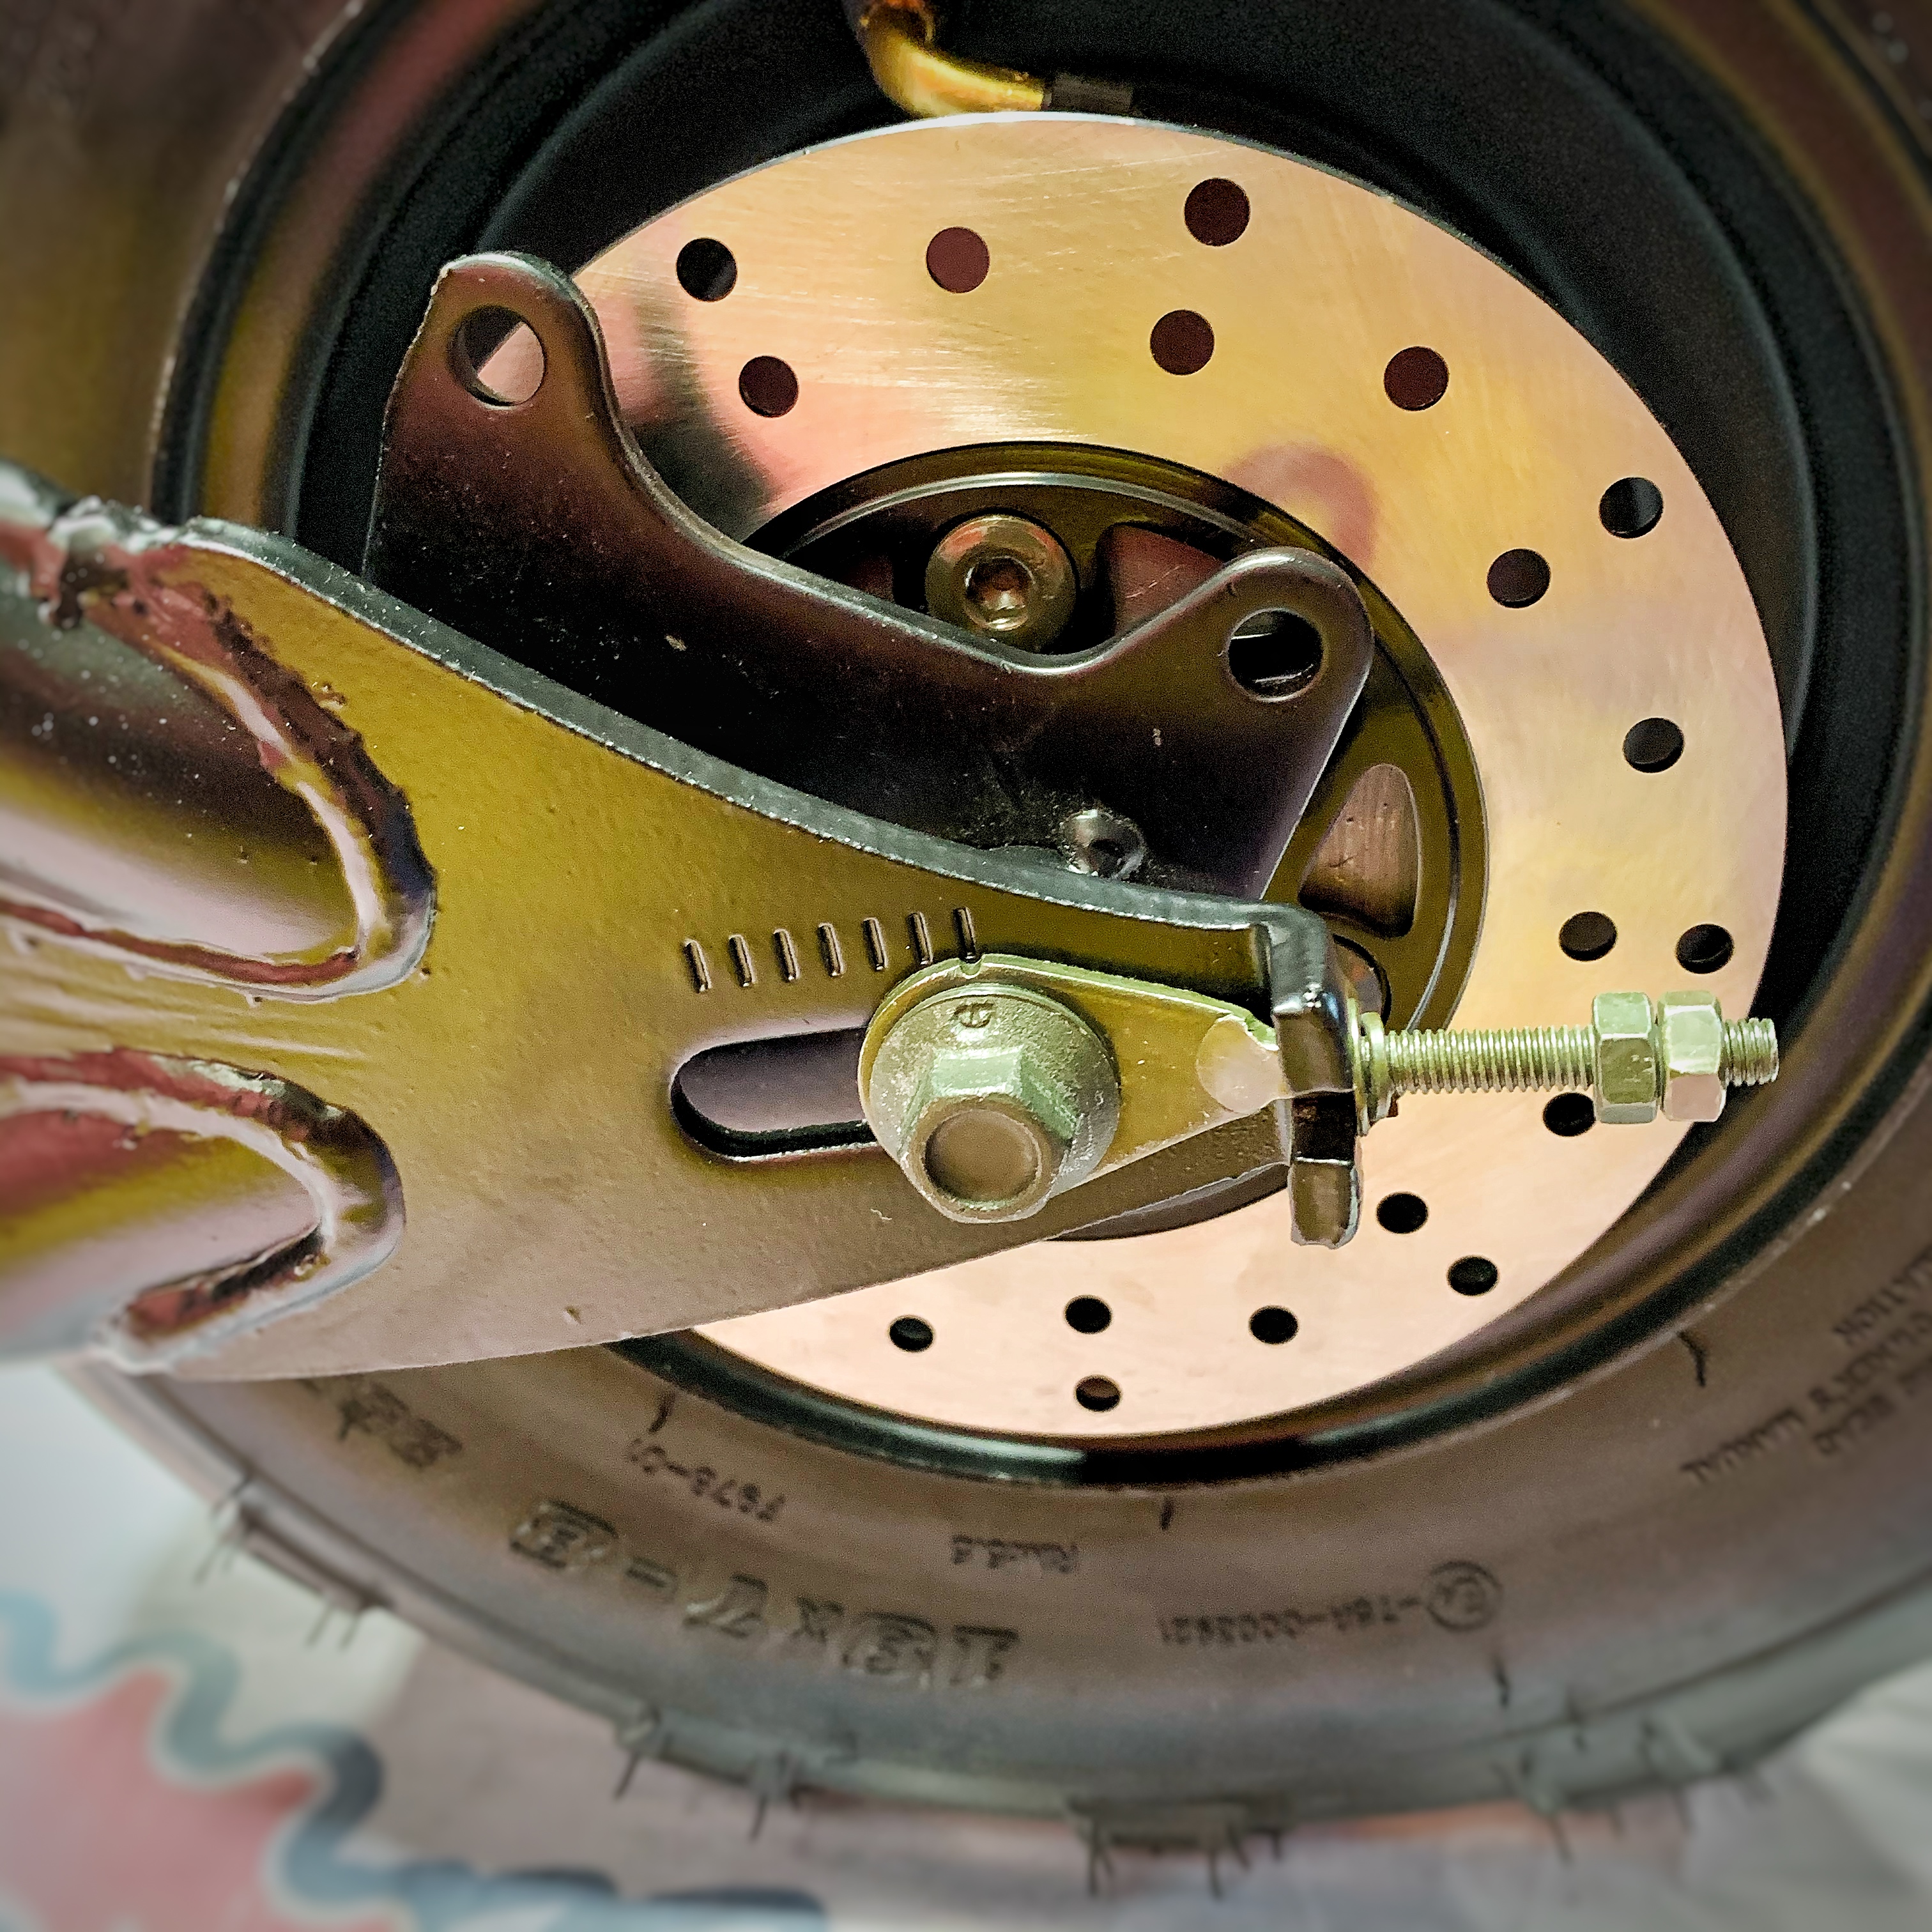
The Brake Side of the Rear Wheel Assembly. This is how the Rear Caliper Mounting Bracket will look after installed. No additional spacers on the brake side.
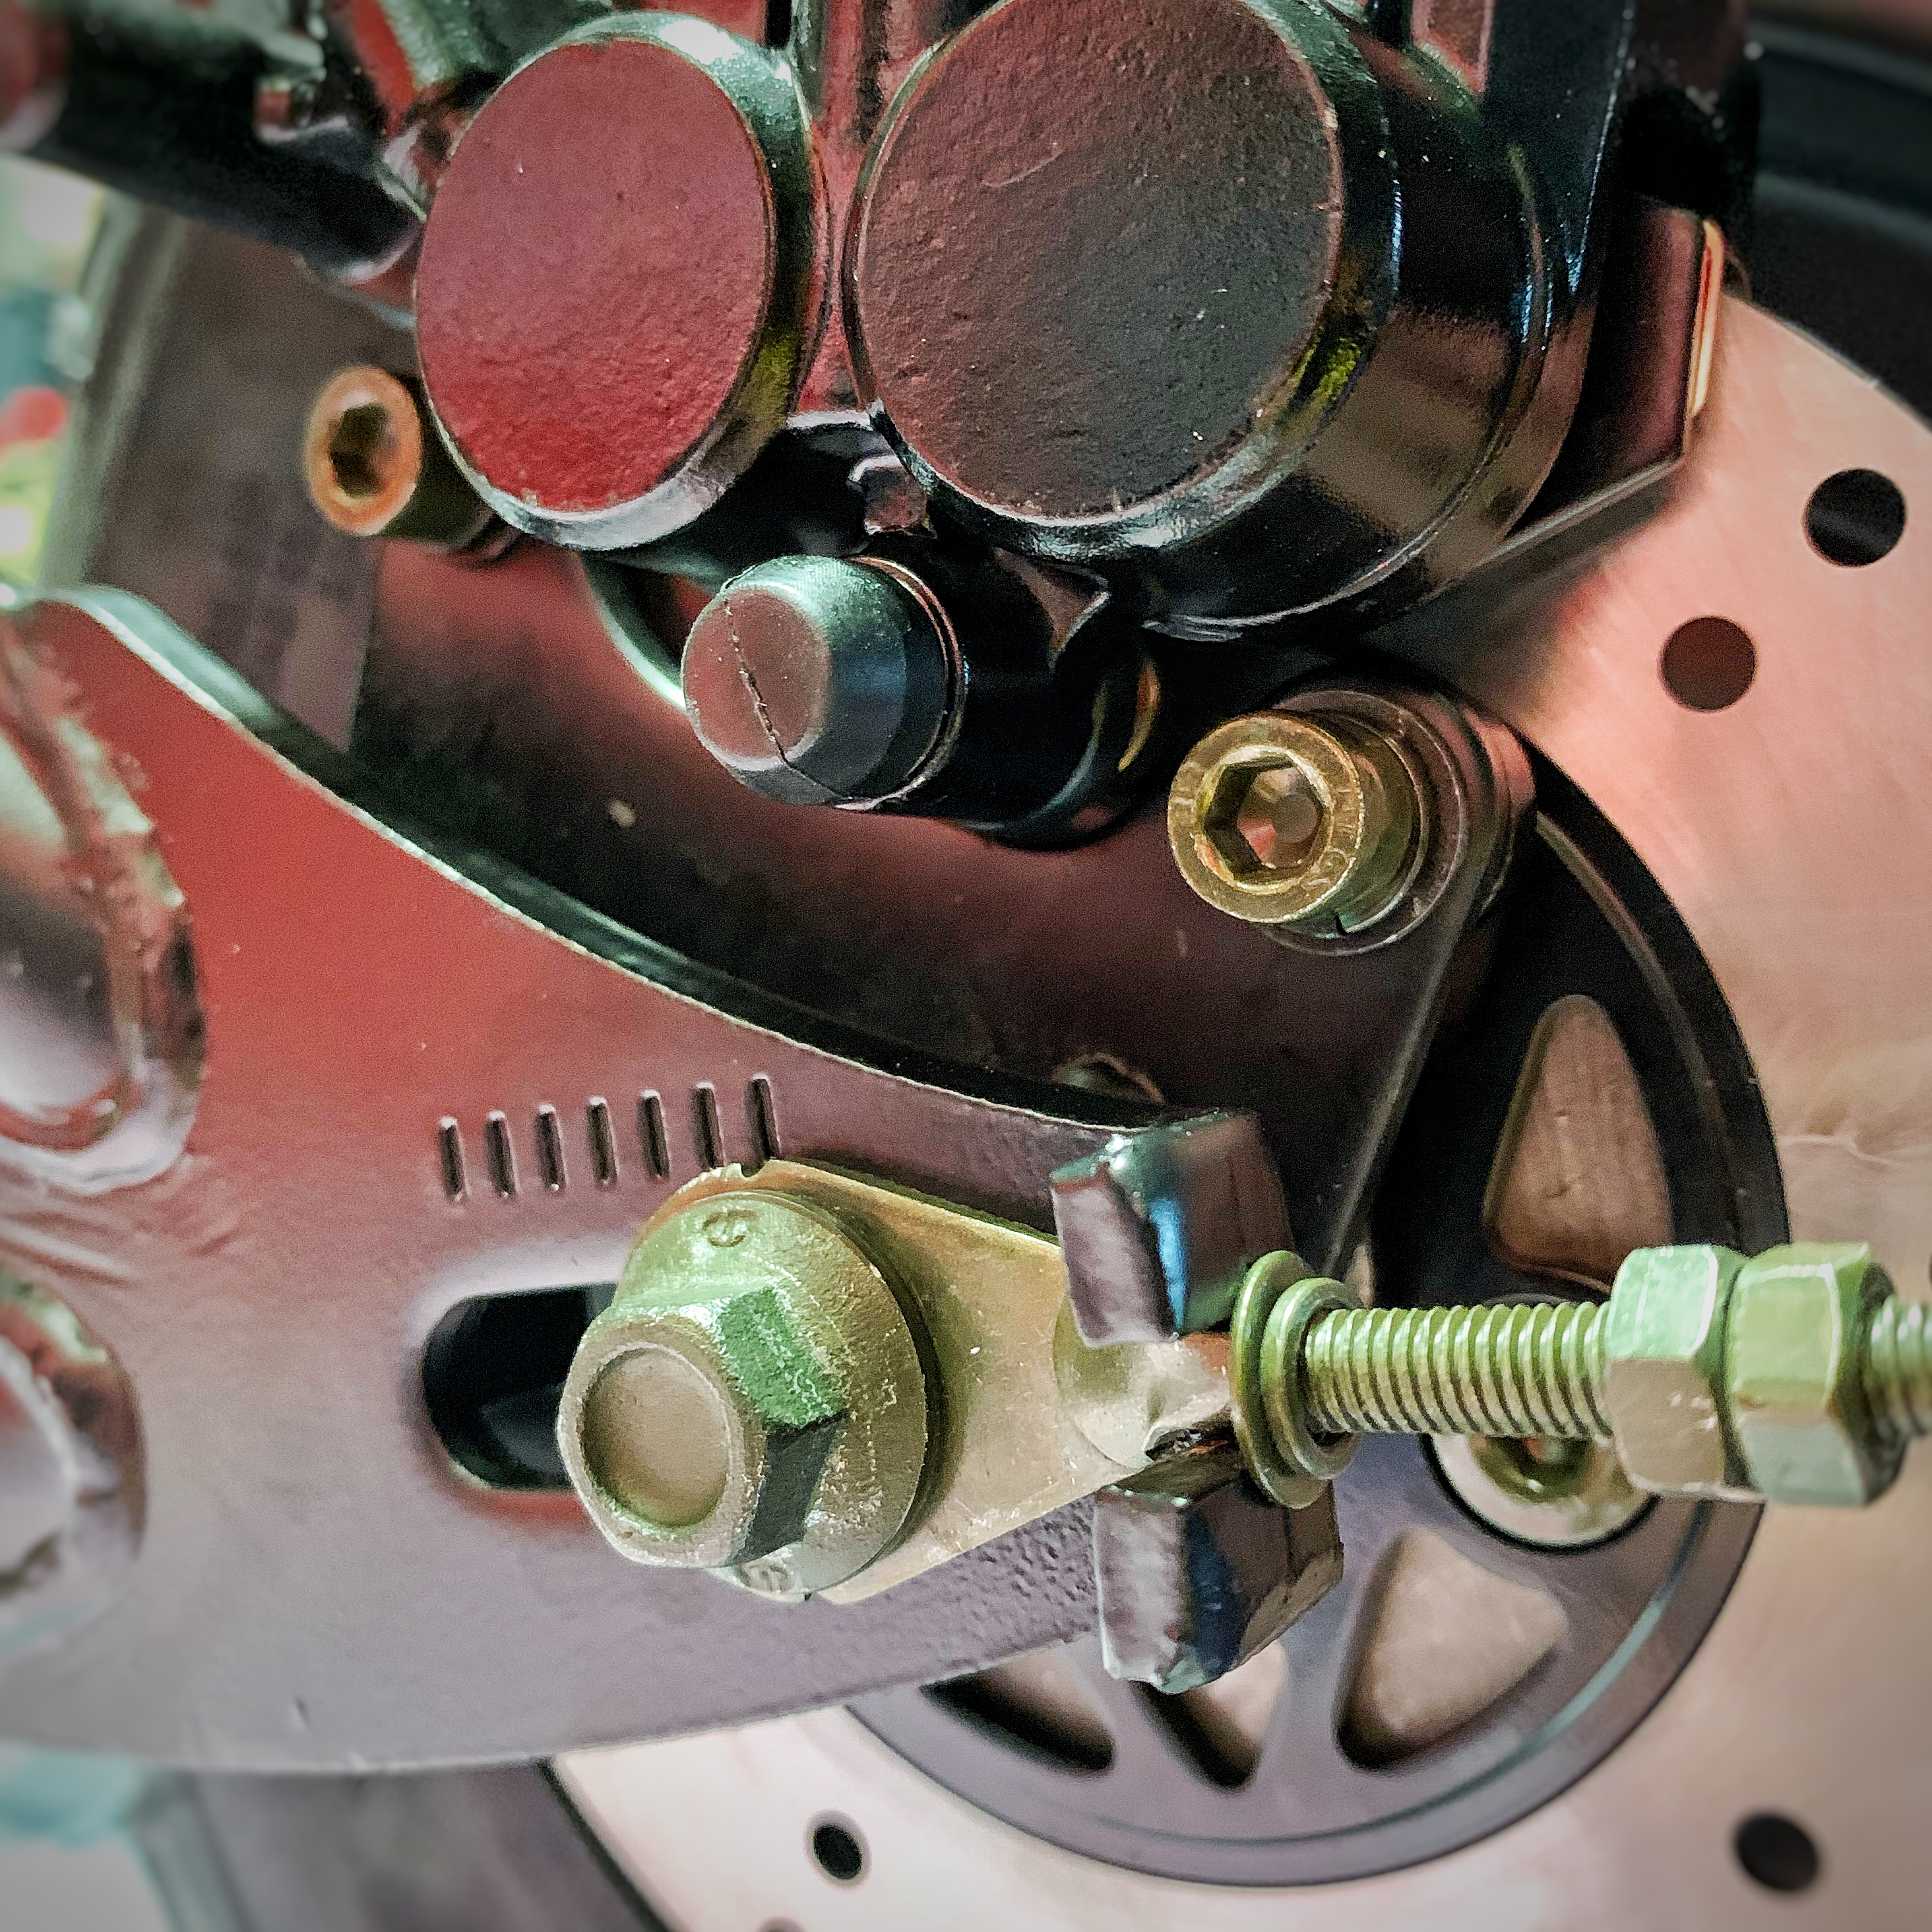
Rear Caliper is then mounted with (2)M8x16 Socket Head Bolts, along with lock washers and washers. The Rear Brake Lever will mount on the left hand side of your handlebars, along with the dummy grip. The Front Caliper is mounted the same way and the Front Brake Lever will mount on the right side of your handlebars. What's nice about these hydraulic kits is that they come pre-bled and ready to go. If ever needed, use DOT3 Brake Fluid.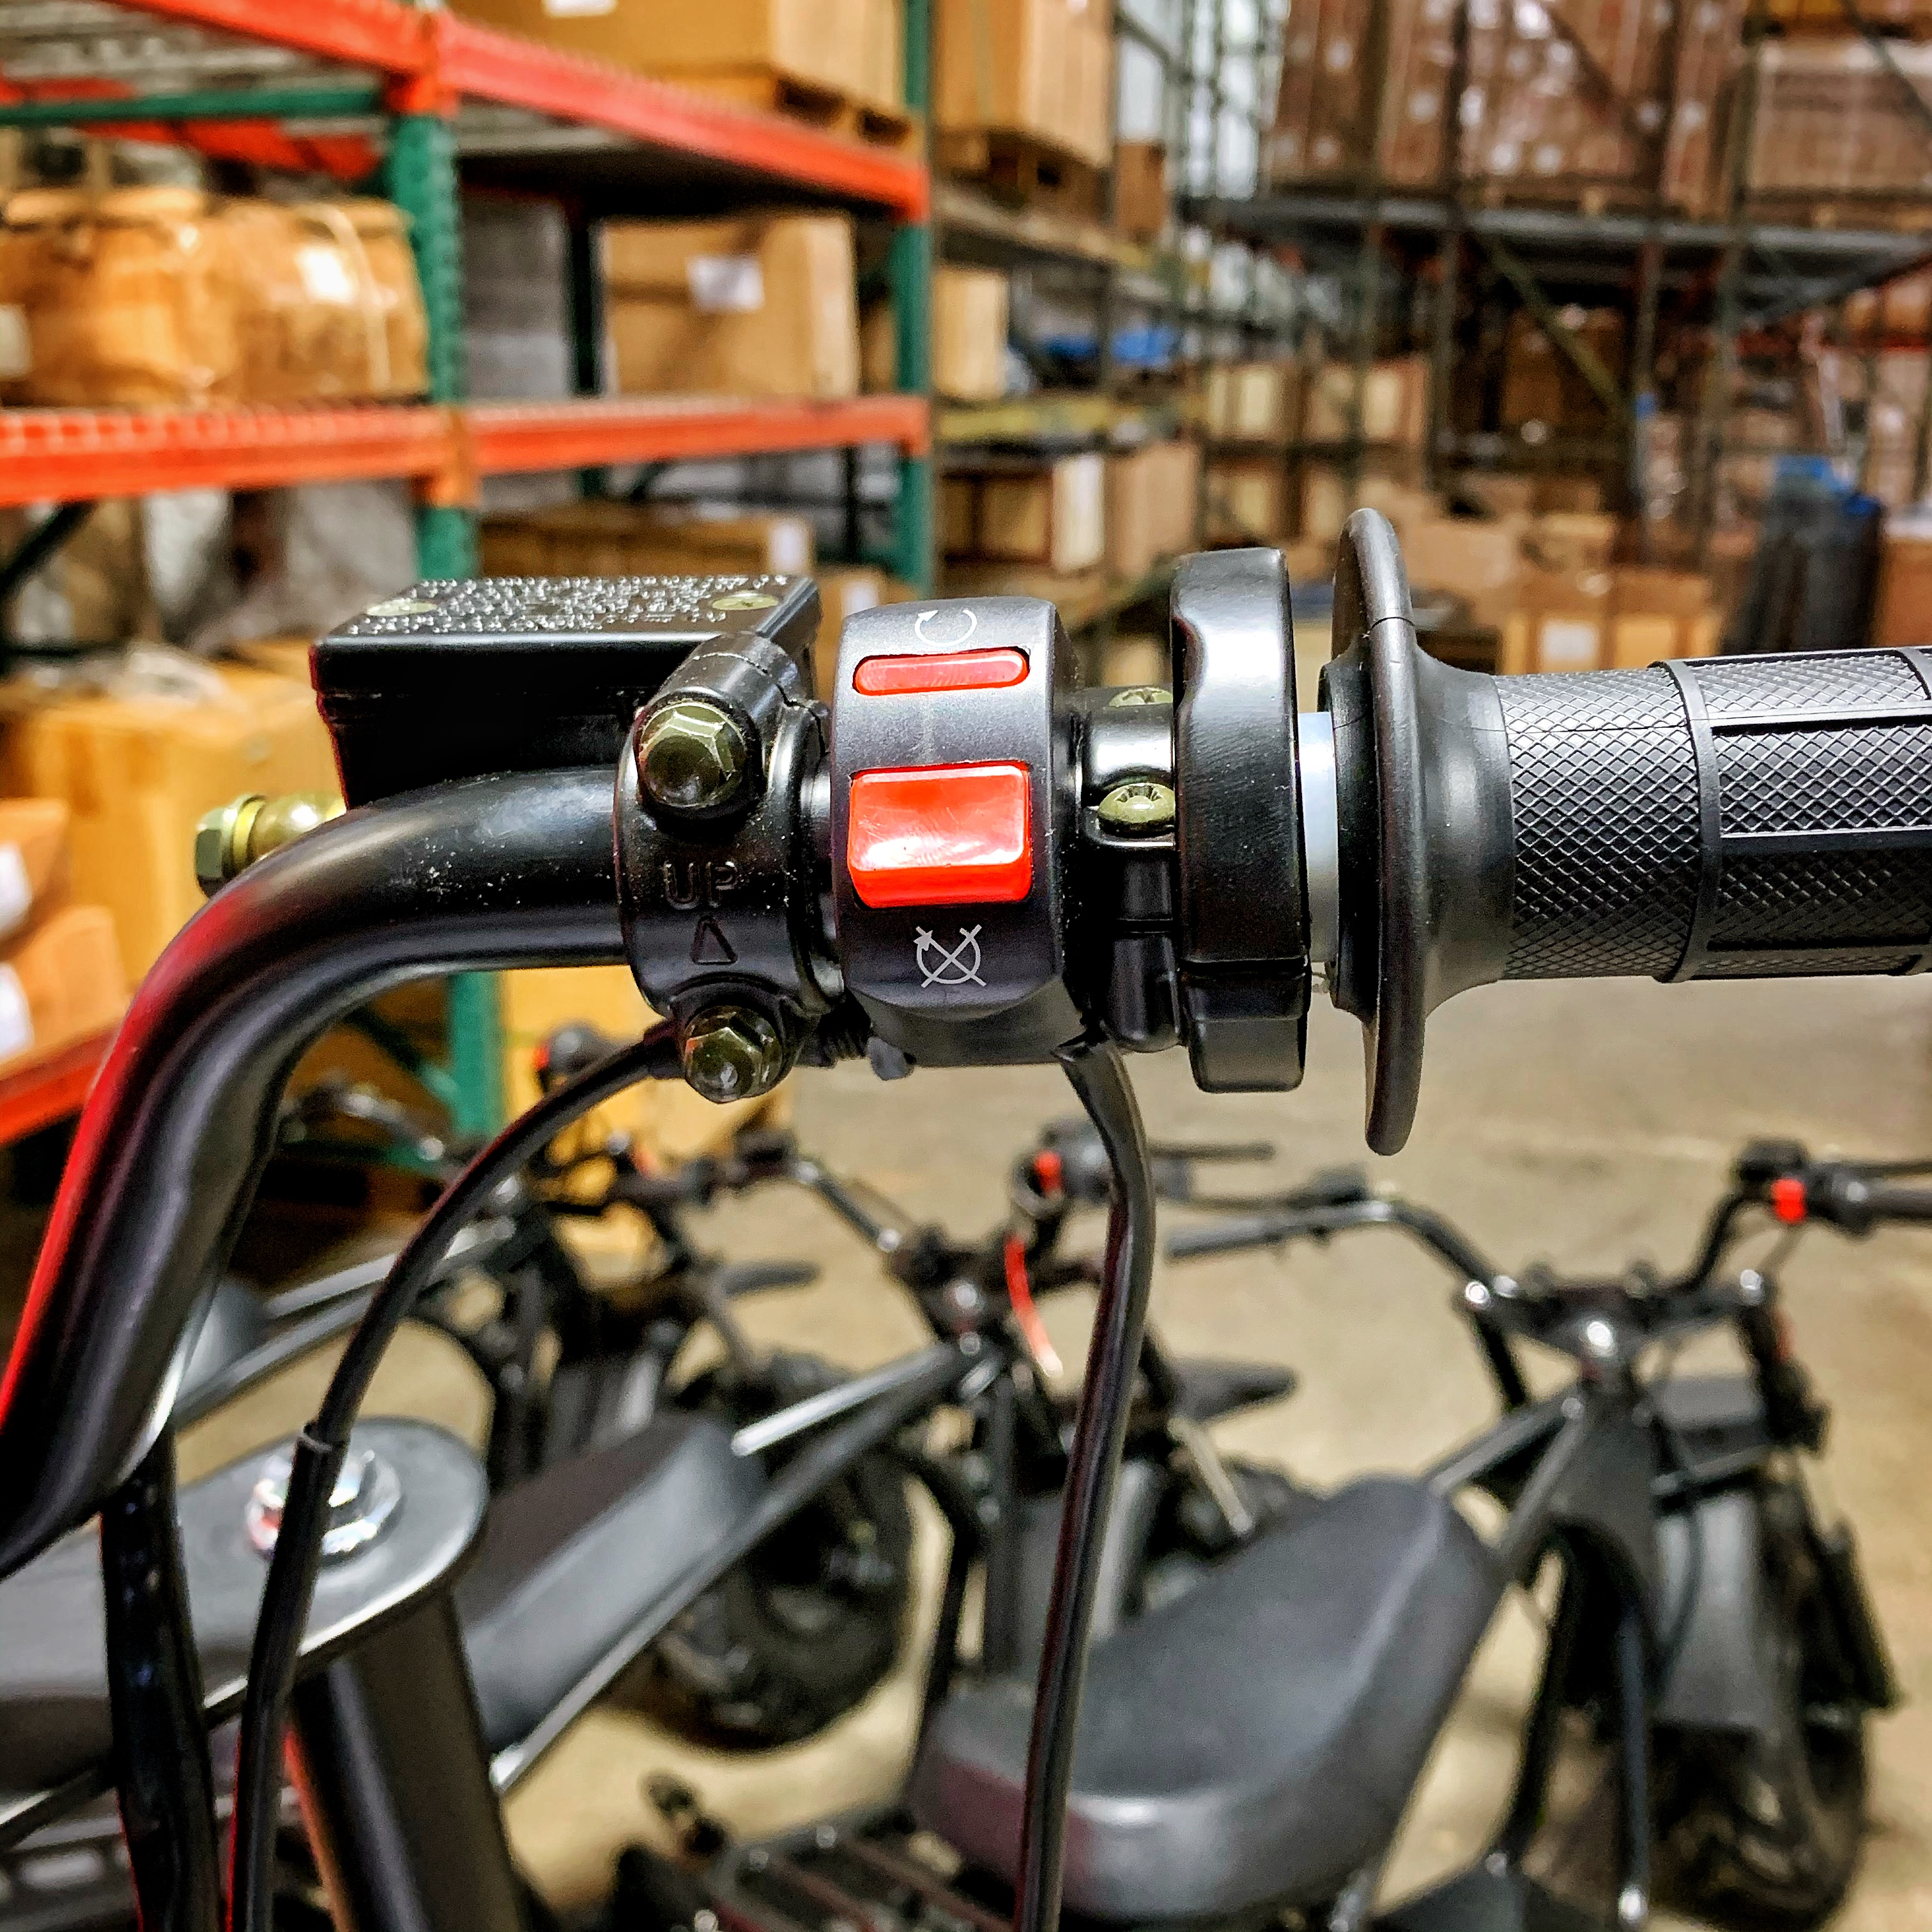
The right side of your handlebars will look like this from left to right: Front Brake Lever, Kill Switch, then Throttle Housing.
The above photo shows the best way to route your cables. Your Brake lines will end up criss-crossing in front of the head, but still within the front suspension tubes. Your Throttle Cable and Kill Switch Wire will run down your frame and enter your frame through the side gussets. We like the run the throttle cable over the seat tube and let it hang down from there. Your throttle cable will be positioned to feed in to the back side of your engine's throttle plate.
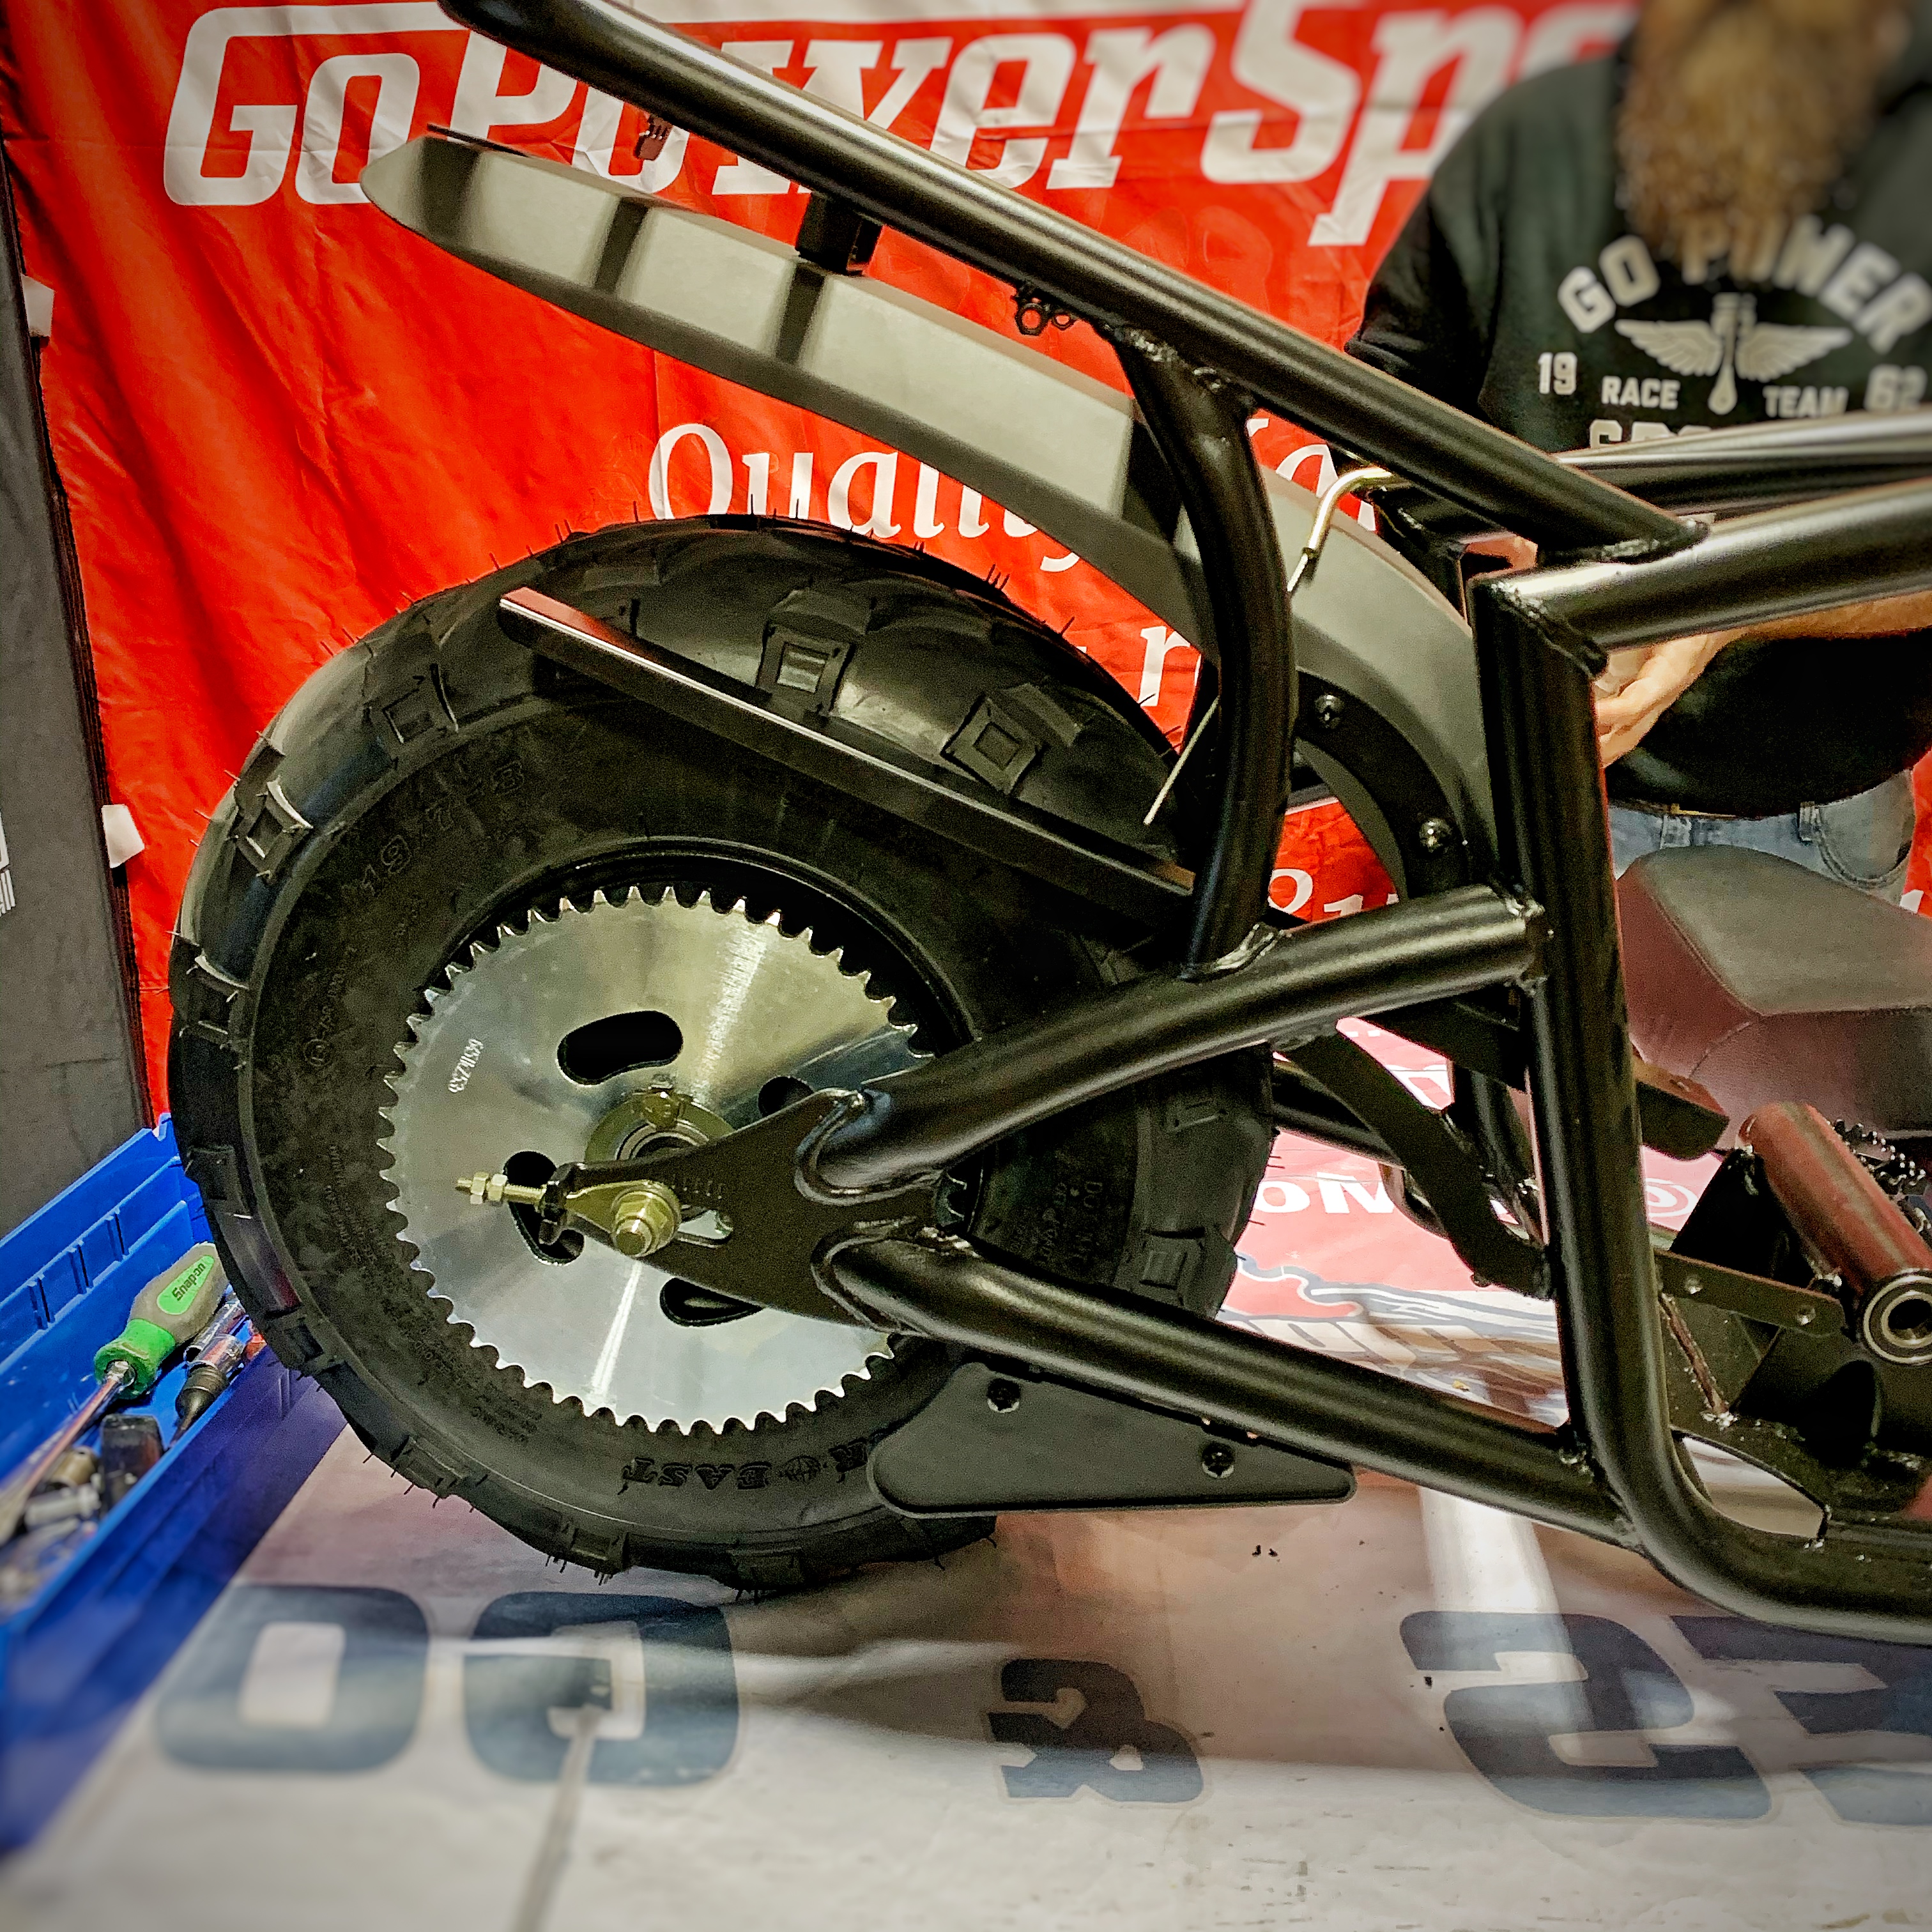
Upper Chain Guard is mounted with (2) M6x12 Screws and washers. There will be a third hole closer to the front of the bike on that same guard that will be left open. This will attach to the Front Chain Guard, but will not happen until after the Jackshaft Sprocket is installed. Lower Chain Guard is then fastened to the frame by (2)M6x10 Screws.
Mount the Rear Tire Fender. There are 6 mounting locations on this fender. 2 on each side and 2 in the middle. For the middle, insert the rubber grommets. Then from the bottom will be the collared washers and then the M6x16 Bolts.
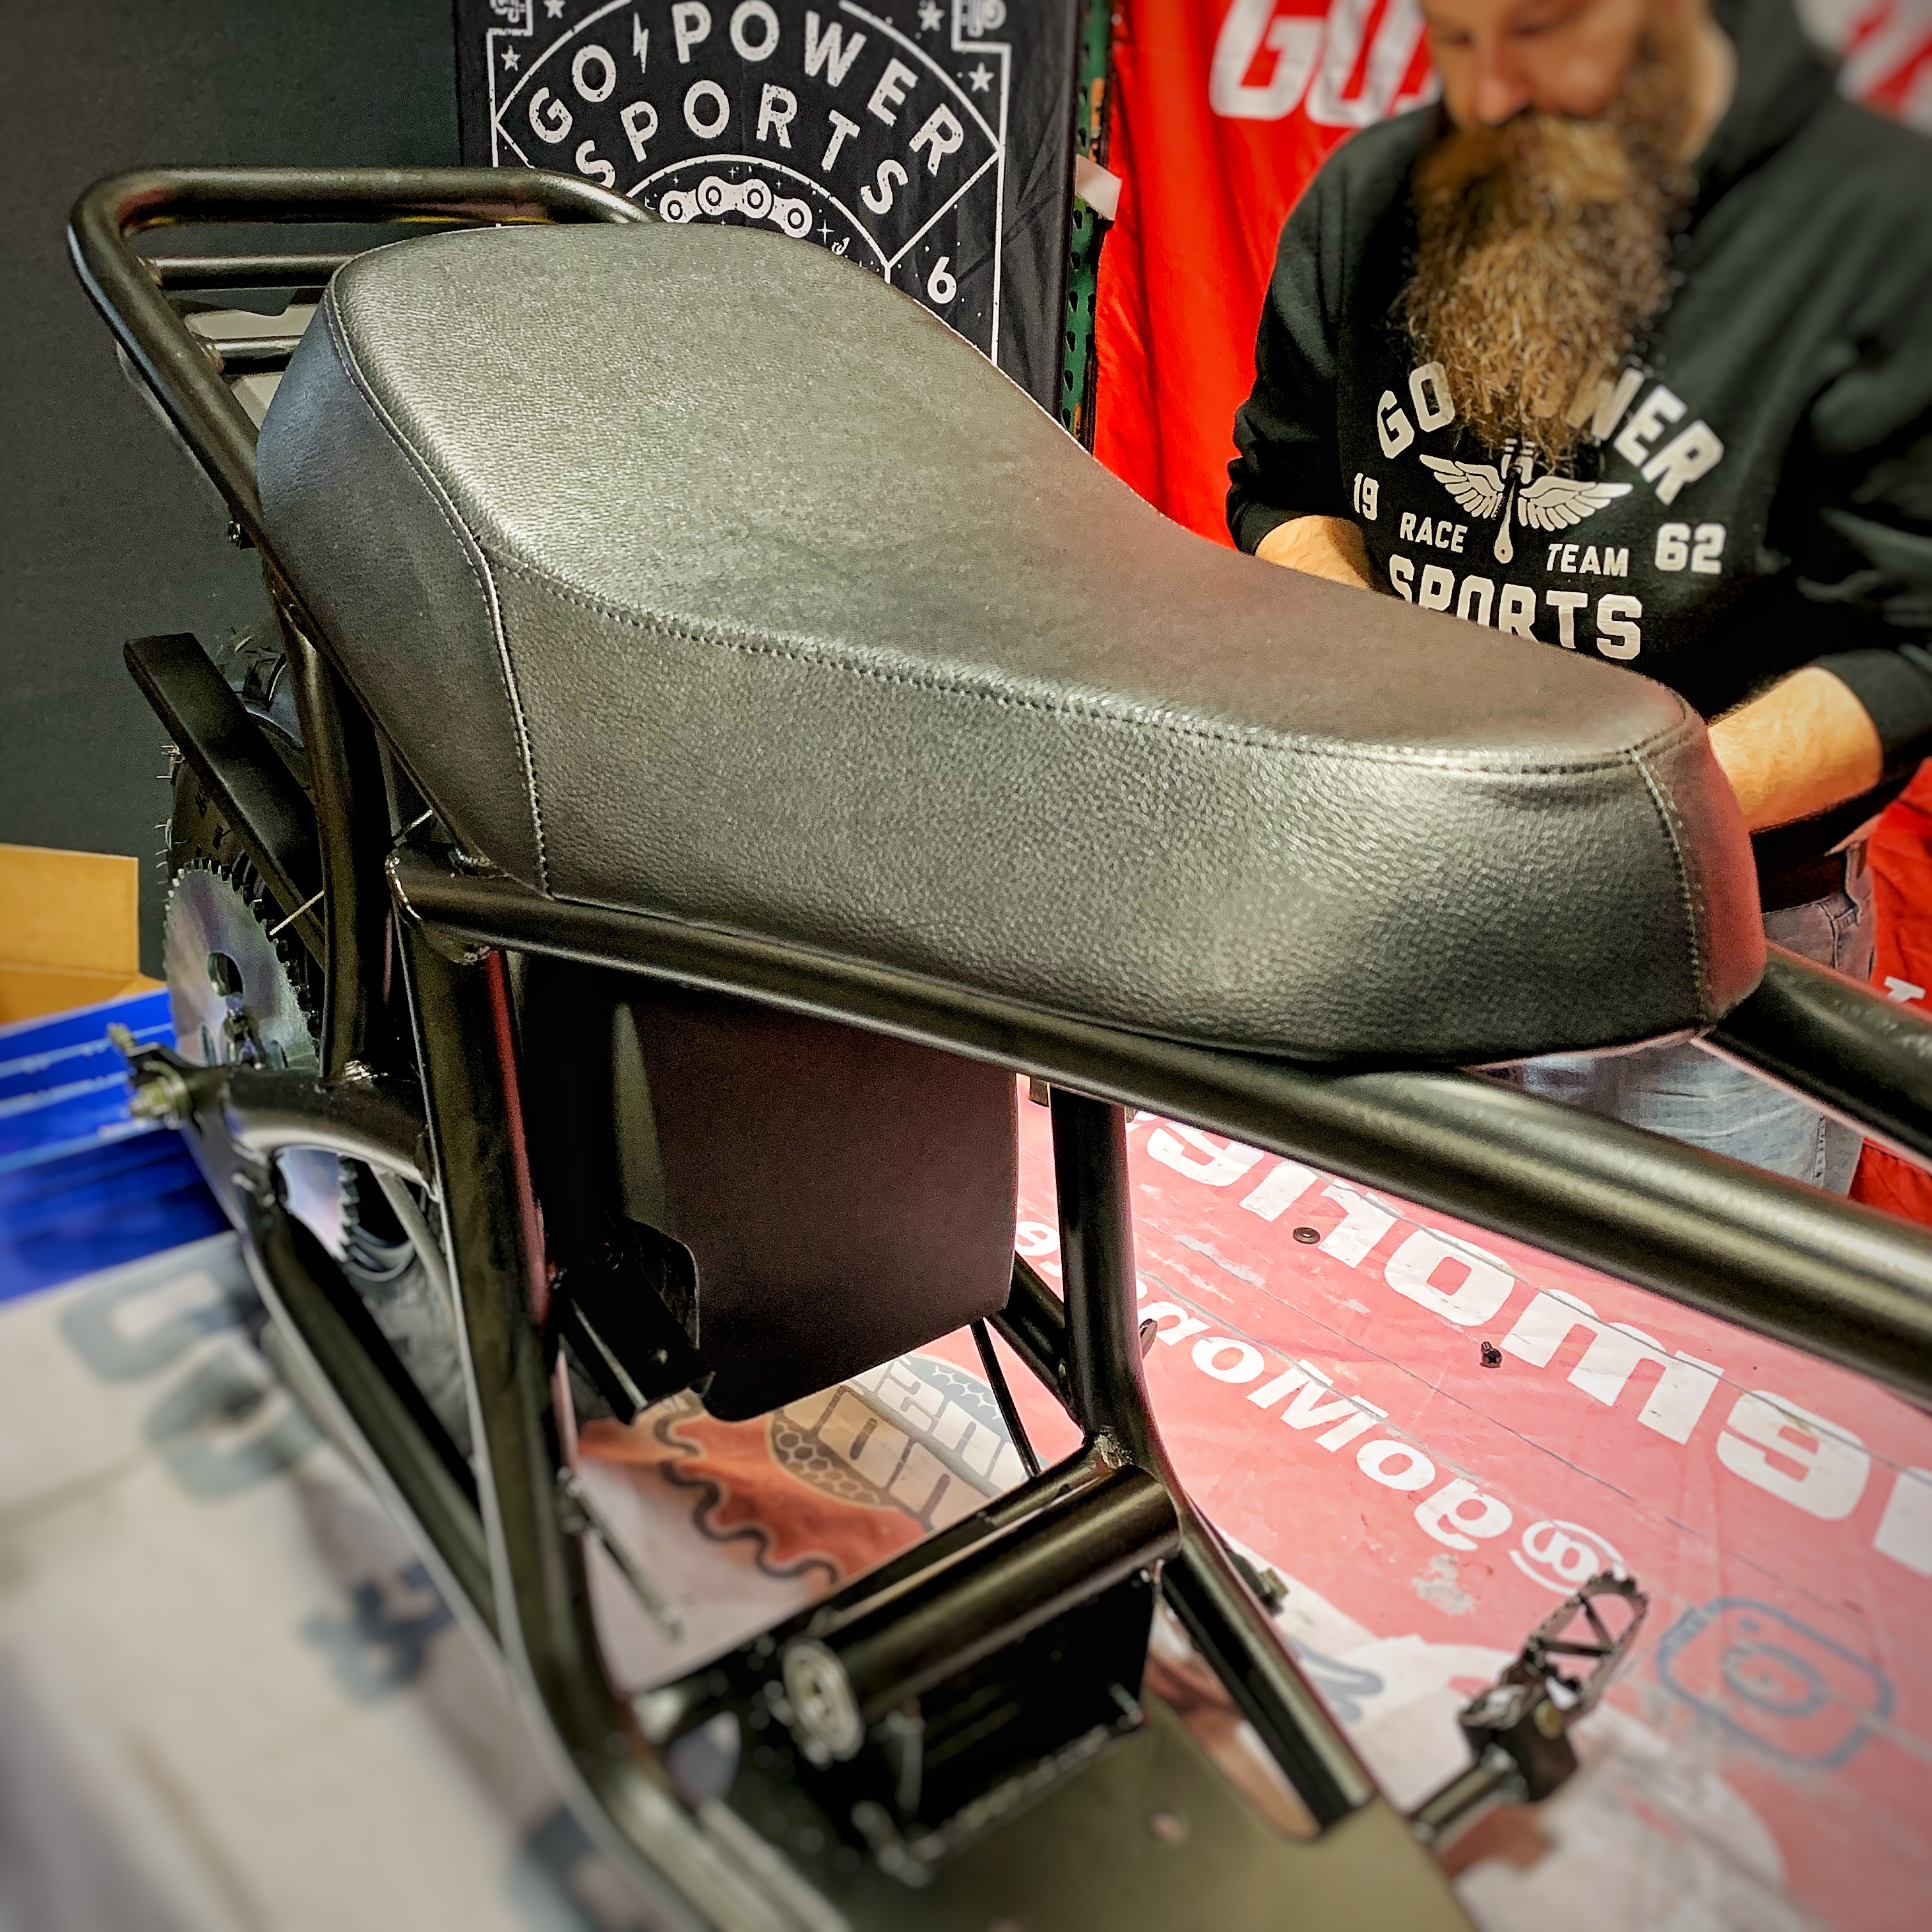
Install the seat using (2)M6x16 Bolts. Note that there is a plastic fin that goes over a tab on your bike. This will keep the nose of your seat from pulling away from the bike. Snap in the (2)Plastic Side Gusset Plates to the frame.
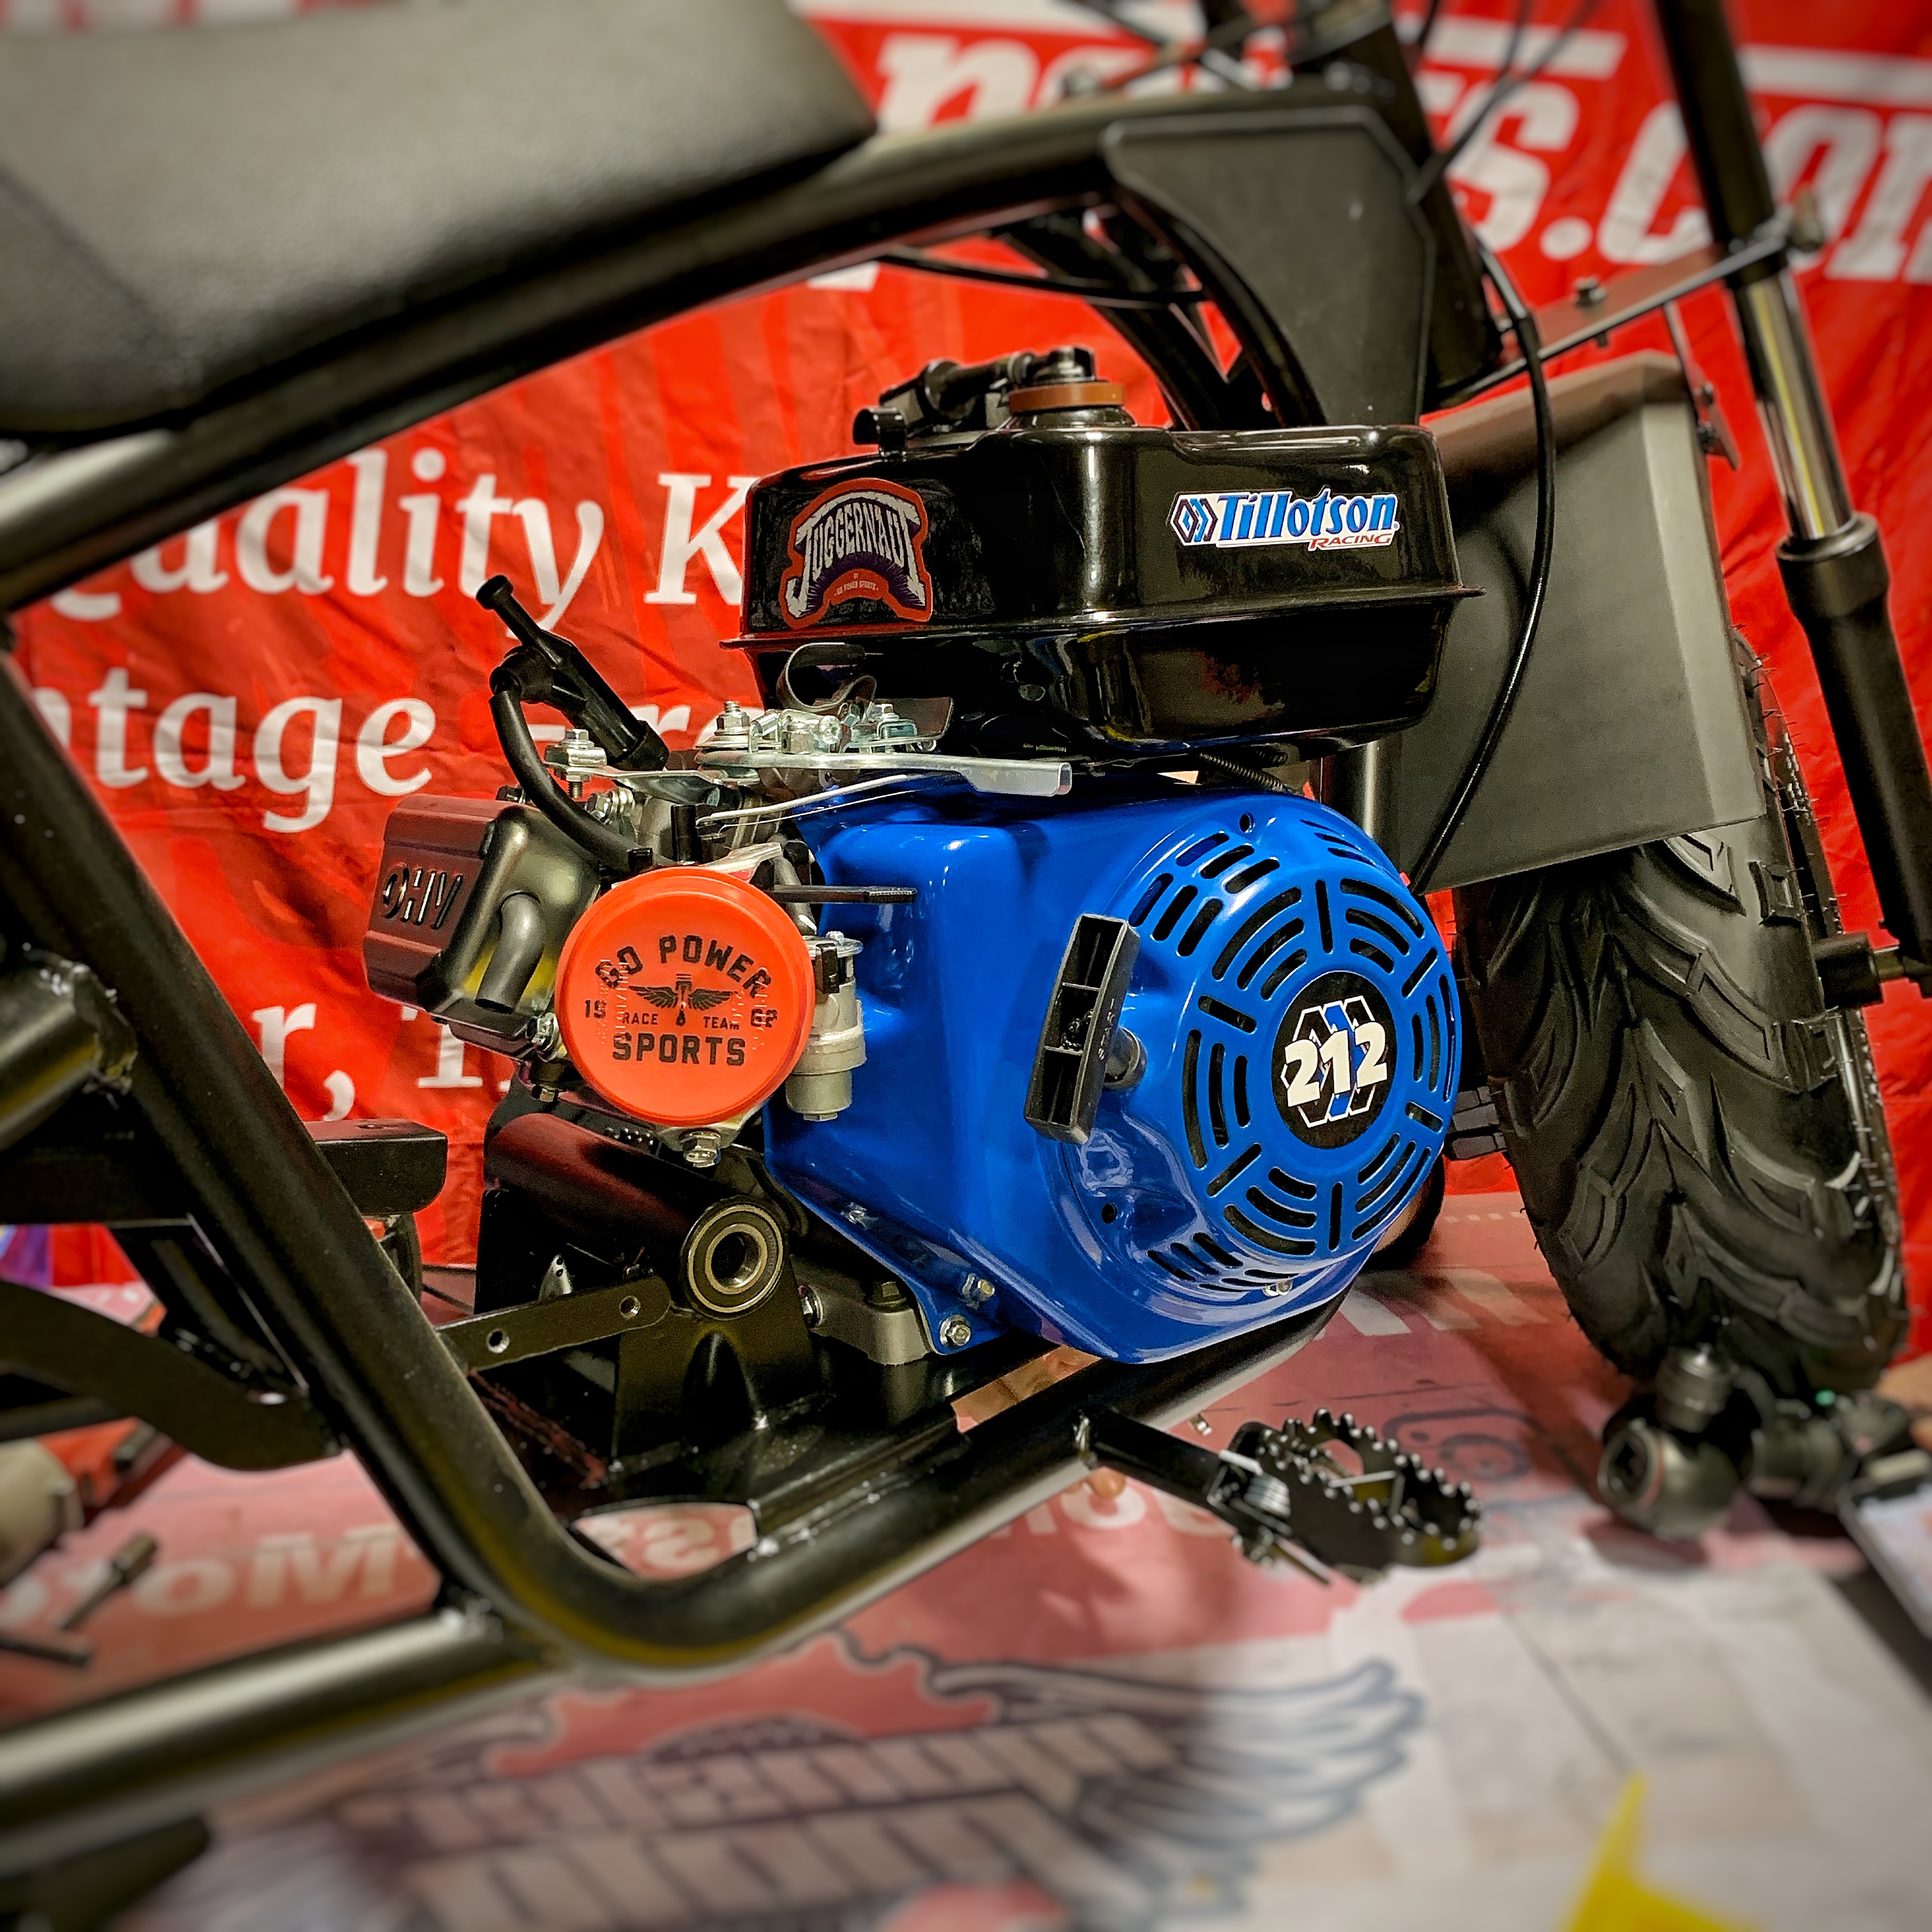
Up til this point, you have a Roller. Add an engine and then you have a Runner. For our runner, we've chosen a Stage 1 Tillotson Engine. Any Honda GX200, Lifan 212, Predator 212 or 196cc Clone engine will bolt down down on to the frame as is. We prefer the Tillotson engines because they put out 10 Horse Power straight out of the box. Mount your engine of choice down using (4)M8x40 Bolts, washers, and nuts.

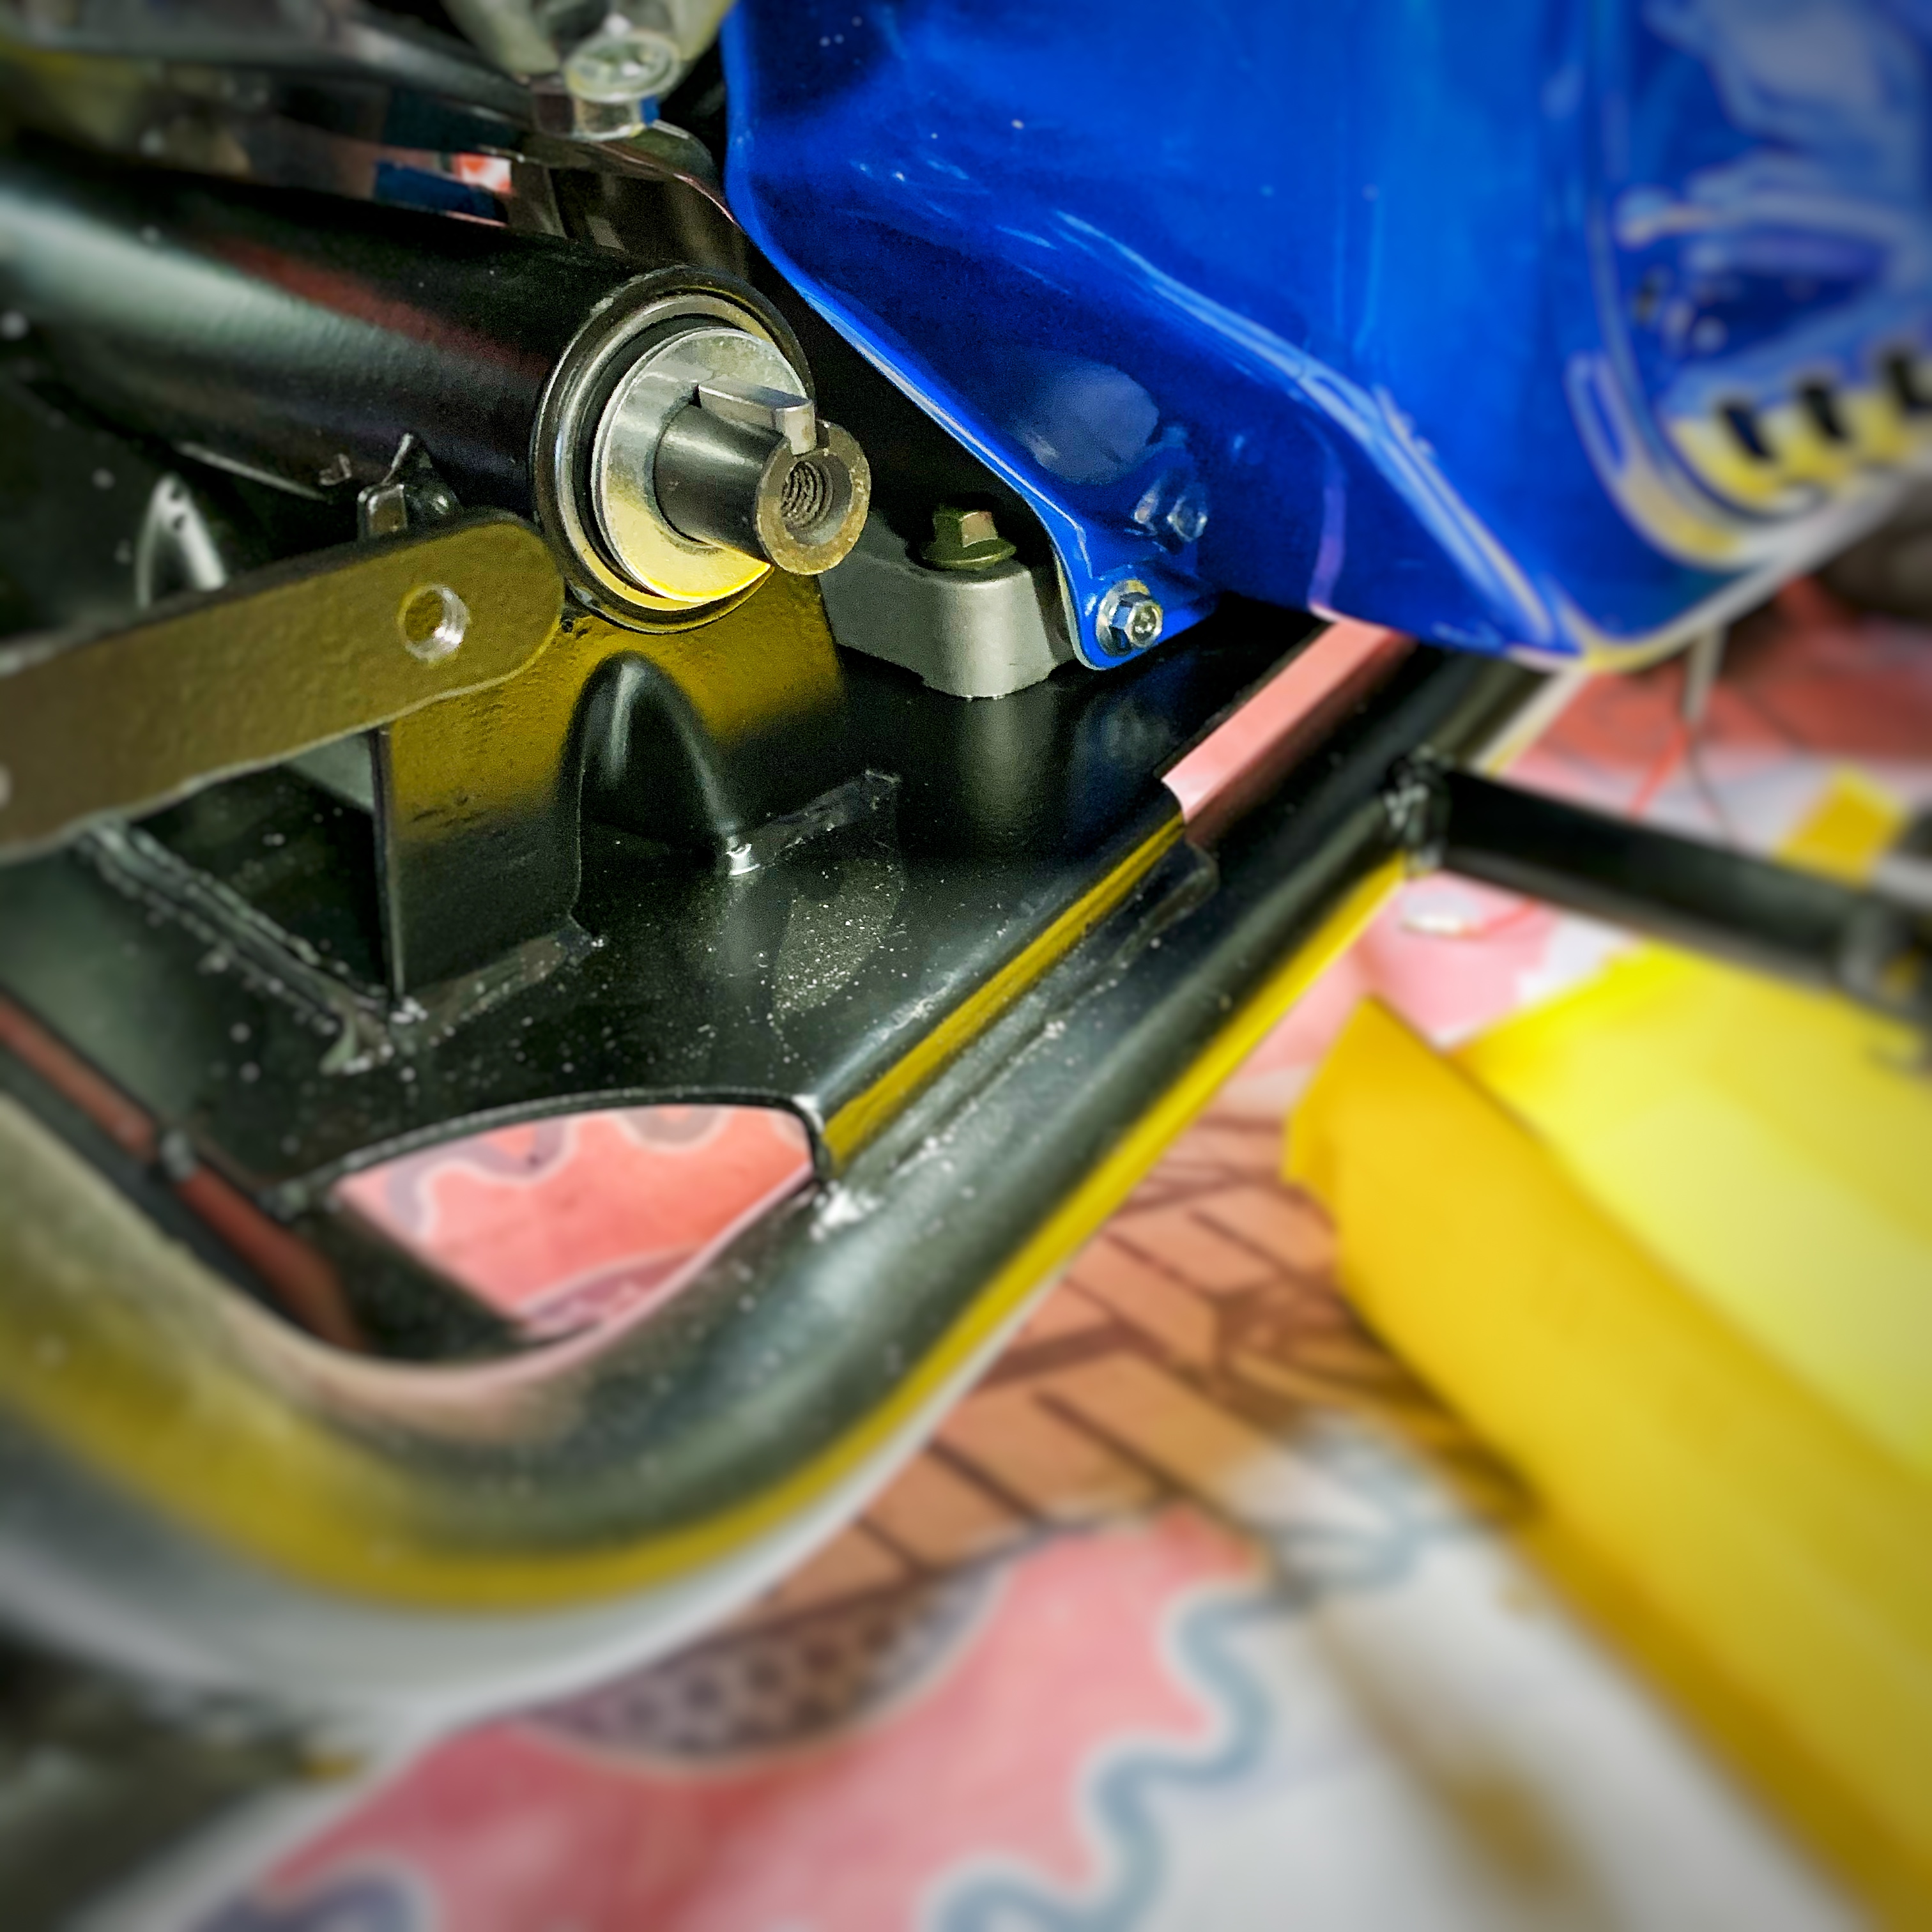
Install the Upper and Lower CVT Cover Brackets. The above photo will help you decipher the correct mounting holes on the engine.
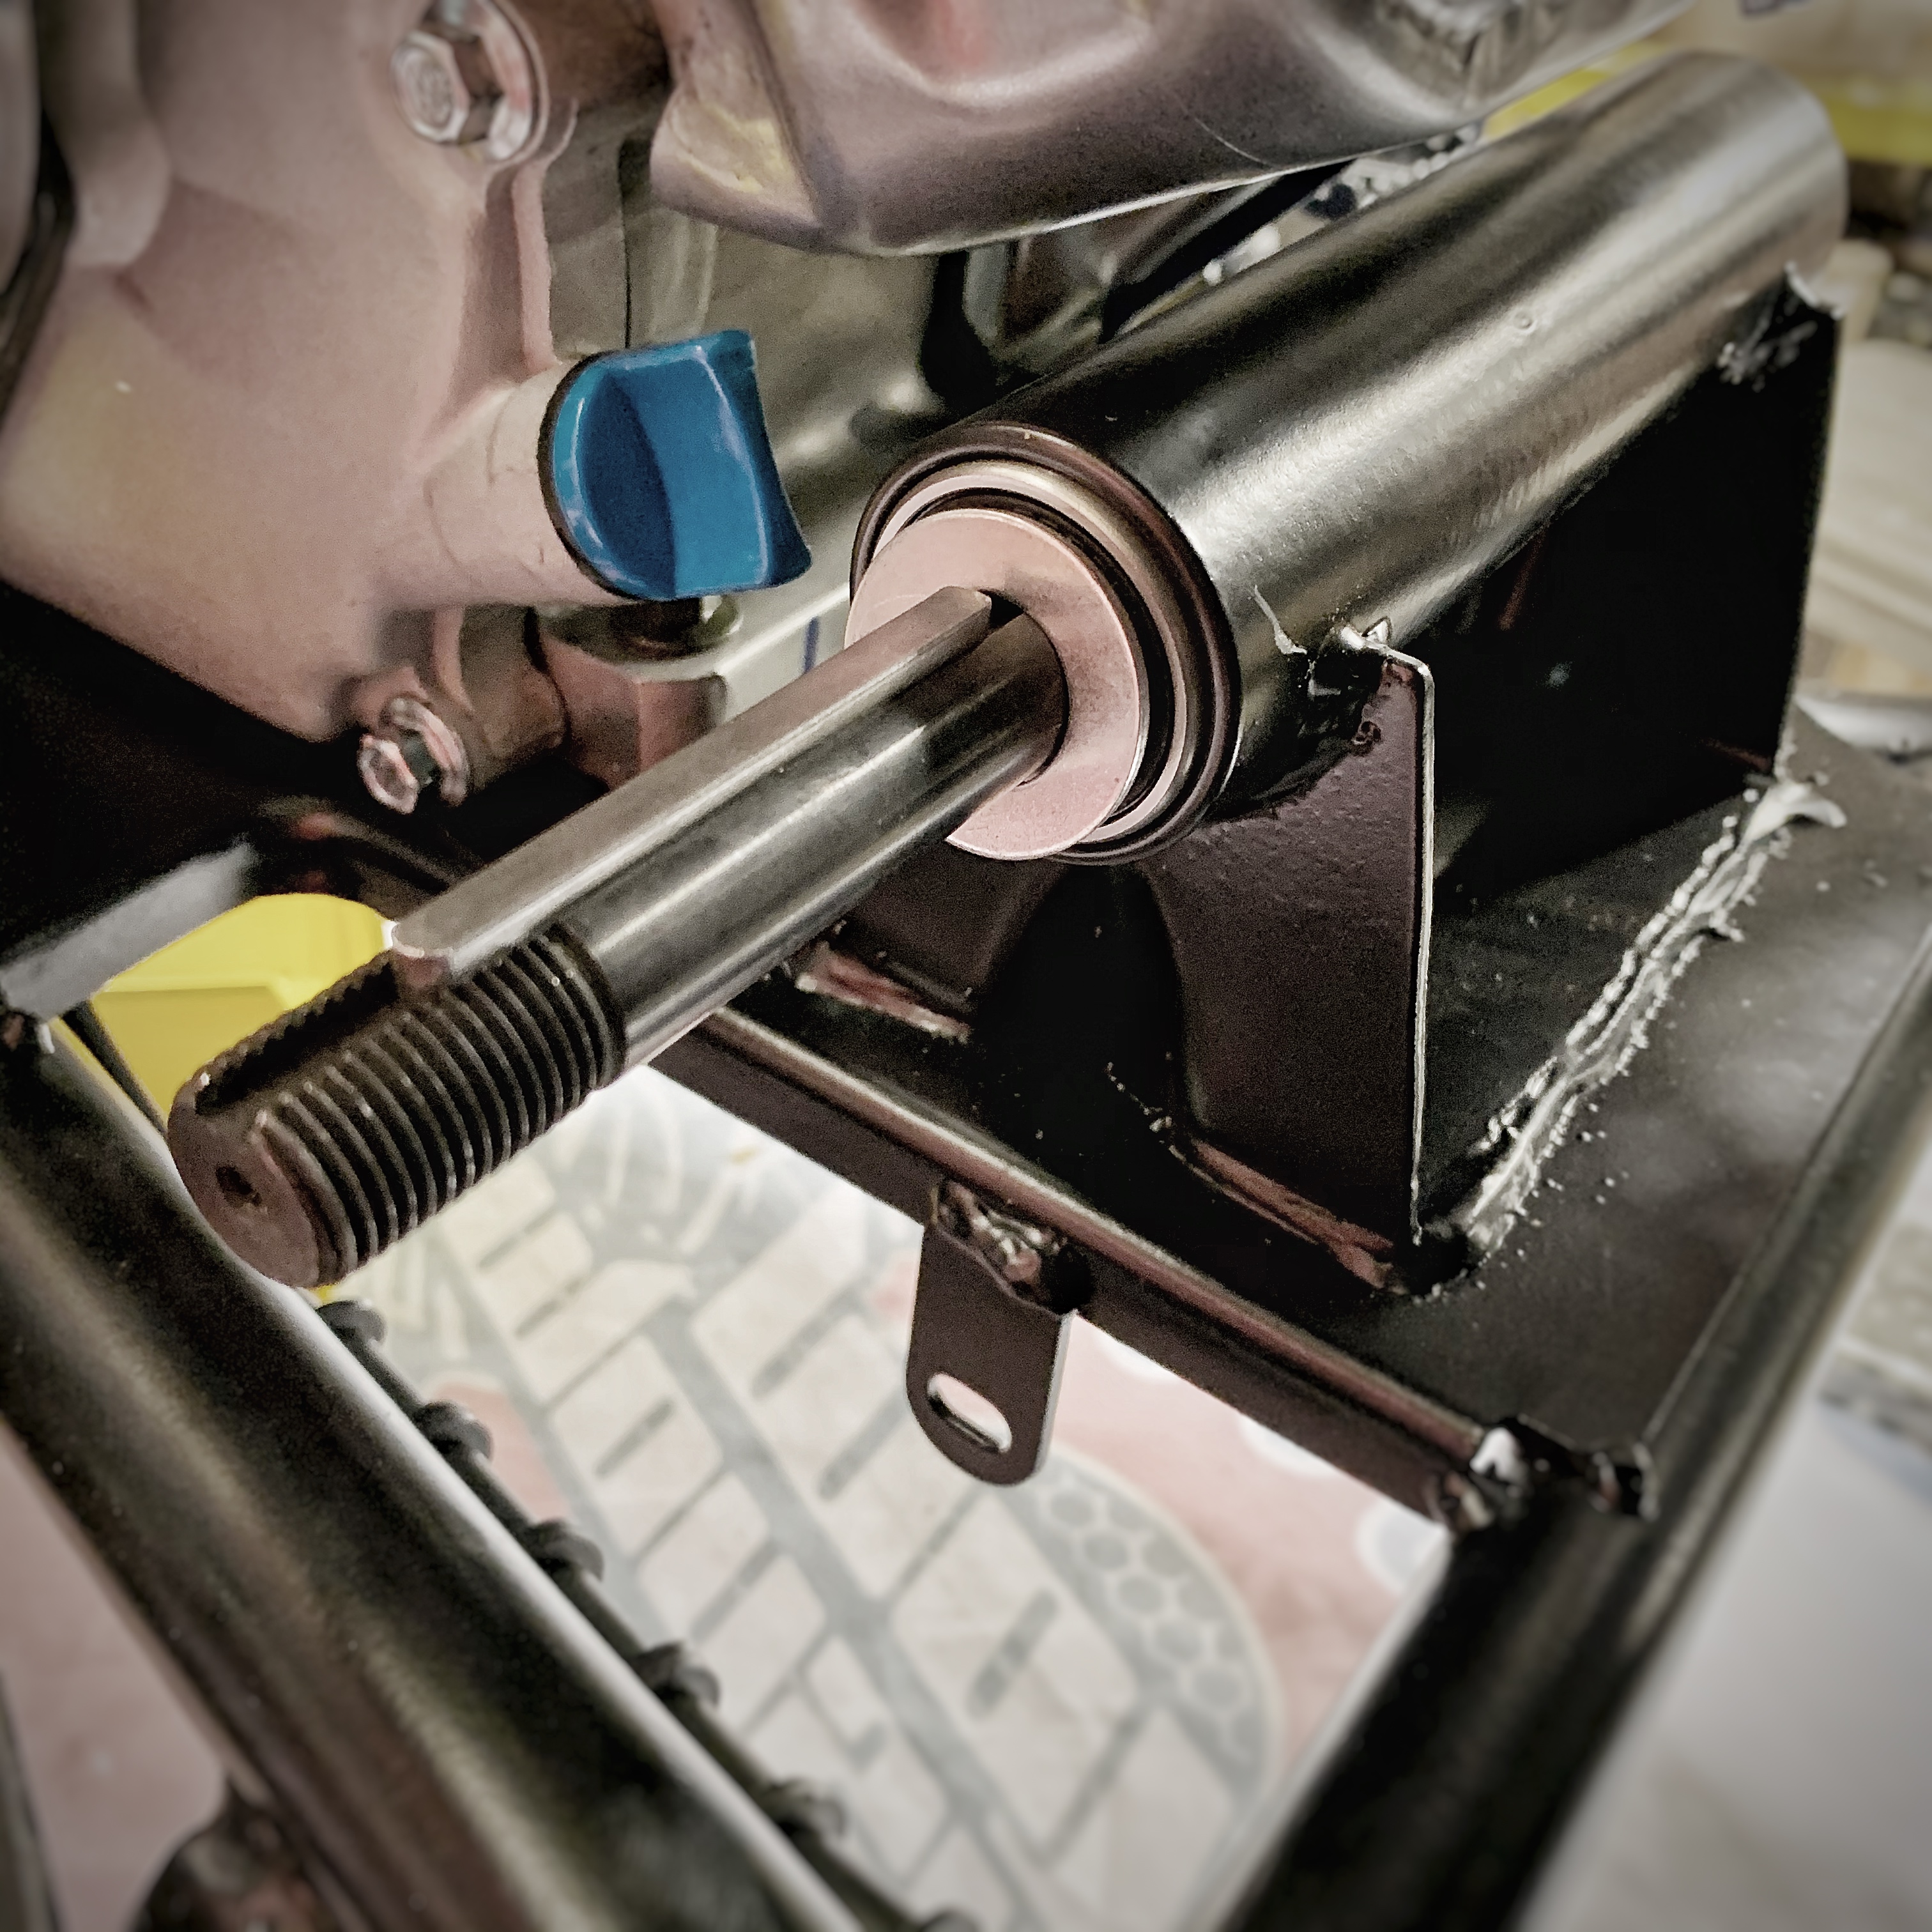
Jackshaft installation. The outside threaded end of your jackshaft will come out the left side (crankshaft side) of your engine. Put the jackshaft through the bearings, washer up against the bearing, and then the longer 5mm key.
Then slide the Driven Pulley over the key, slide on a washer, and then the locking nut. Before zipping this down tight, we will want to mount the jackshaft sprocket first.
The other side of the jackshaft will have an inside thread. Slide a washer up against the bearing and then install the shorter 5mm key.
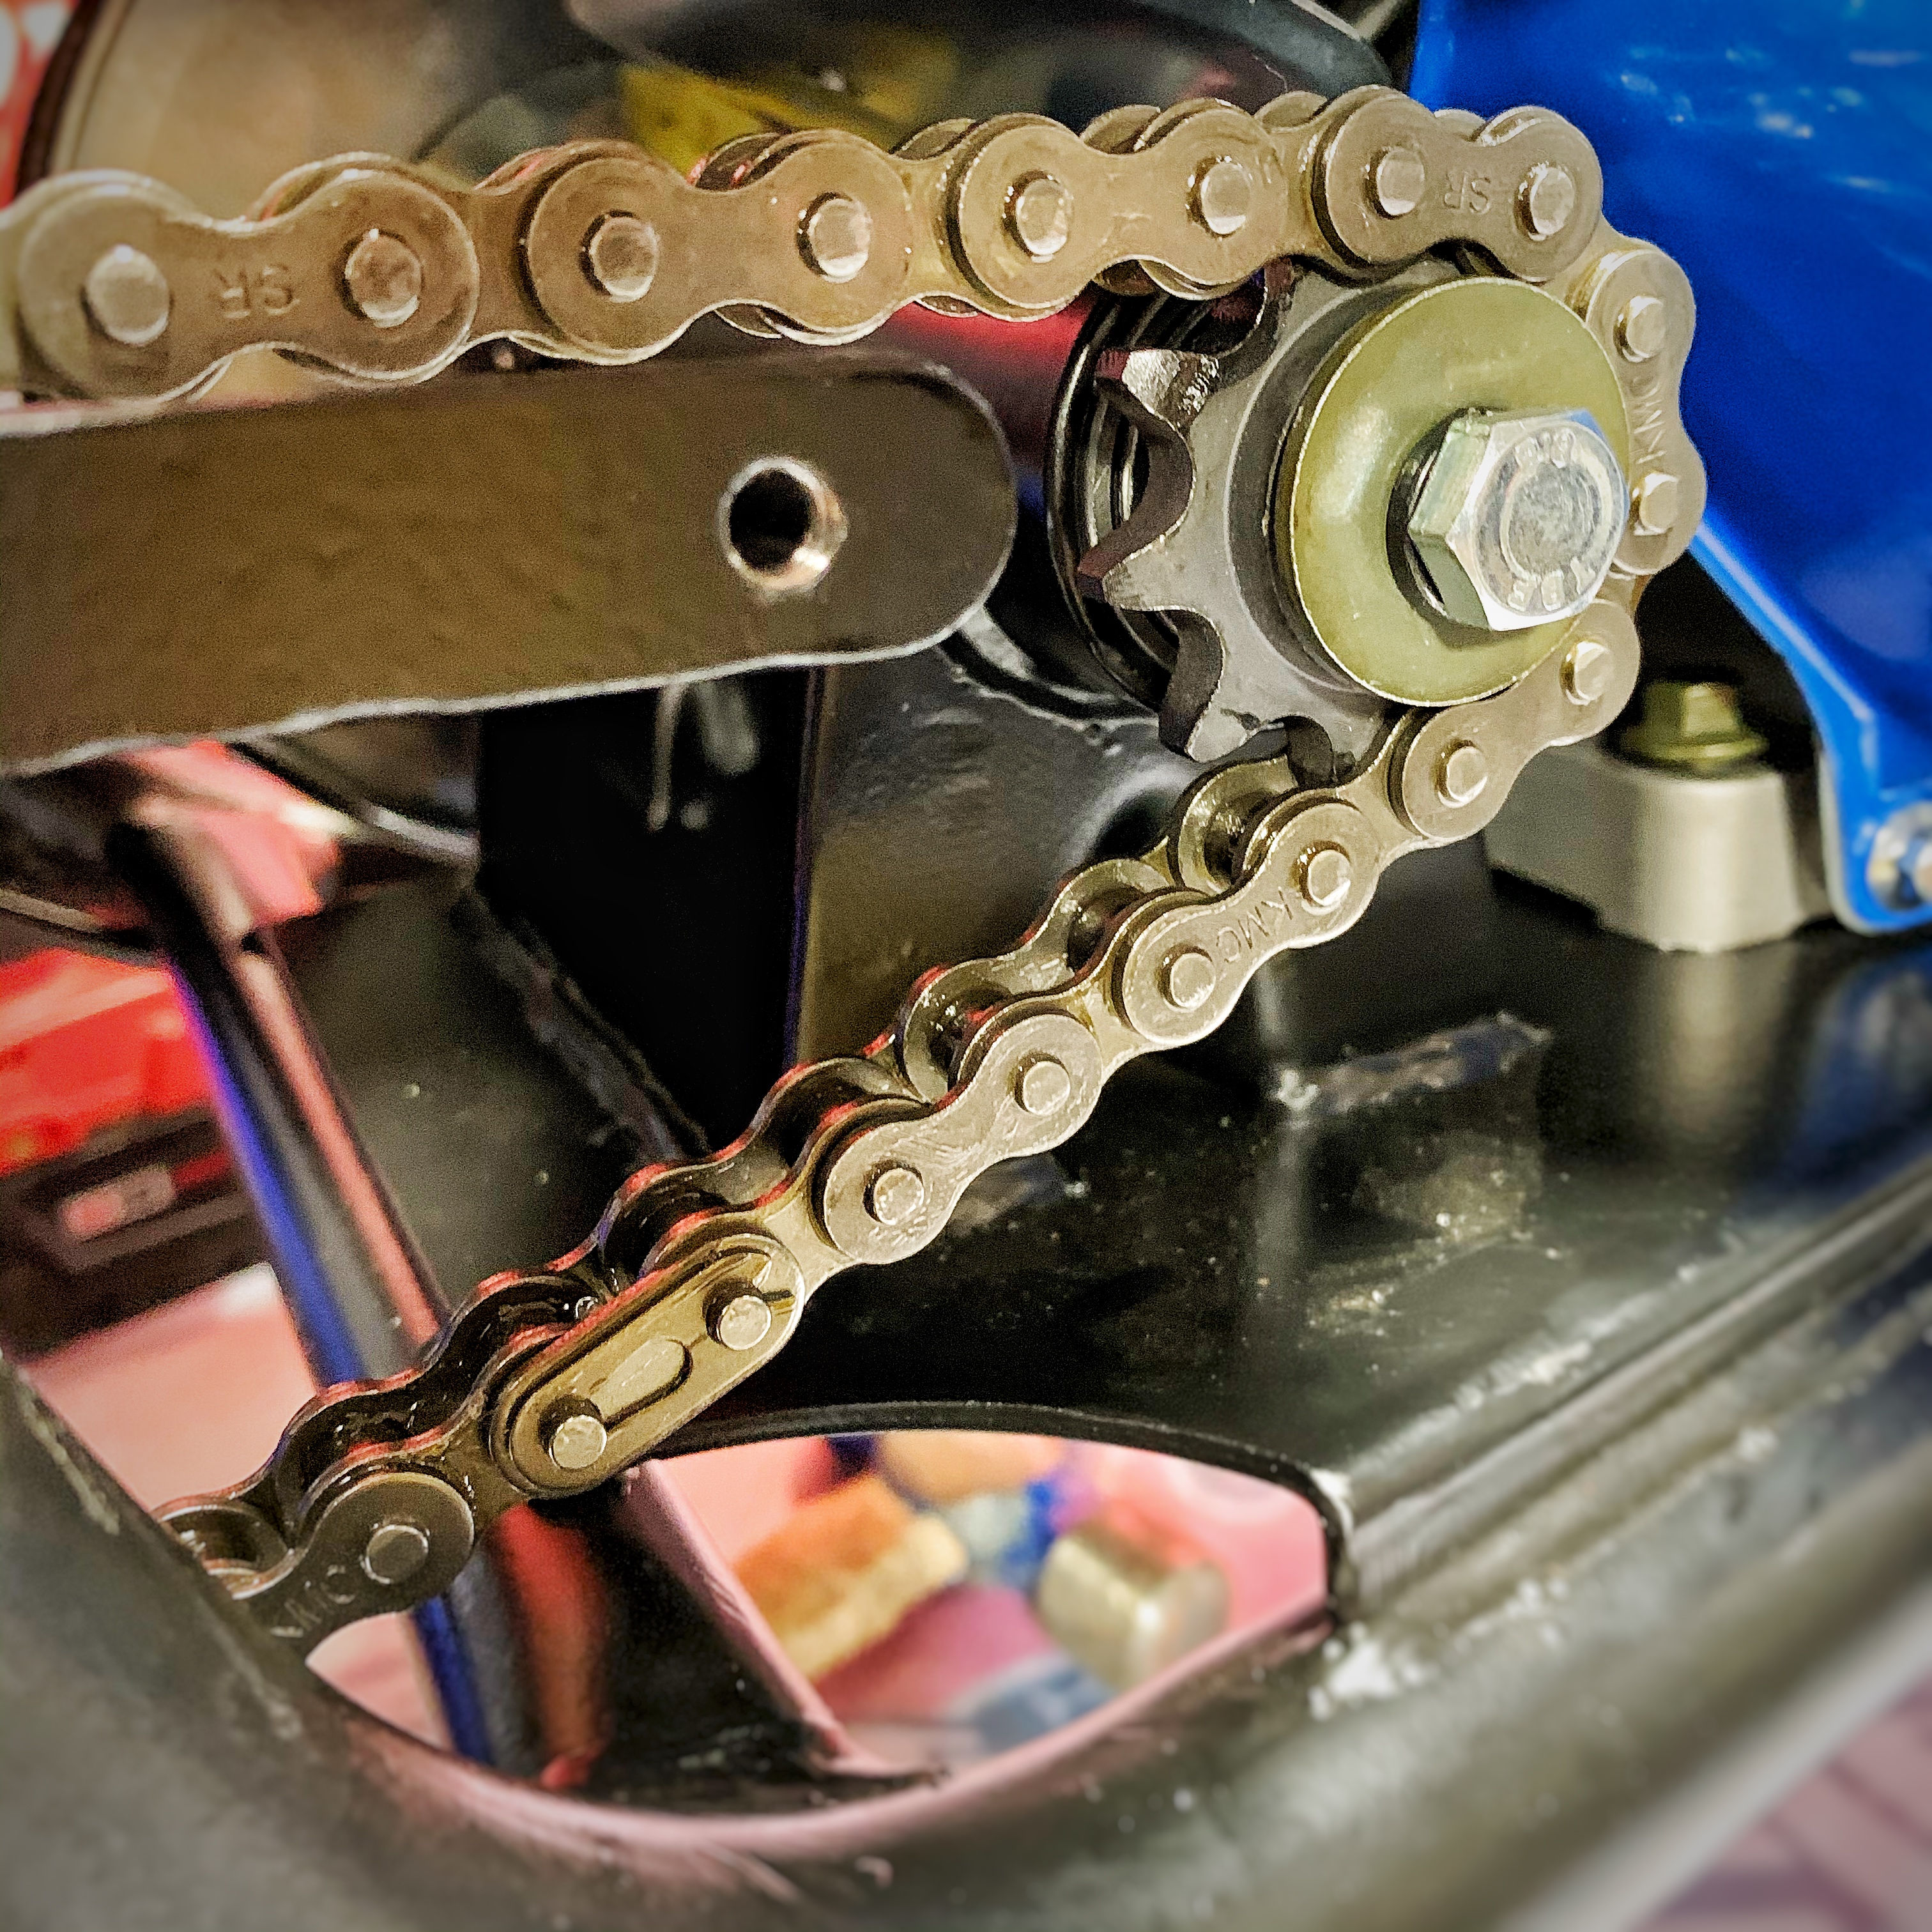
The 10 Tooth Jackshaft Sprocket then slides over the key, followed by a washer, and then a M8x16 Bolt. Tight down the bolt and then lock nut on the other side of your jackshaft.
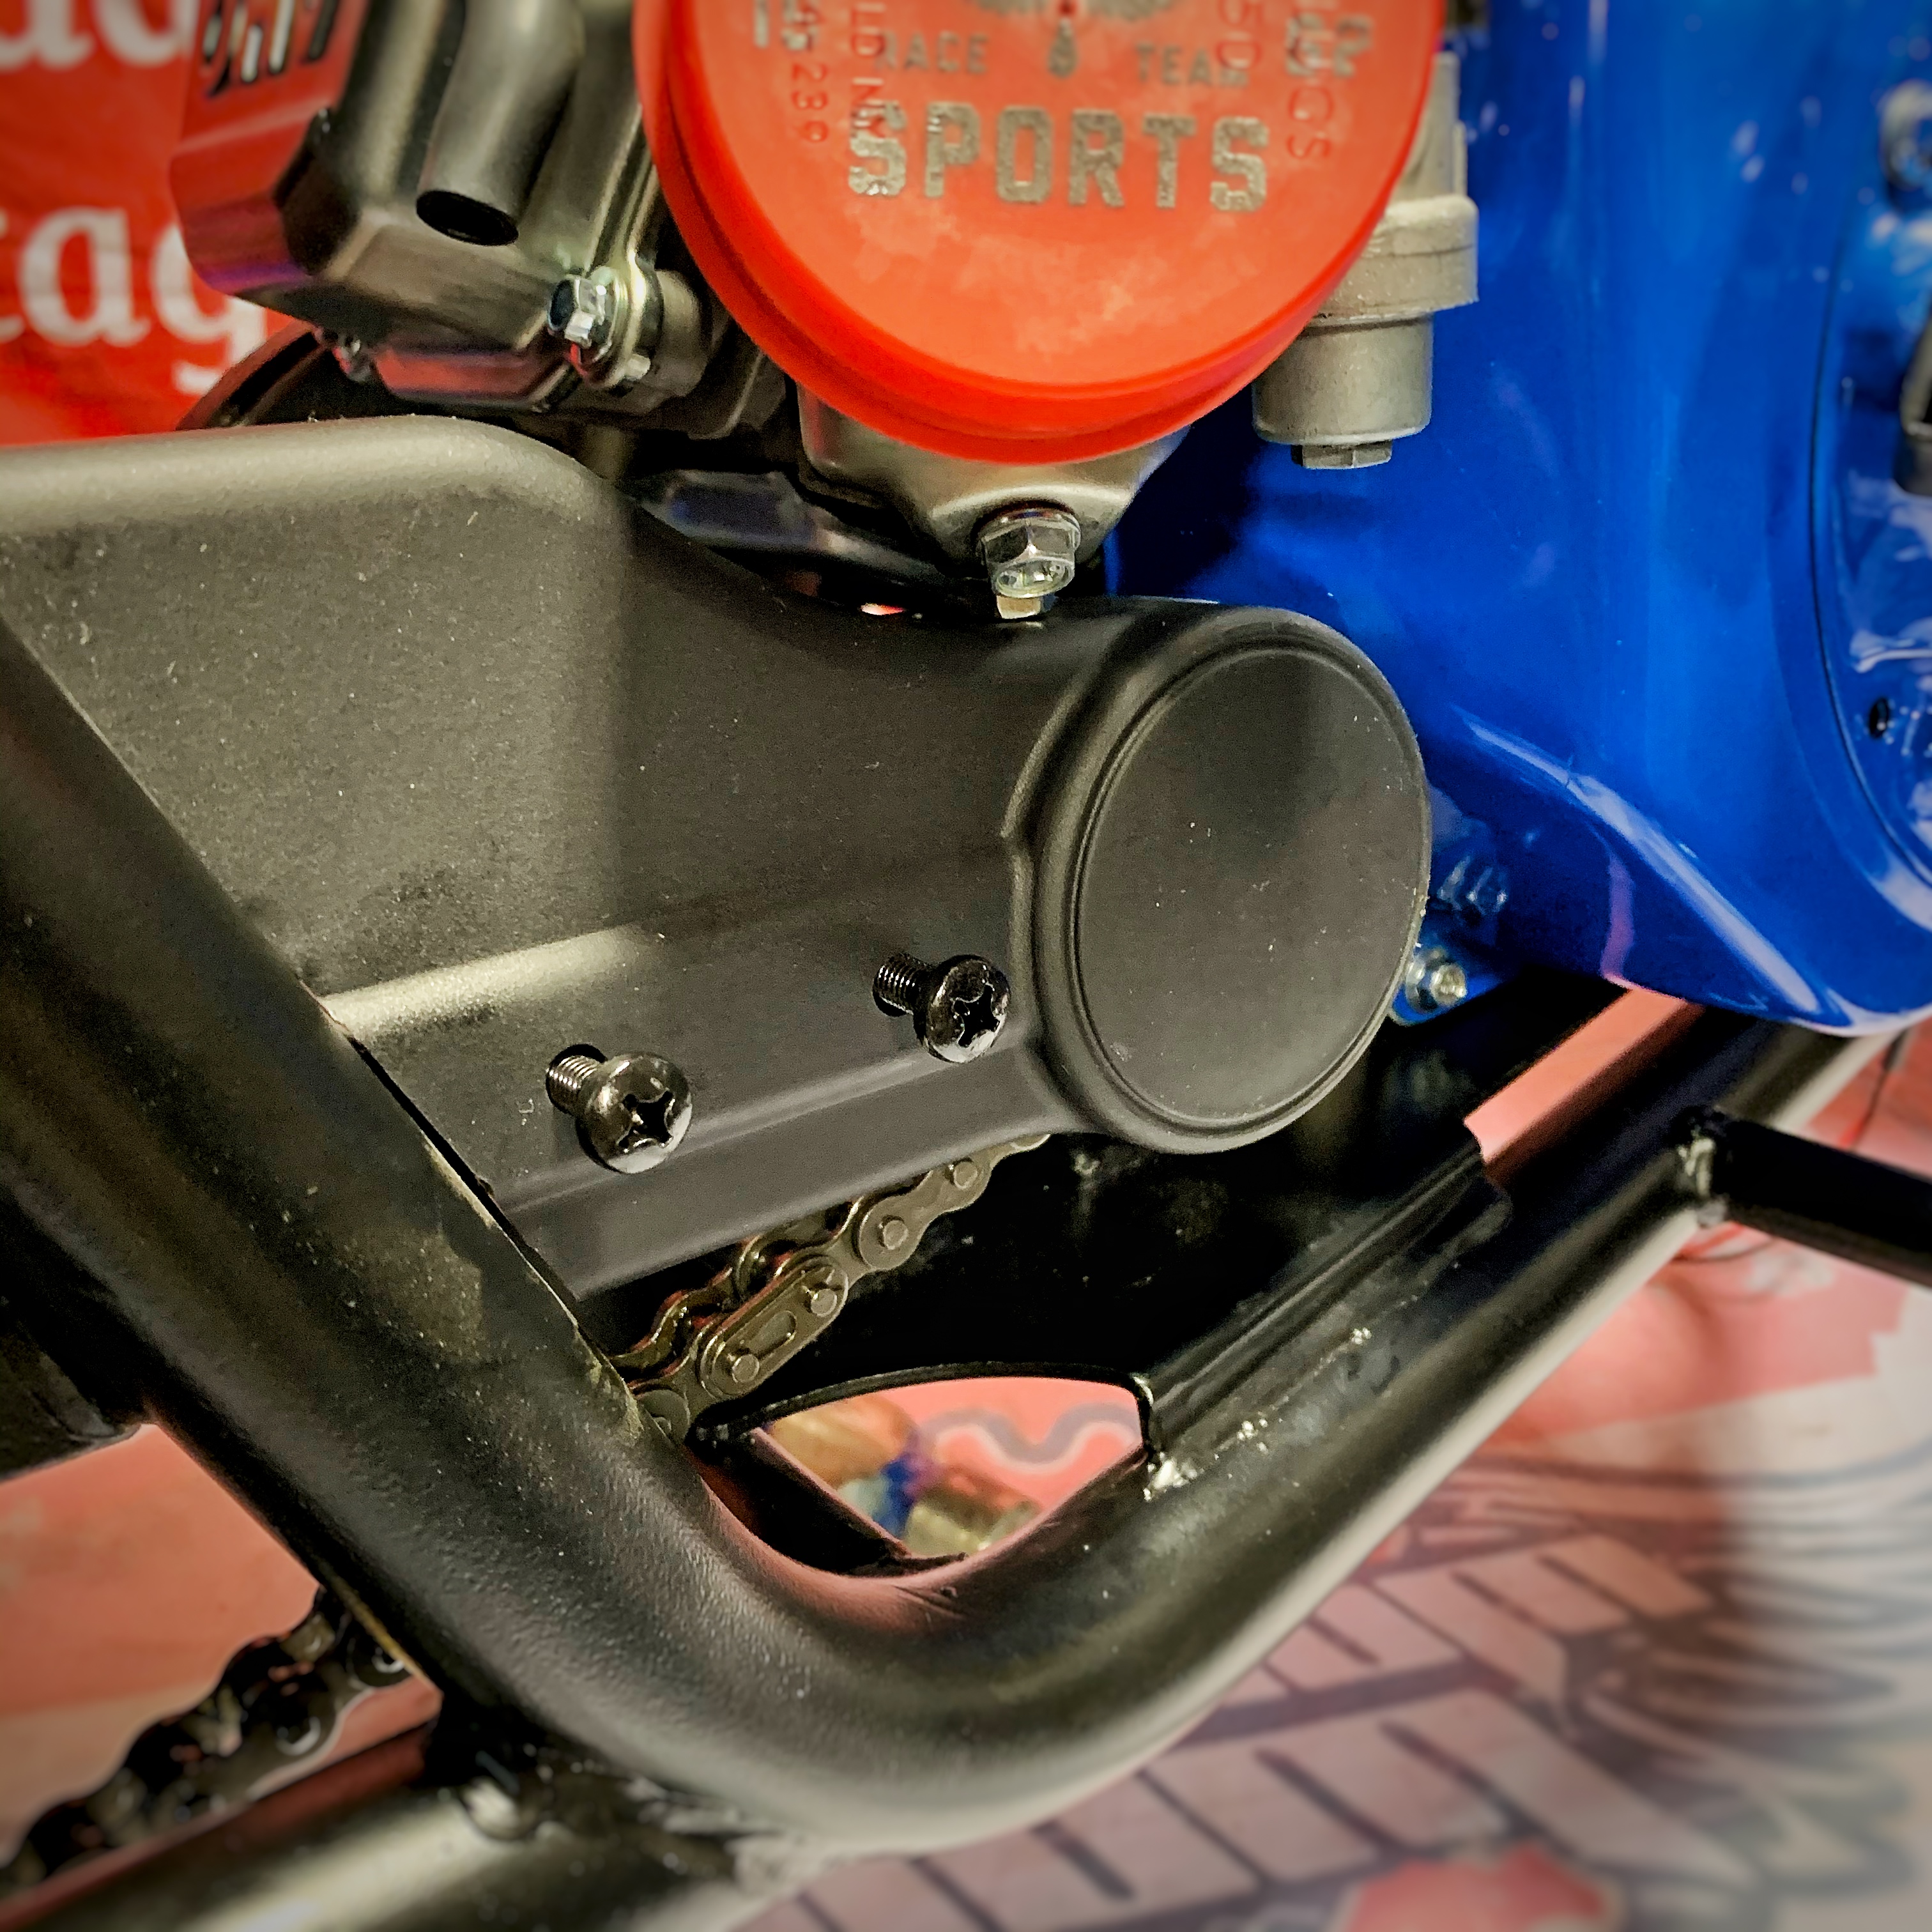
With the jackshaft sprocket mounted, we then attach the Front Chain Guard.
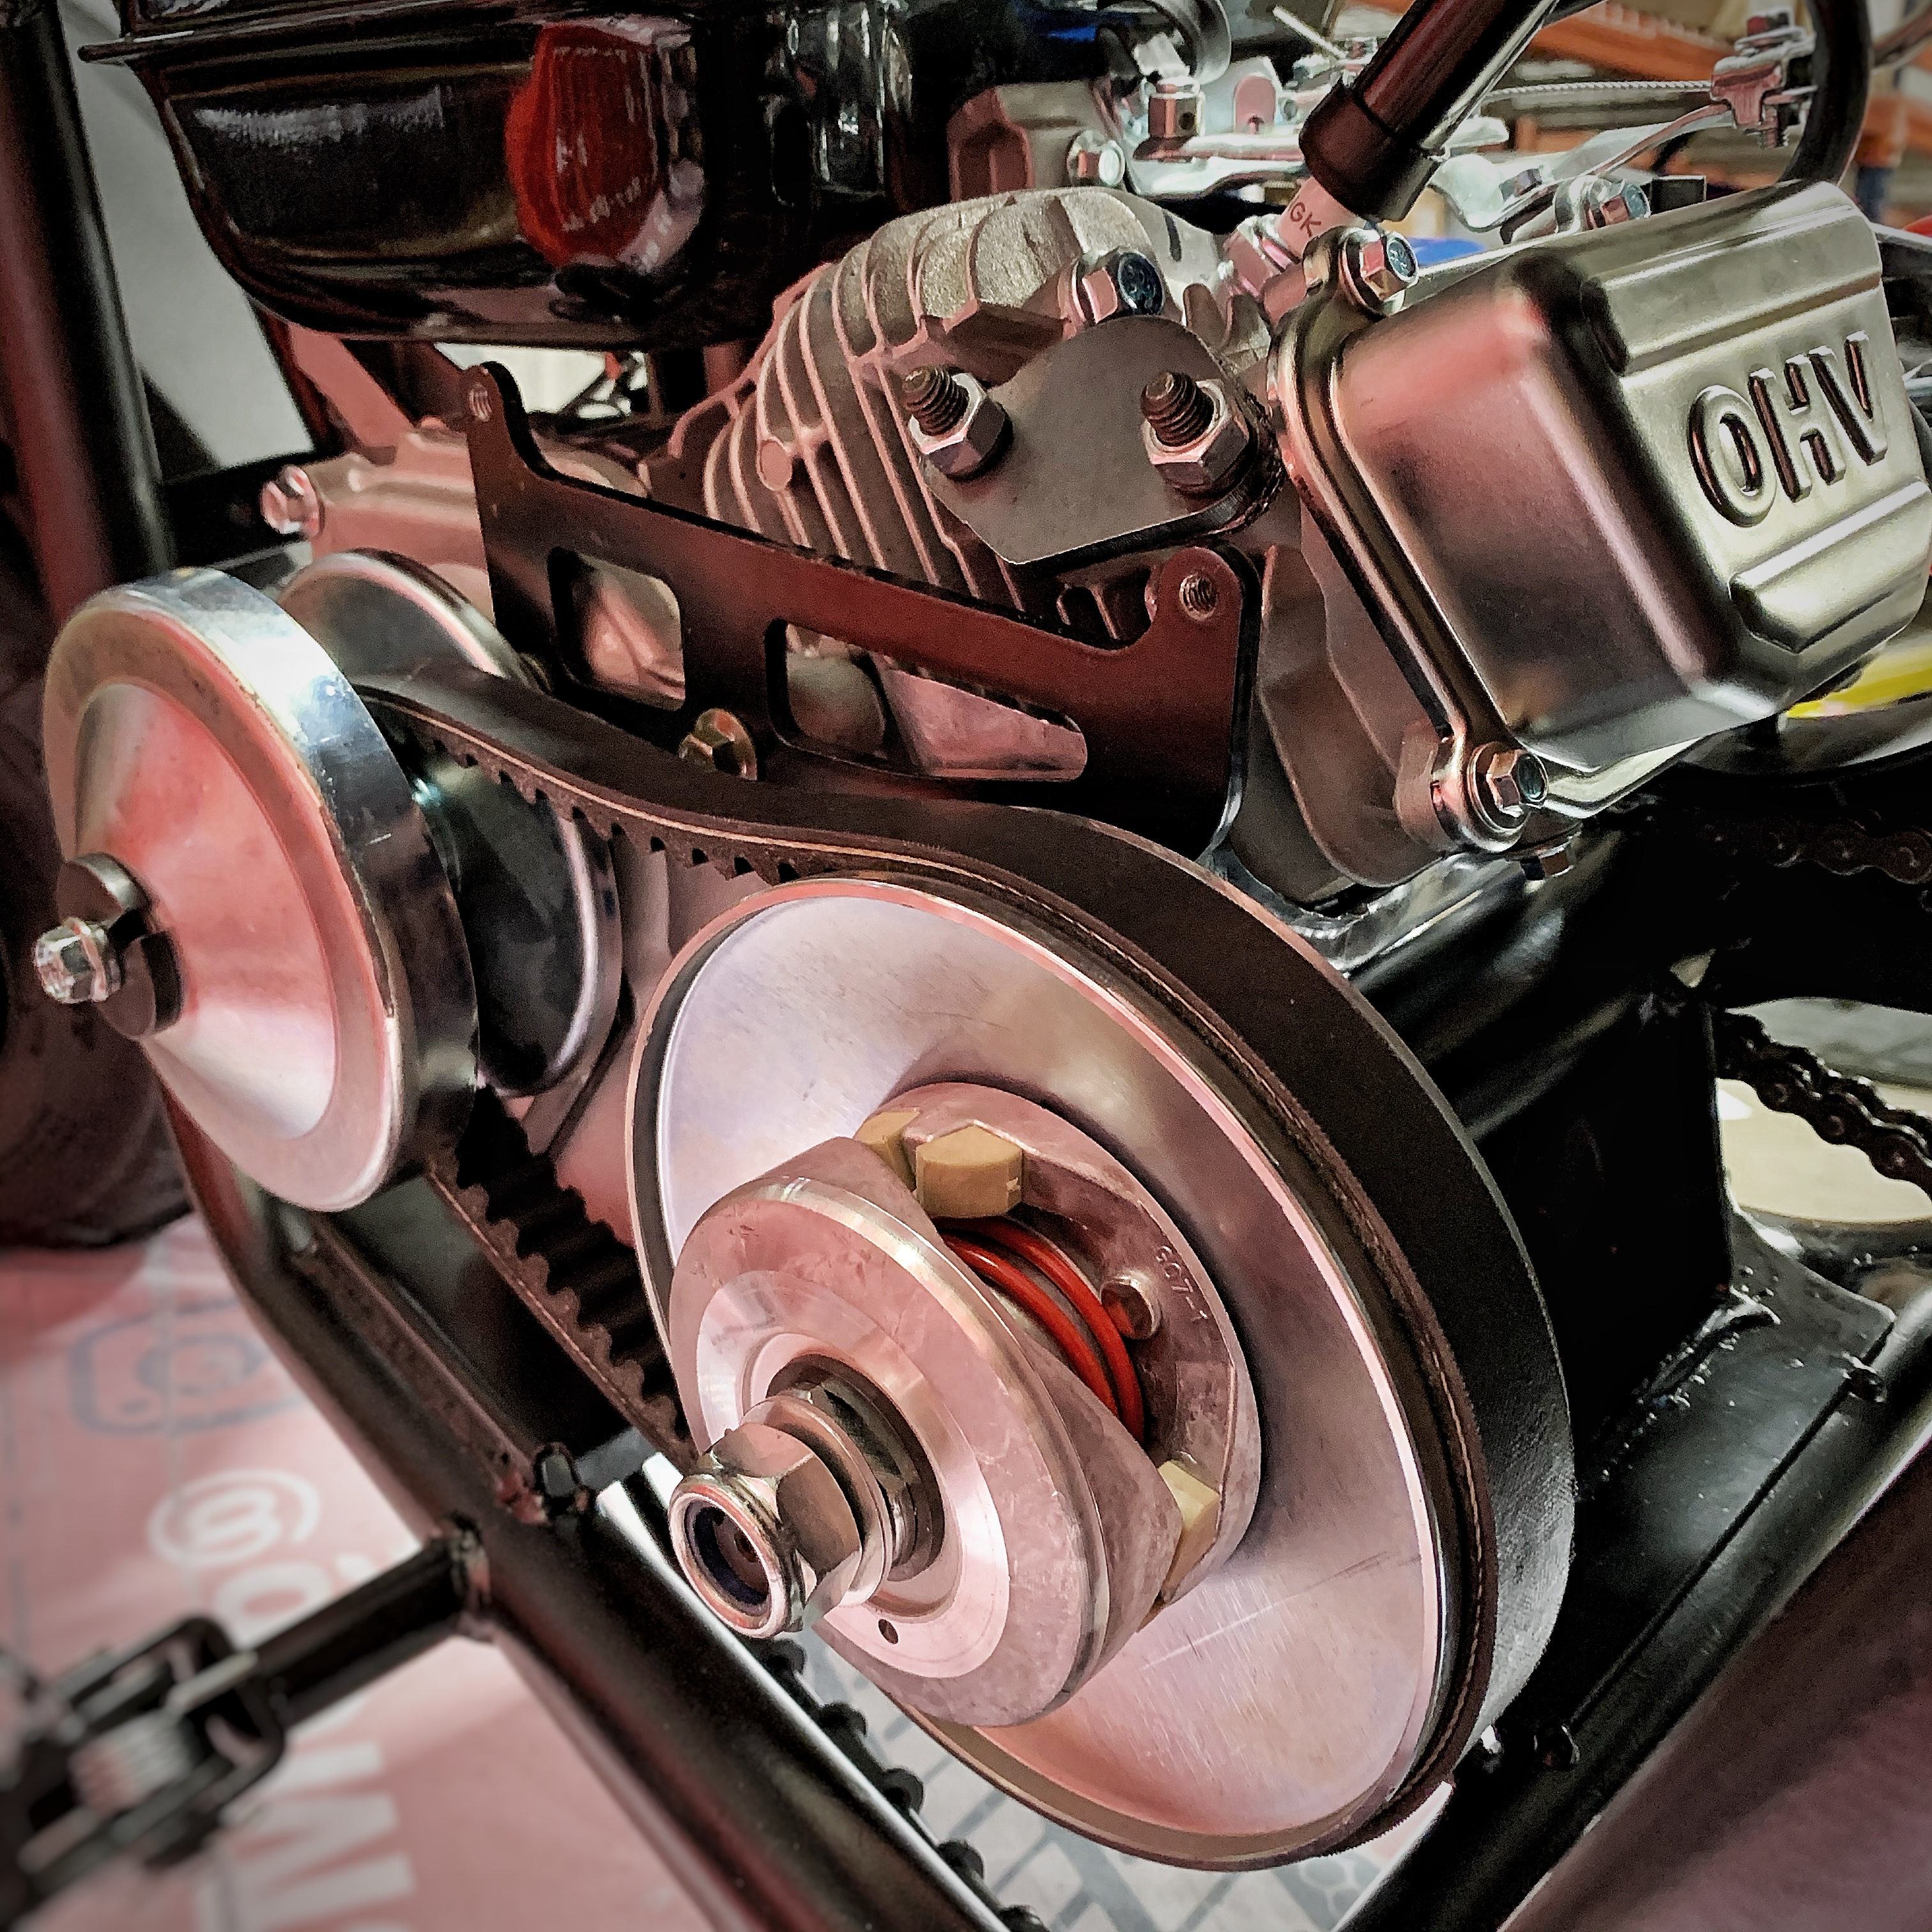
Finish up the Torque Converter by installing the 203590 Belt along with the Driver Pulley on to your engine's crankshaft. Flat side of the belt will be mounted up against the flat side of your pulleys (flat slide is the side closest to your engine).
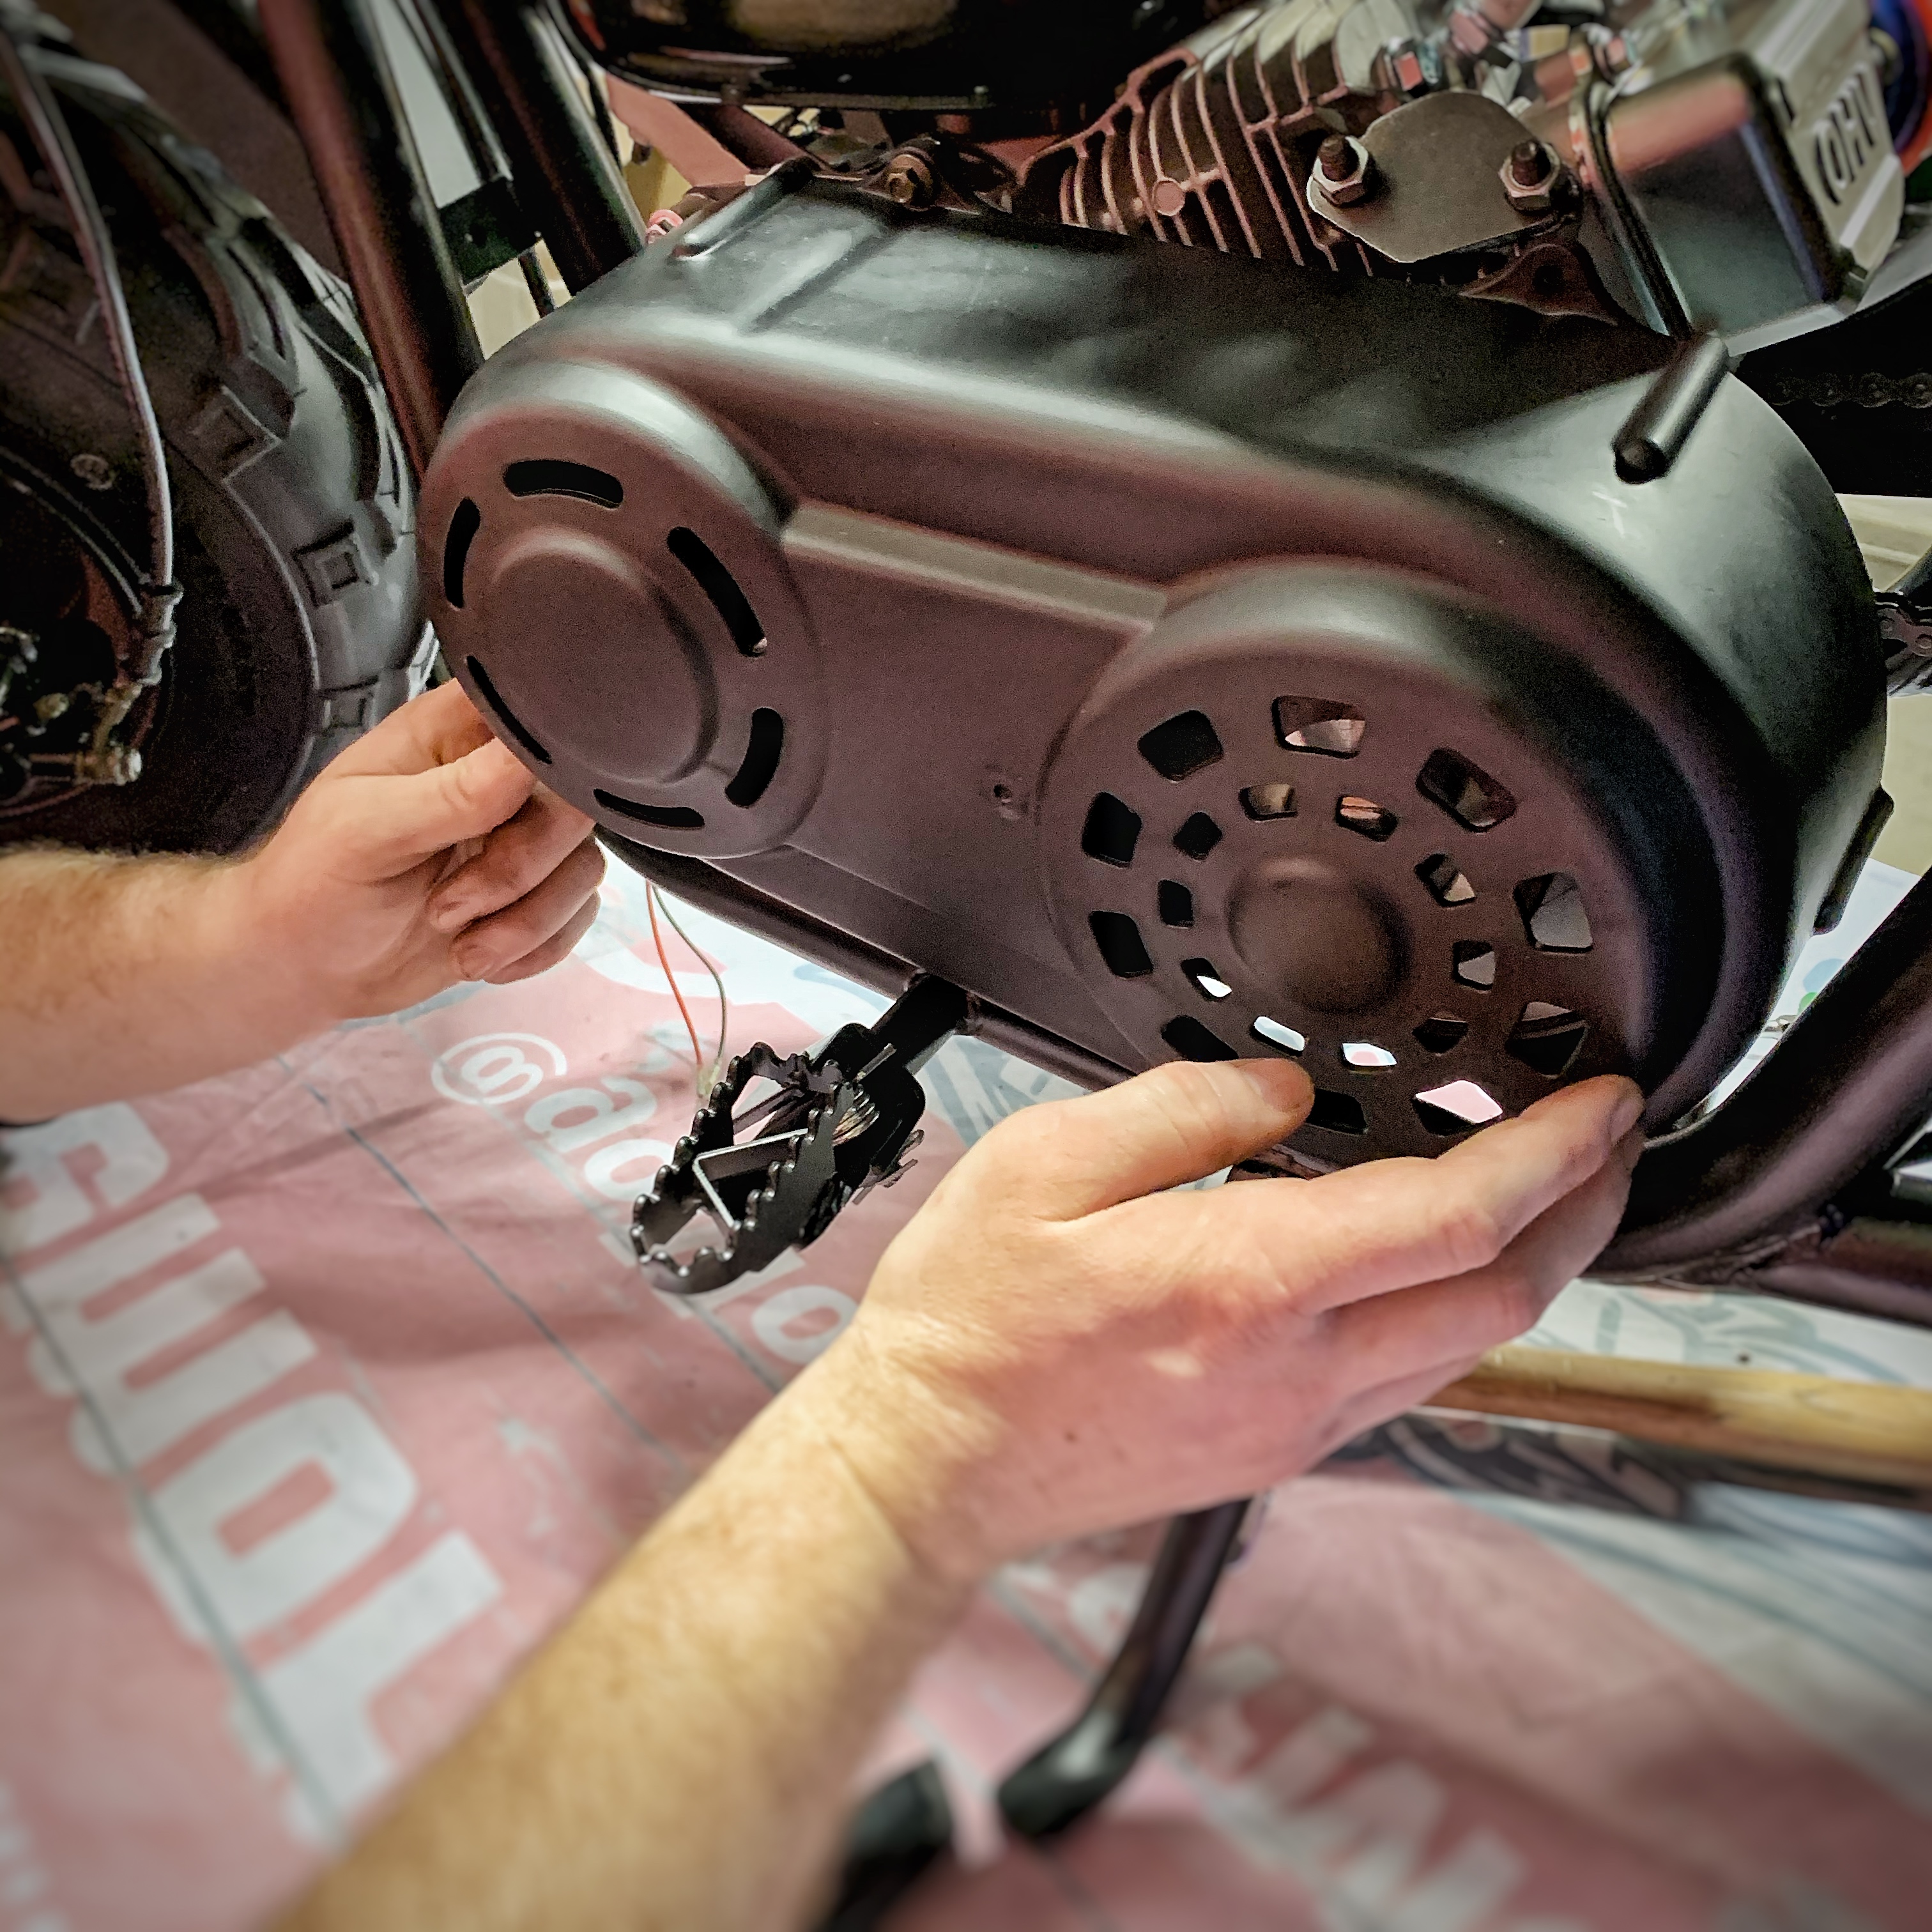
Mount your Torque Converter Cover with (3) M6x12 Bolts.
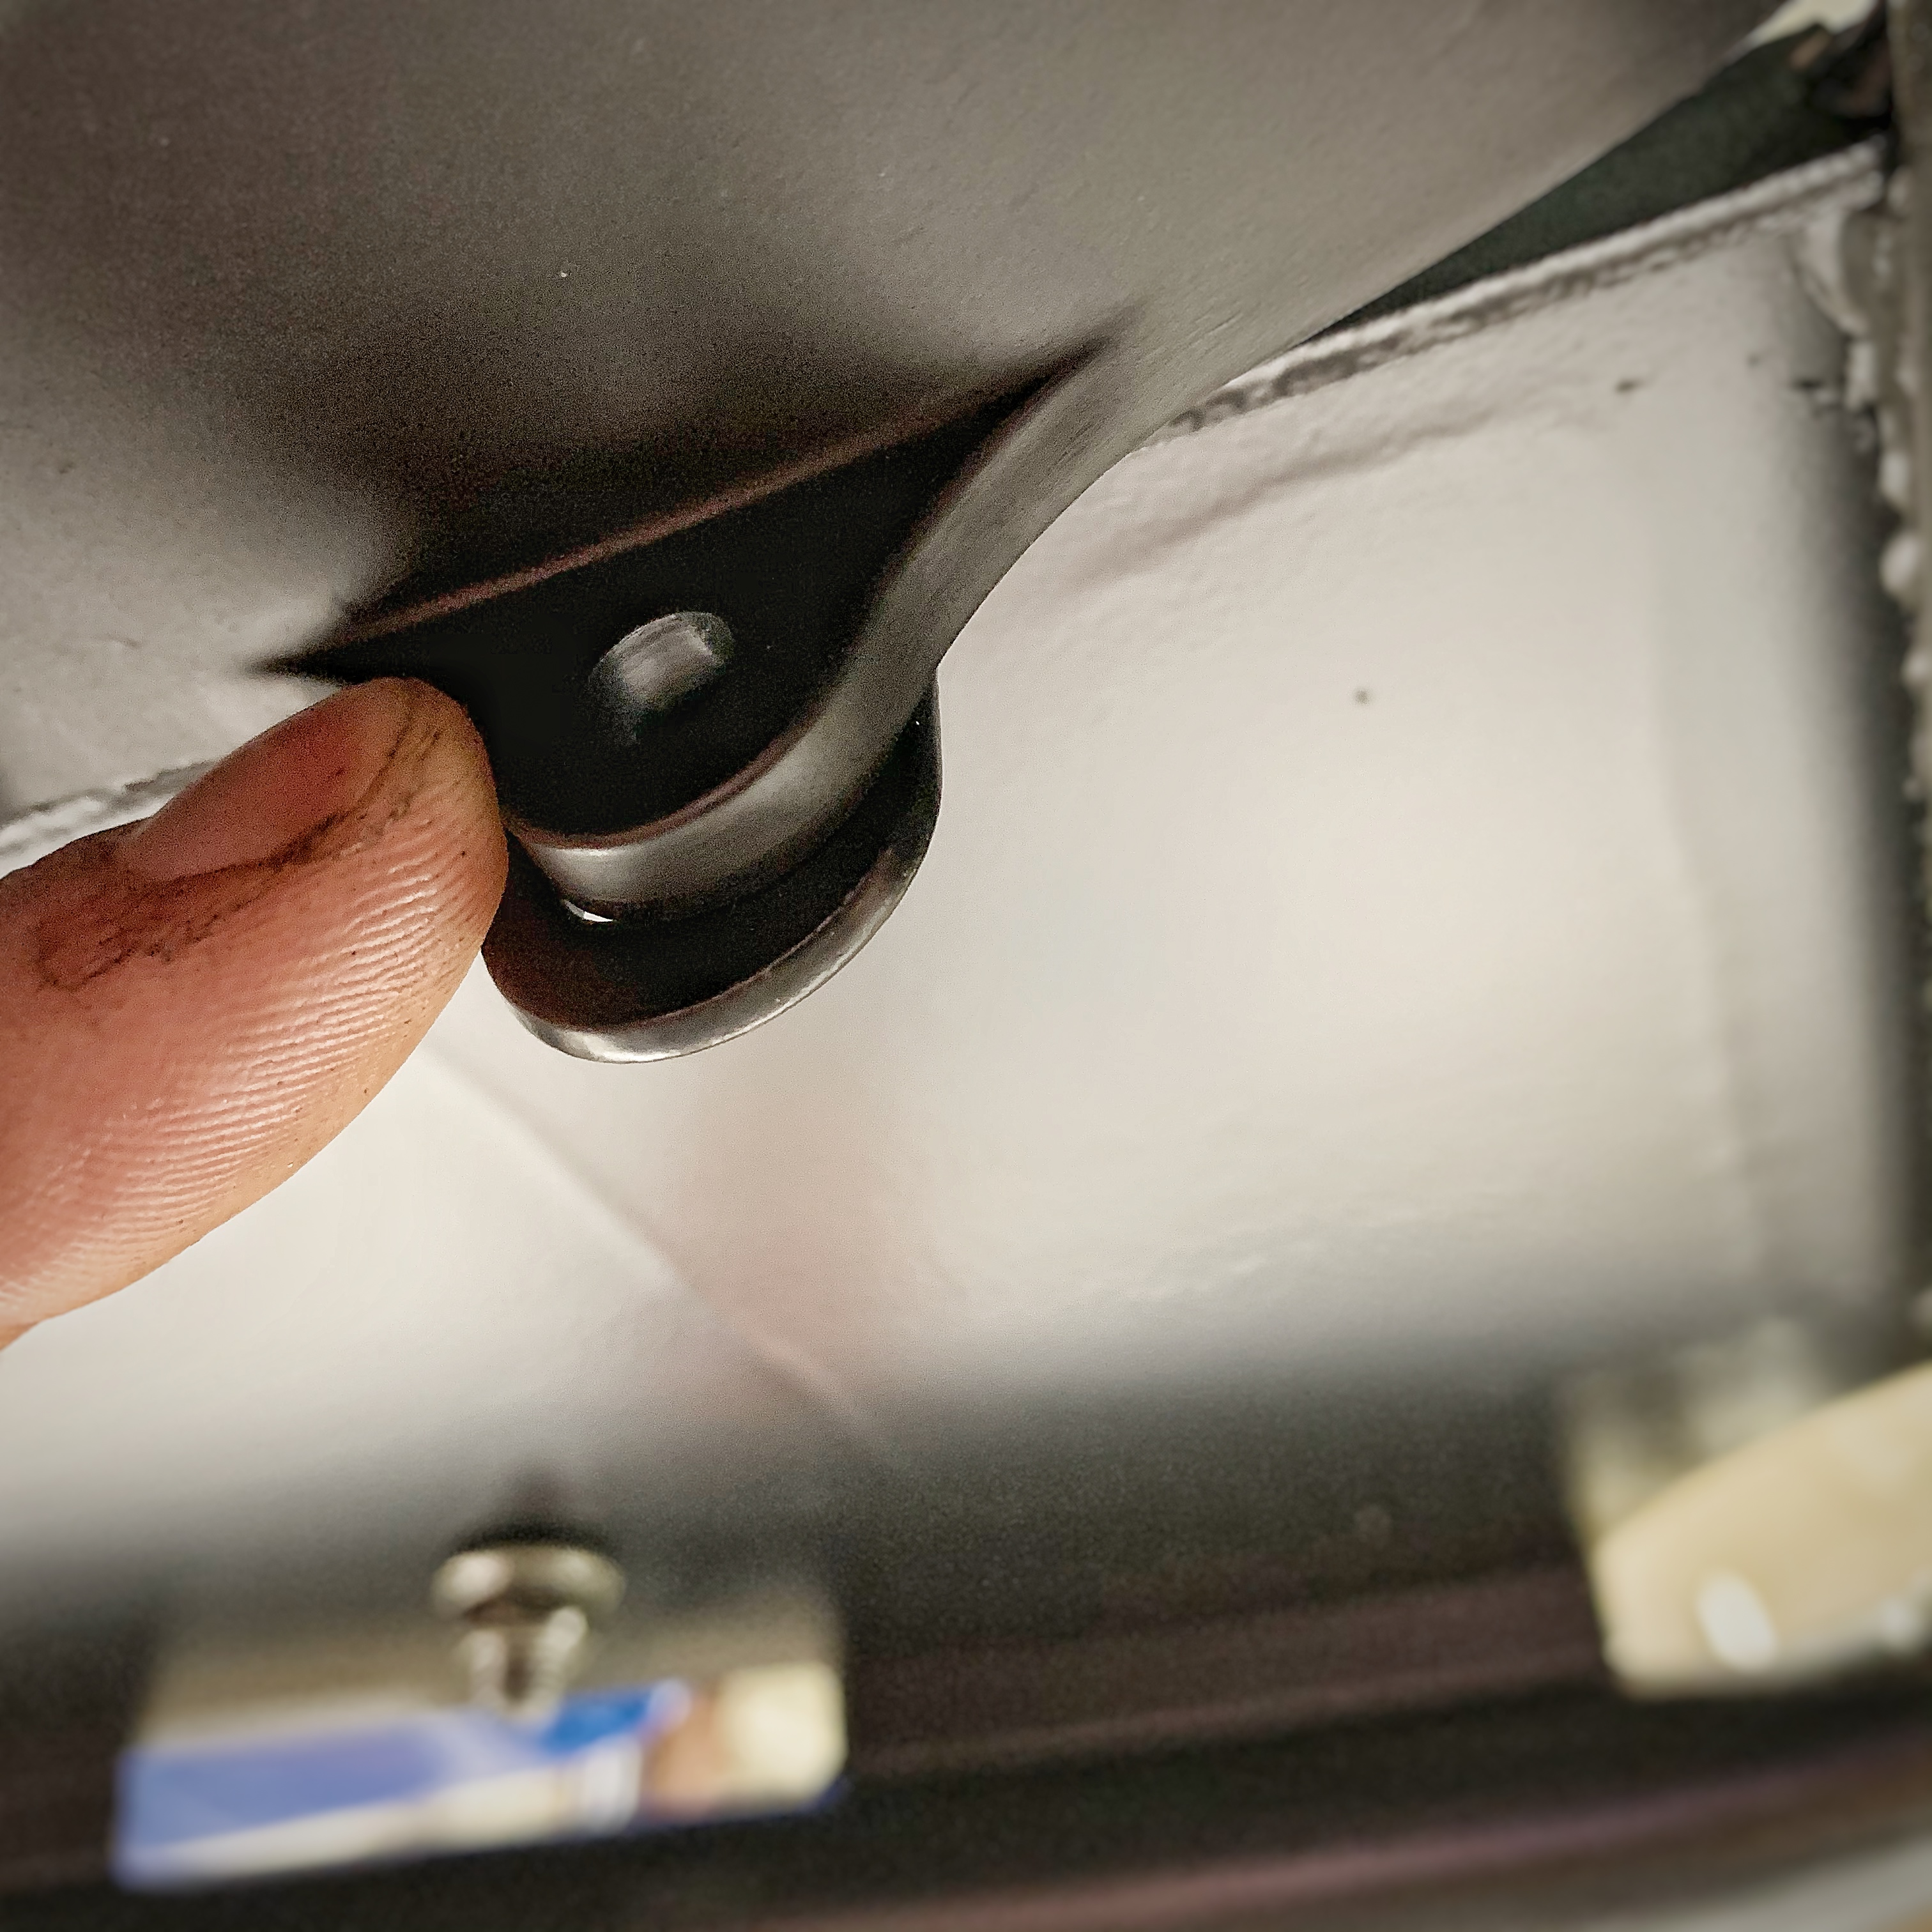
The 4th mounting bolt for your cover will be under the frame. This takes a longer M6x20 Bolt and a M6 Locking Flange Nut.
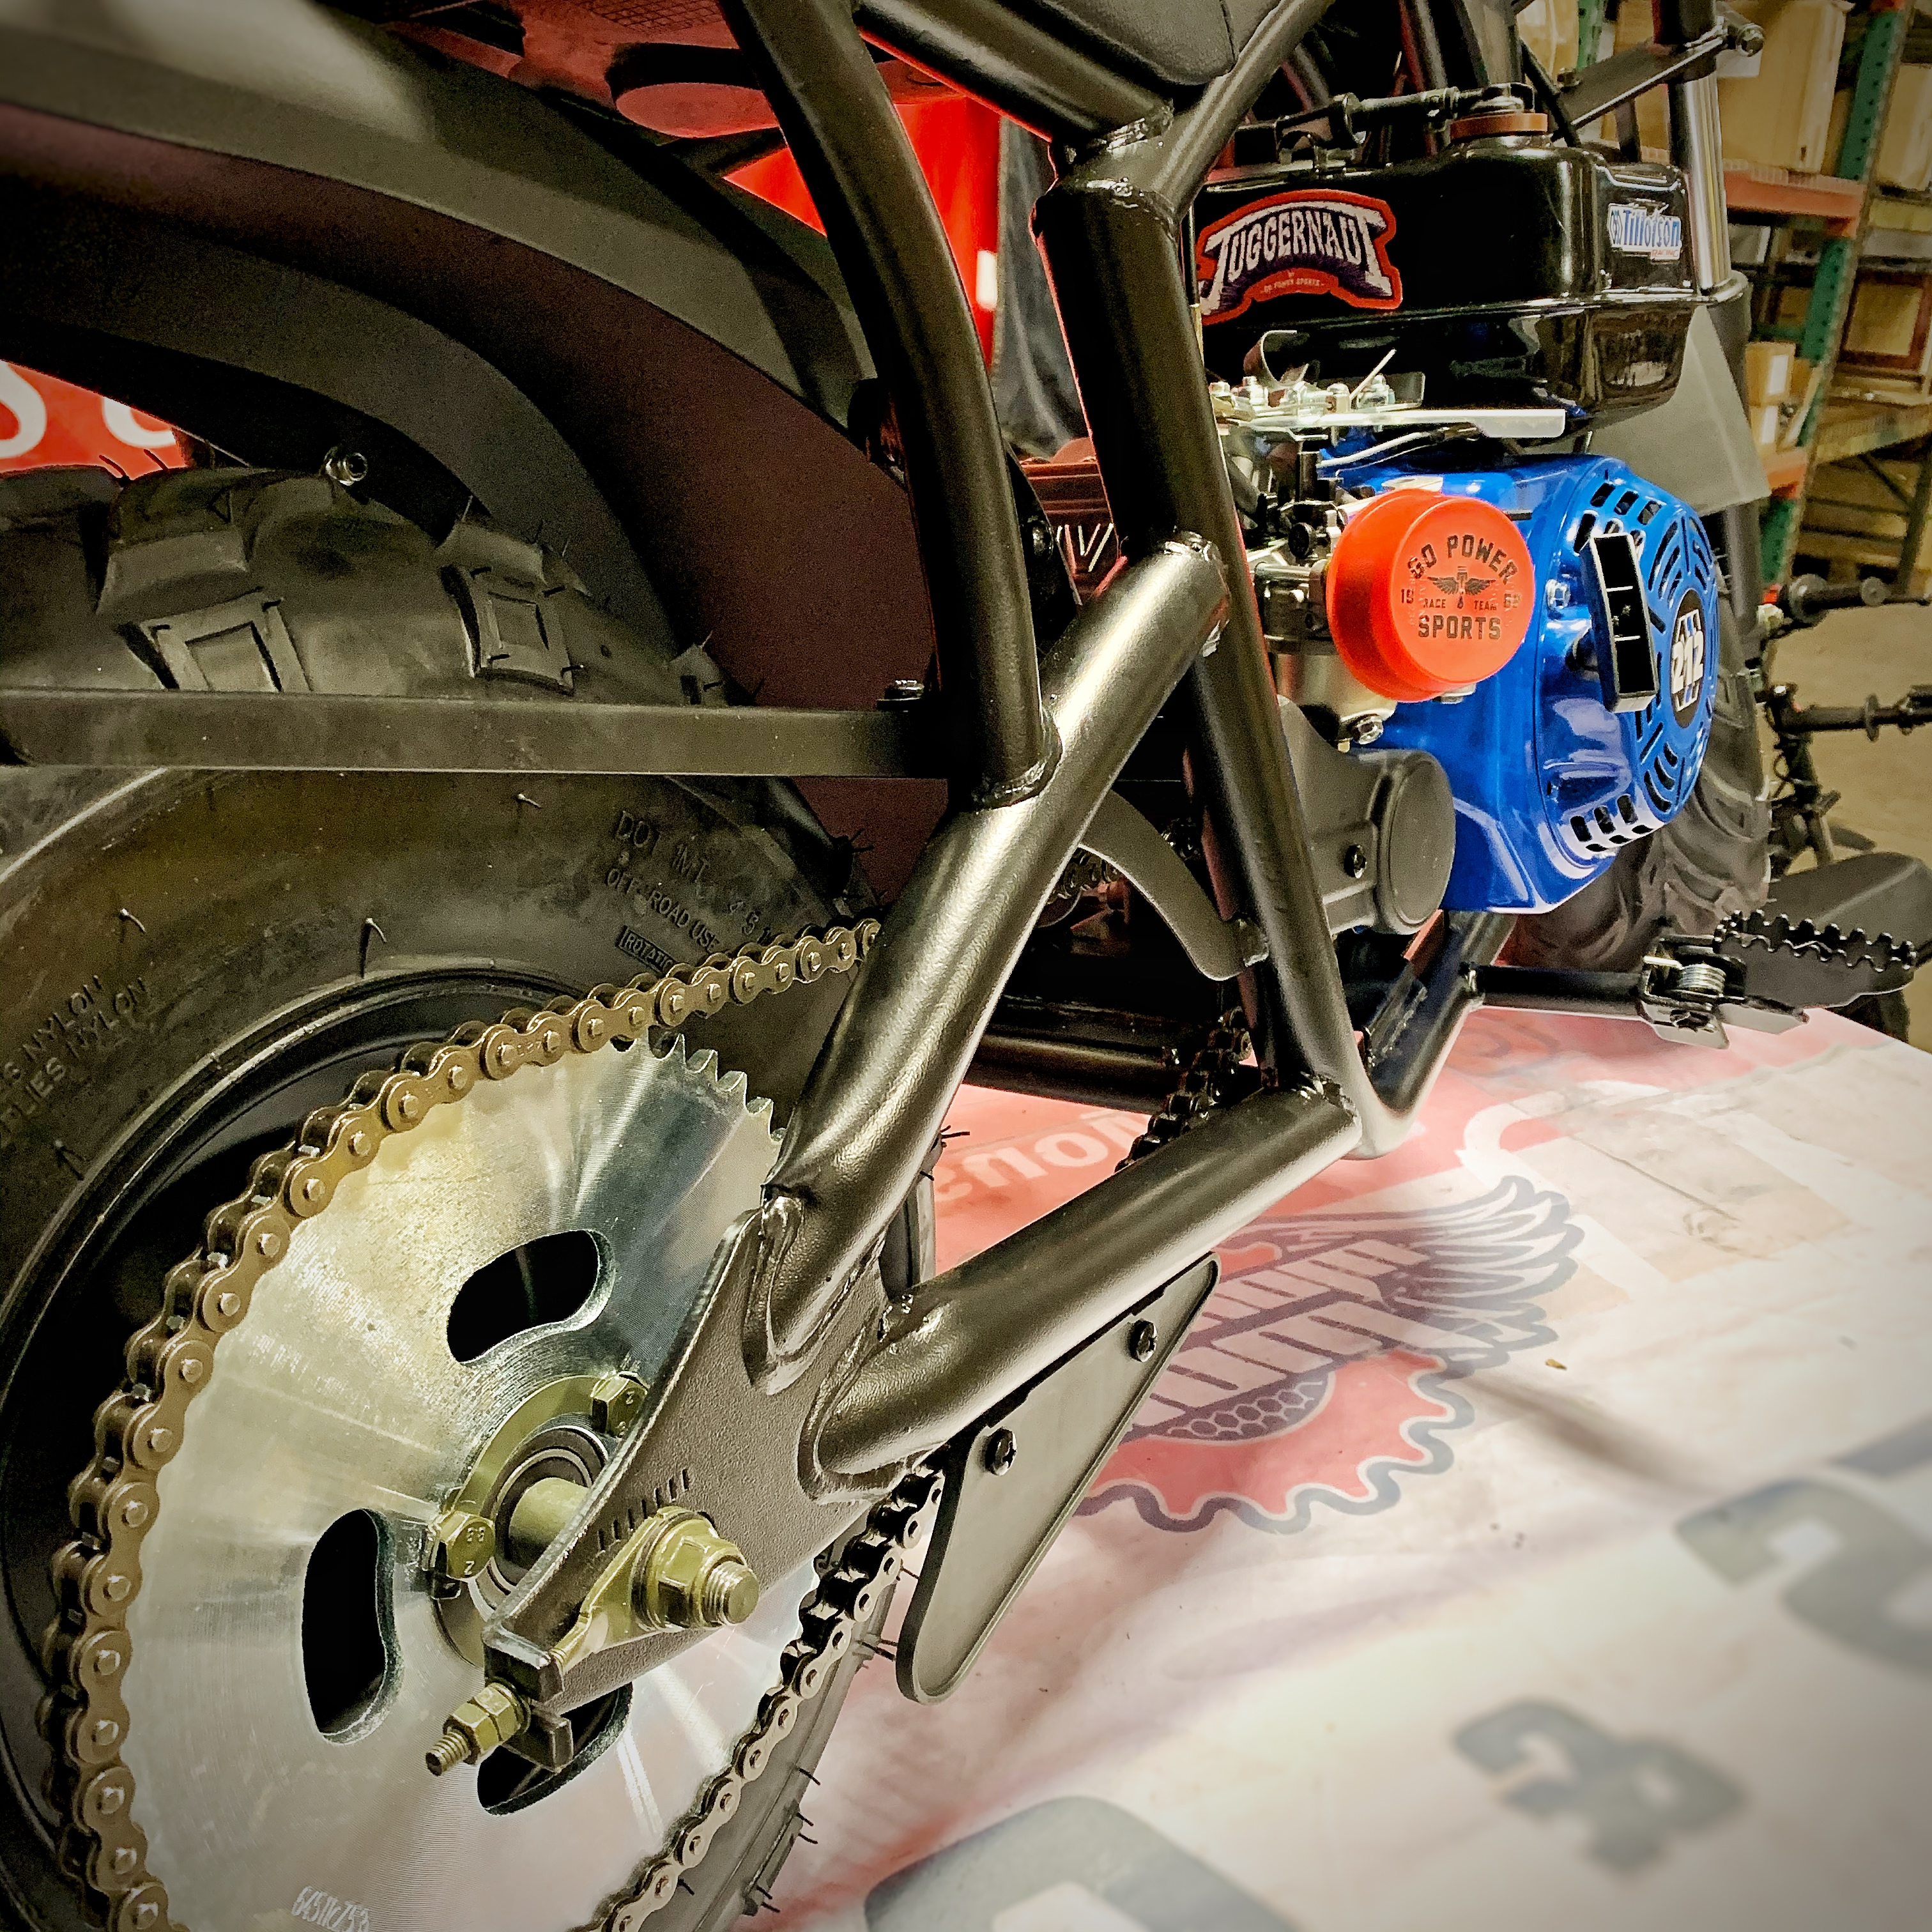
Attach your throttle cable to the throttle linkages on top of your engine and you are just about set. Pour in some Amsoil 4T Oil, add gas, and let her rip! A great upgrade to this bike would be our Stage 1 Coleman Kit. Even though it's not a Coleman, this kit fits just about all of the big wheeled mini bikes out there and it will add 2-3 Horse Power. Plan on taking out your governor? Then upgrade to our GoPowerSports Juggernaut Driver for better response and will allow you to run at a higher RPM.
We really dig these Mega Moto 212 Mini Bikes. If you're neighborhood cruising, racing, or even Gamblin', then you will enjoy this bike. Need a pit bike/camping bike/hunting bike, then you will enjoy this bike. If you like having a comfortable wide seat, then you're booty will enjoy this bike. Even without rear suspension, this bike rides like a dream.
I'll be Gamblin' on my Mega Moto 212 Mini Bike, aka Dominion. I love this bike and can not wait to see everyone on the track. Take care Race Team!