Howdy Race Team! Here's another build that hopefully will spark some inspiration to your next build.
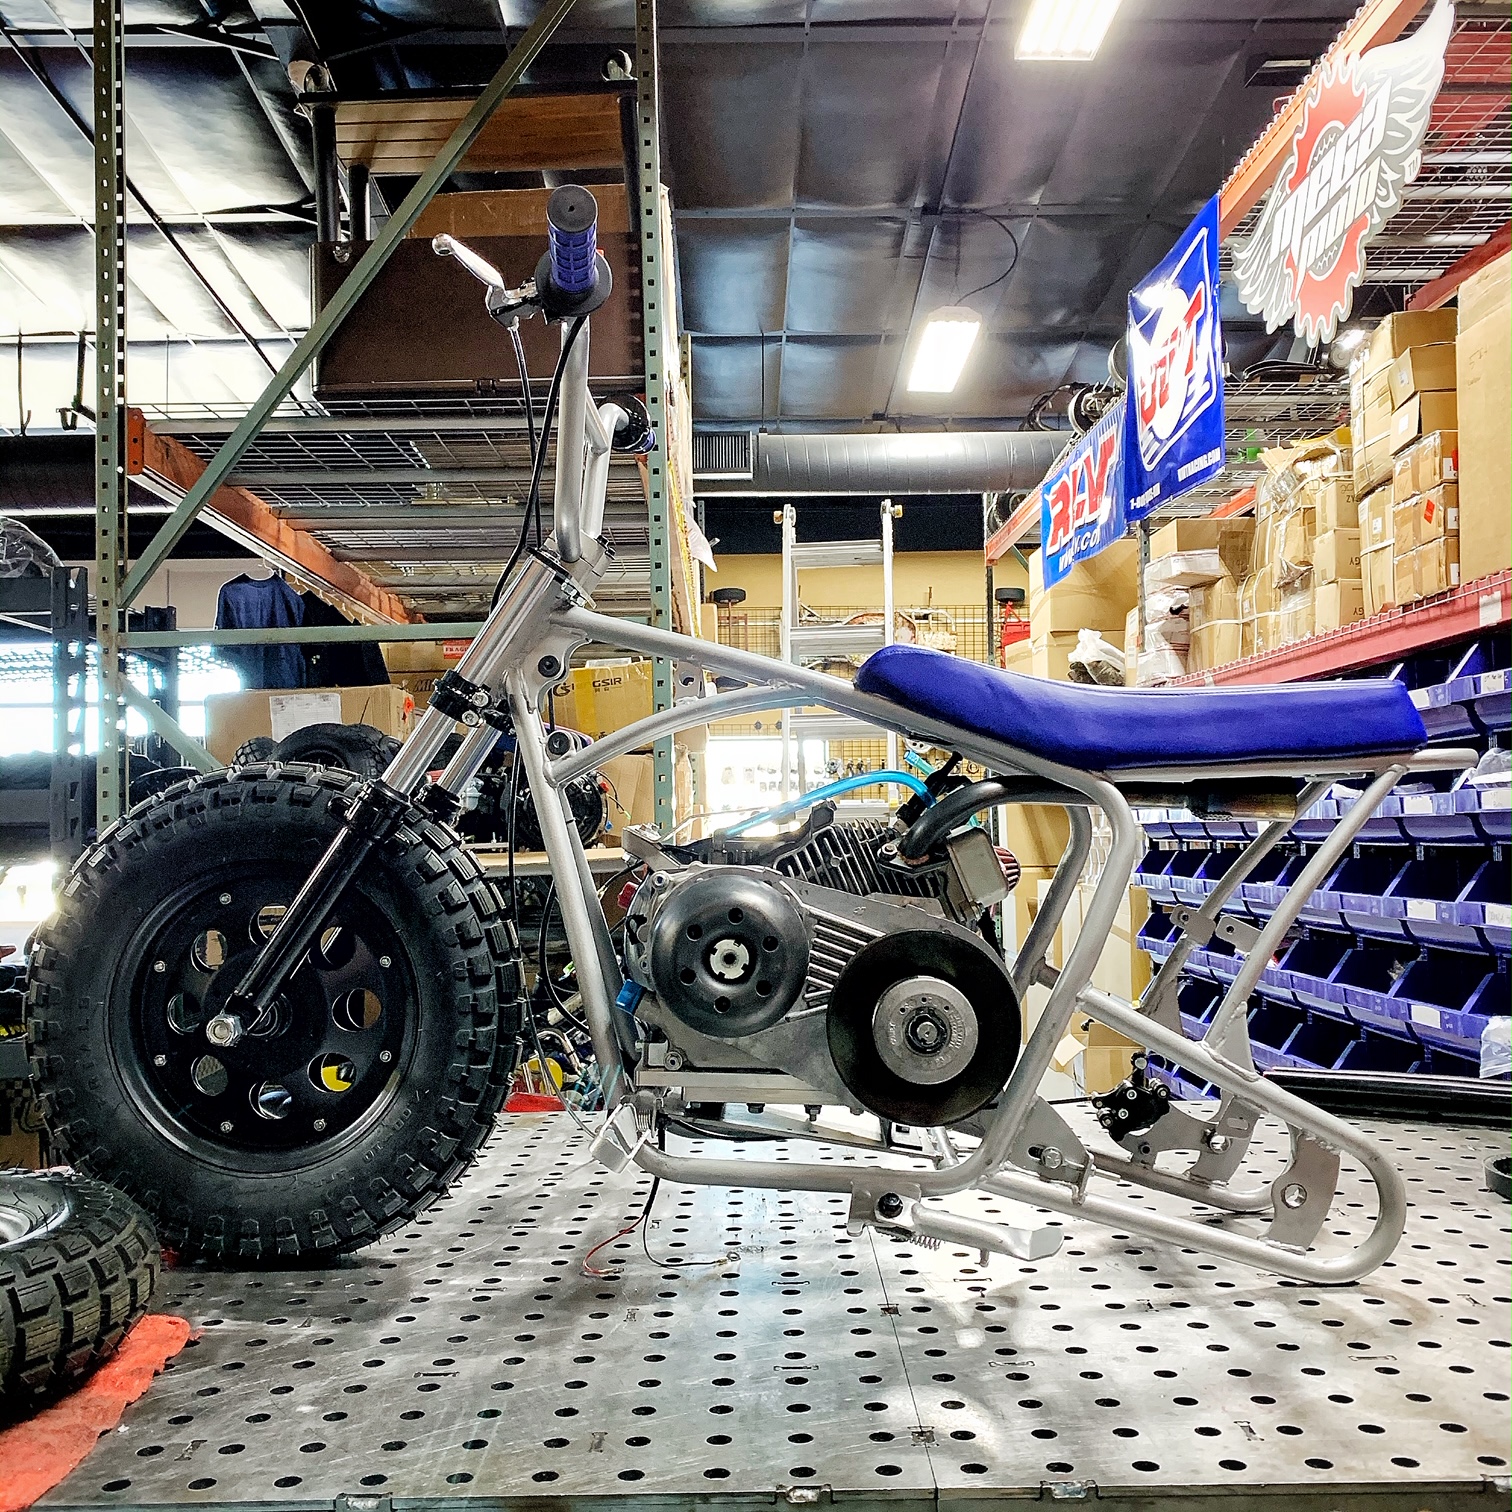
With the influx of Mega Moto 80/105 frames in the shop, we decided to use this frame but tricked it up with our 10" Modular Wheels, Juggernaut Driver, Front Suspension, Hydraulic Brakes and a Stage 2 Tillotson Race Engine.
There are many ways to skin a cat, but this is how we did ours in the shop. Our main goals were to see if we could fit a Super 30 TAV kit without having to cut the Mega Moto 80/105 frame and use only the parts we sell.
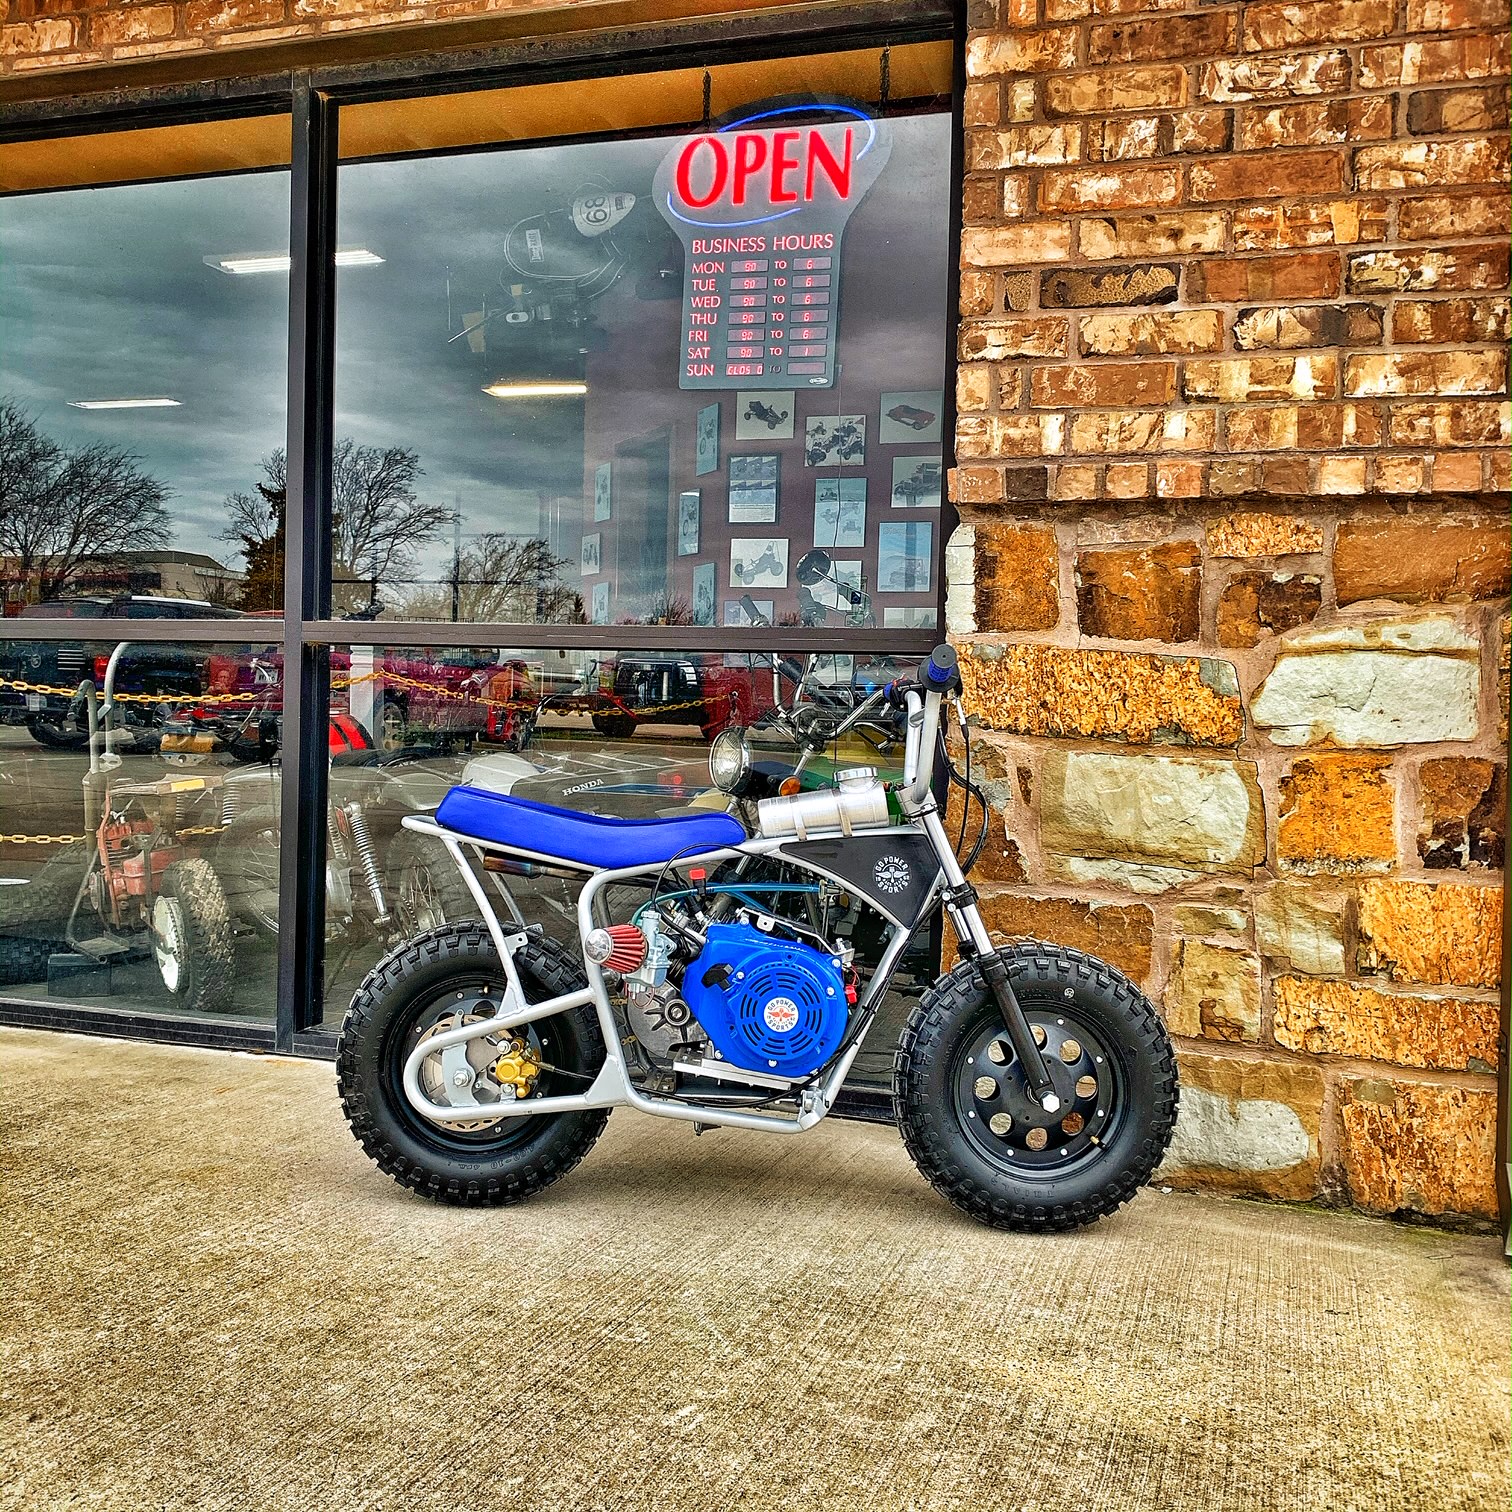
We've had this Blue/Silver Mega Moto bike on our floor and decided to give it a flat track look.
https://www.gopowersports.com/mega-moto-mini-bike-frame-fits-b80-b105-e1000/ - Frame (black only)
https://www.gopowersports.com/minibike-suspension-kit-complete-front-fork-assembly-universal/ - Front Suspension
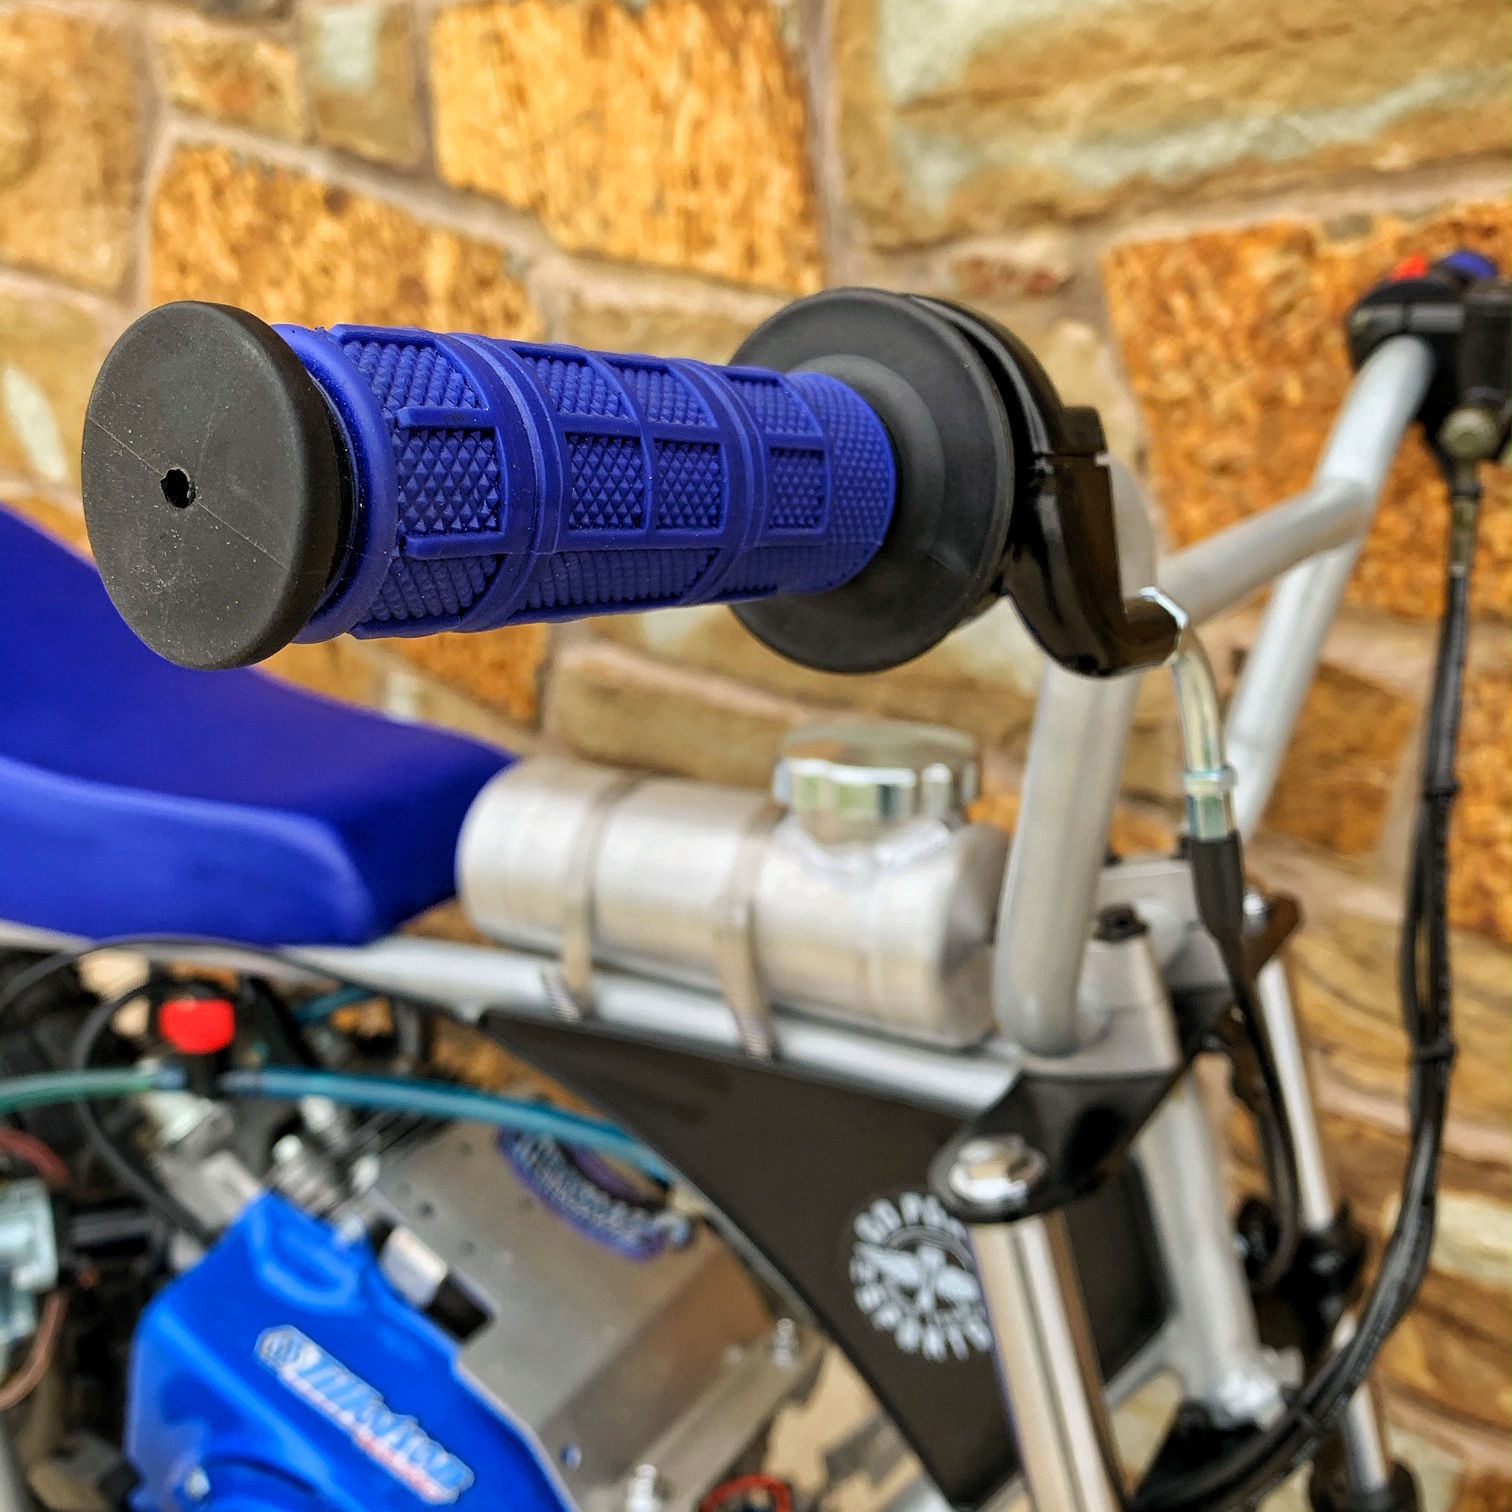
https://www.gopowersports.com/7-8-mini-bike-handle-bars/ - Handlebars (black only)
https://www.gopowersports.com/7-8-handlebar-riser-clamp-kit/ - Clamps for Handlebars
https://www.gopowersports.com/blue-handle-bar-grips/
https://www.gopowersports.com/kill-switch-7-8-handlebar-mount/
https://www.gopowersports.com/mini-bike-brake-system/ - Hydraulic Brakes *modified*
https://www.gopowersports.com/front-left-brake-caliper-rear-caliper-80t-tm-mid-series/ - Bigger caliper
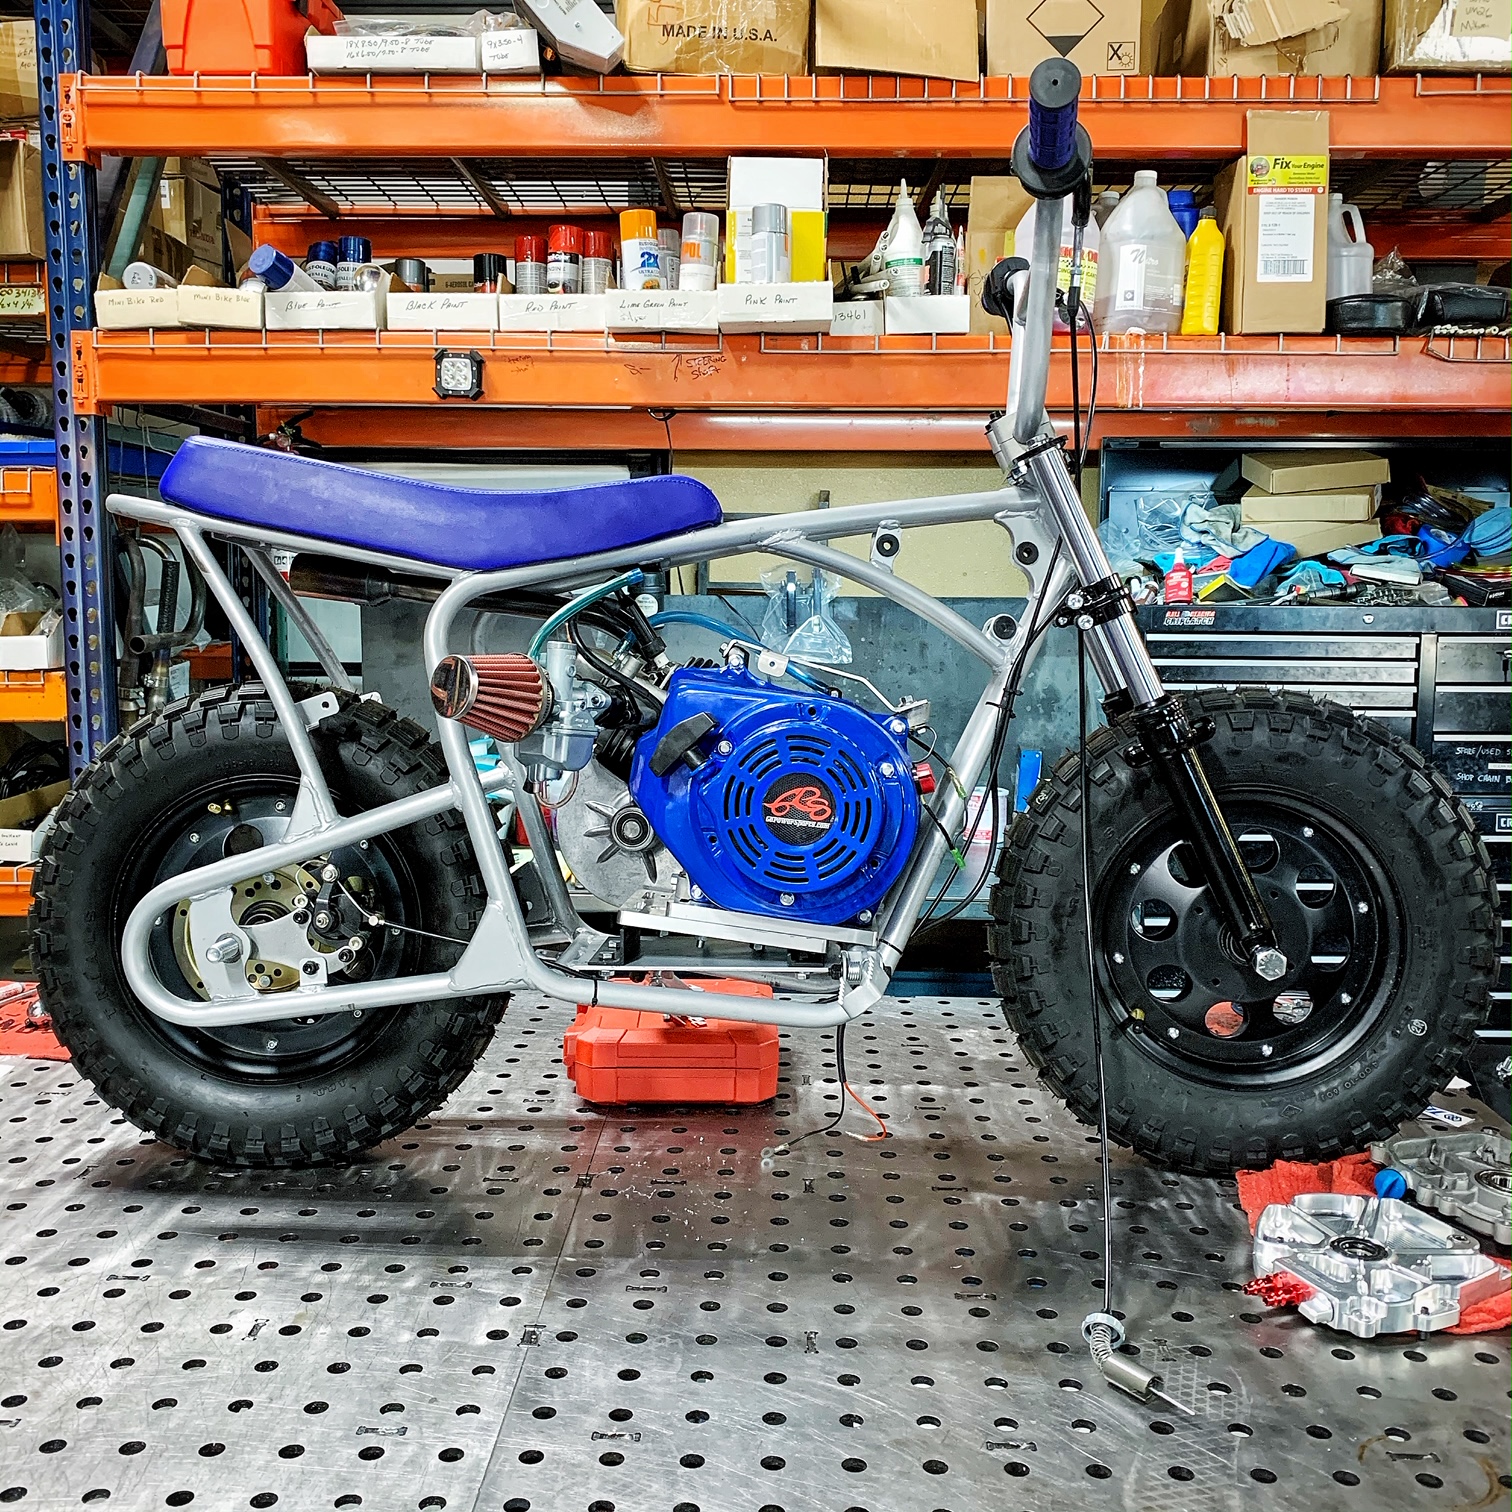
Here's a good stopping point. We love the hydraulic brake kit but it was not lasting too long with us zipping around at high speed and being bigger human beings than what these bikes are meant for. So we swapped to a Mid size Go-Kart caliper. Going to a bigger caliper, we needed to open up some holes on a caliper bracket. You may need to make your own bracket or you may modify the one we sell for the #MBSYSTEM (hydraulic kit).
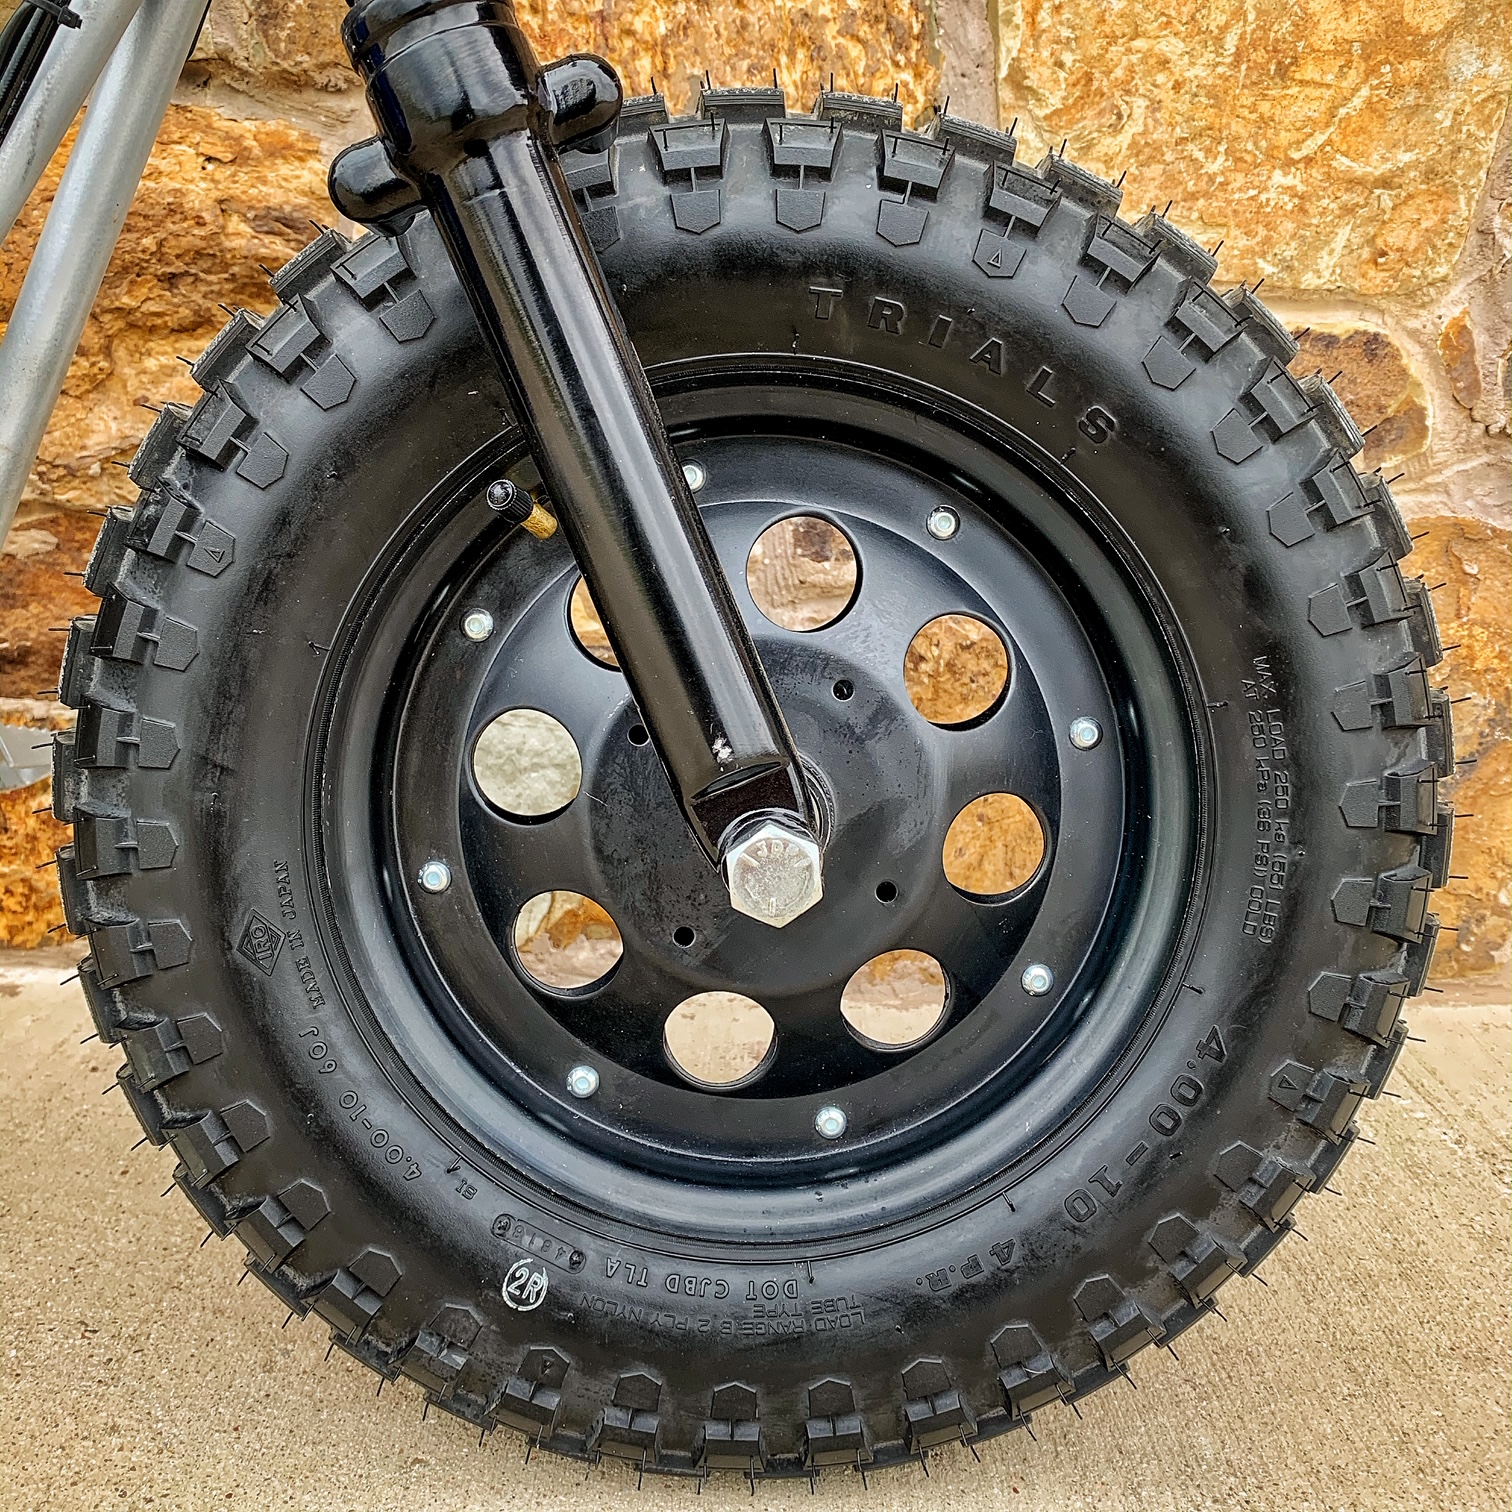
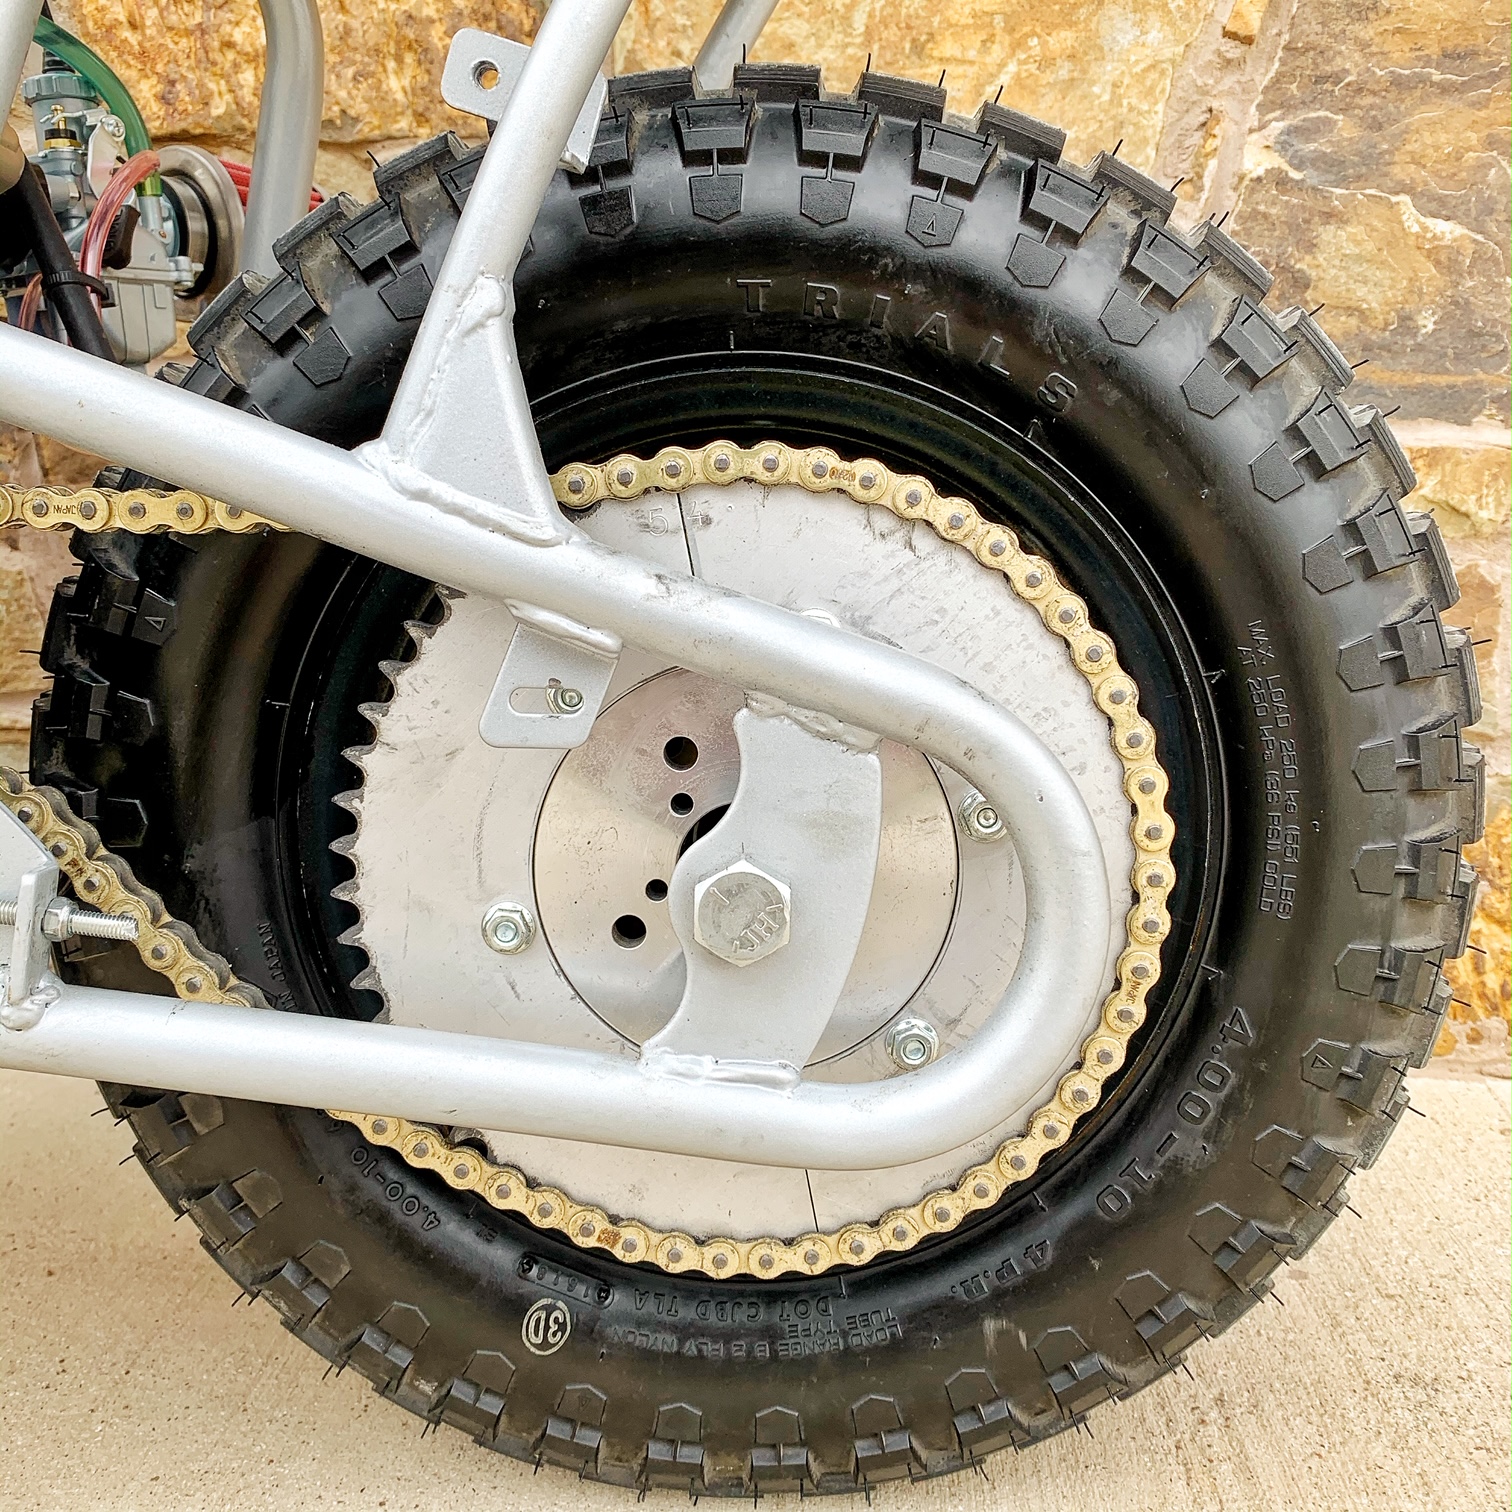
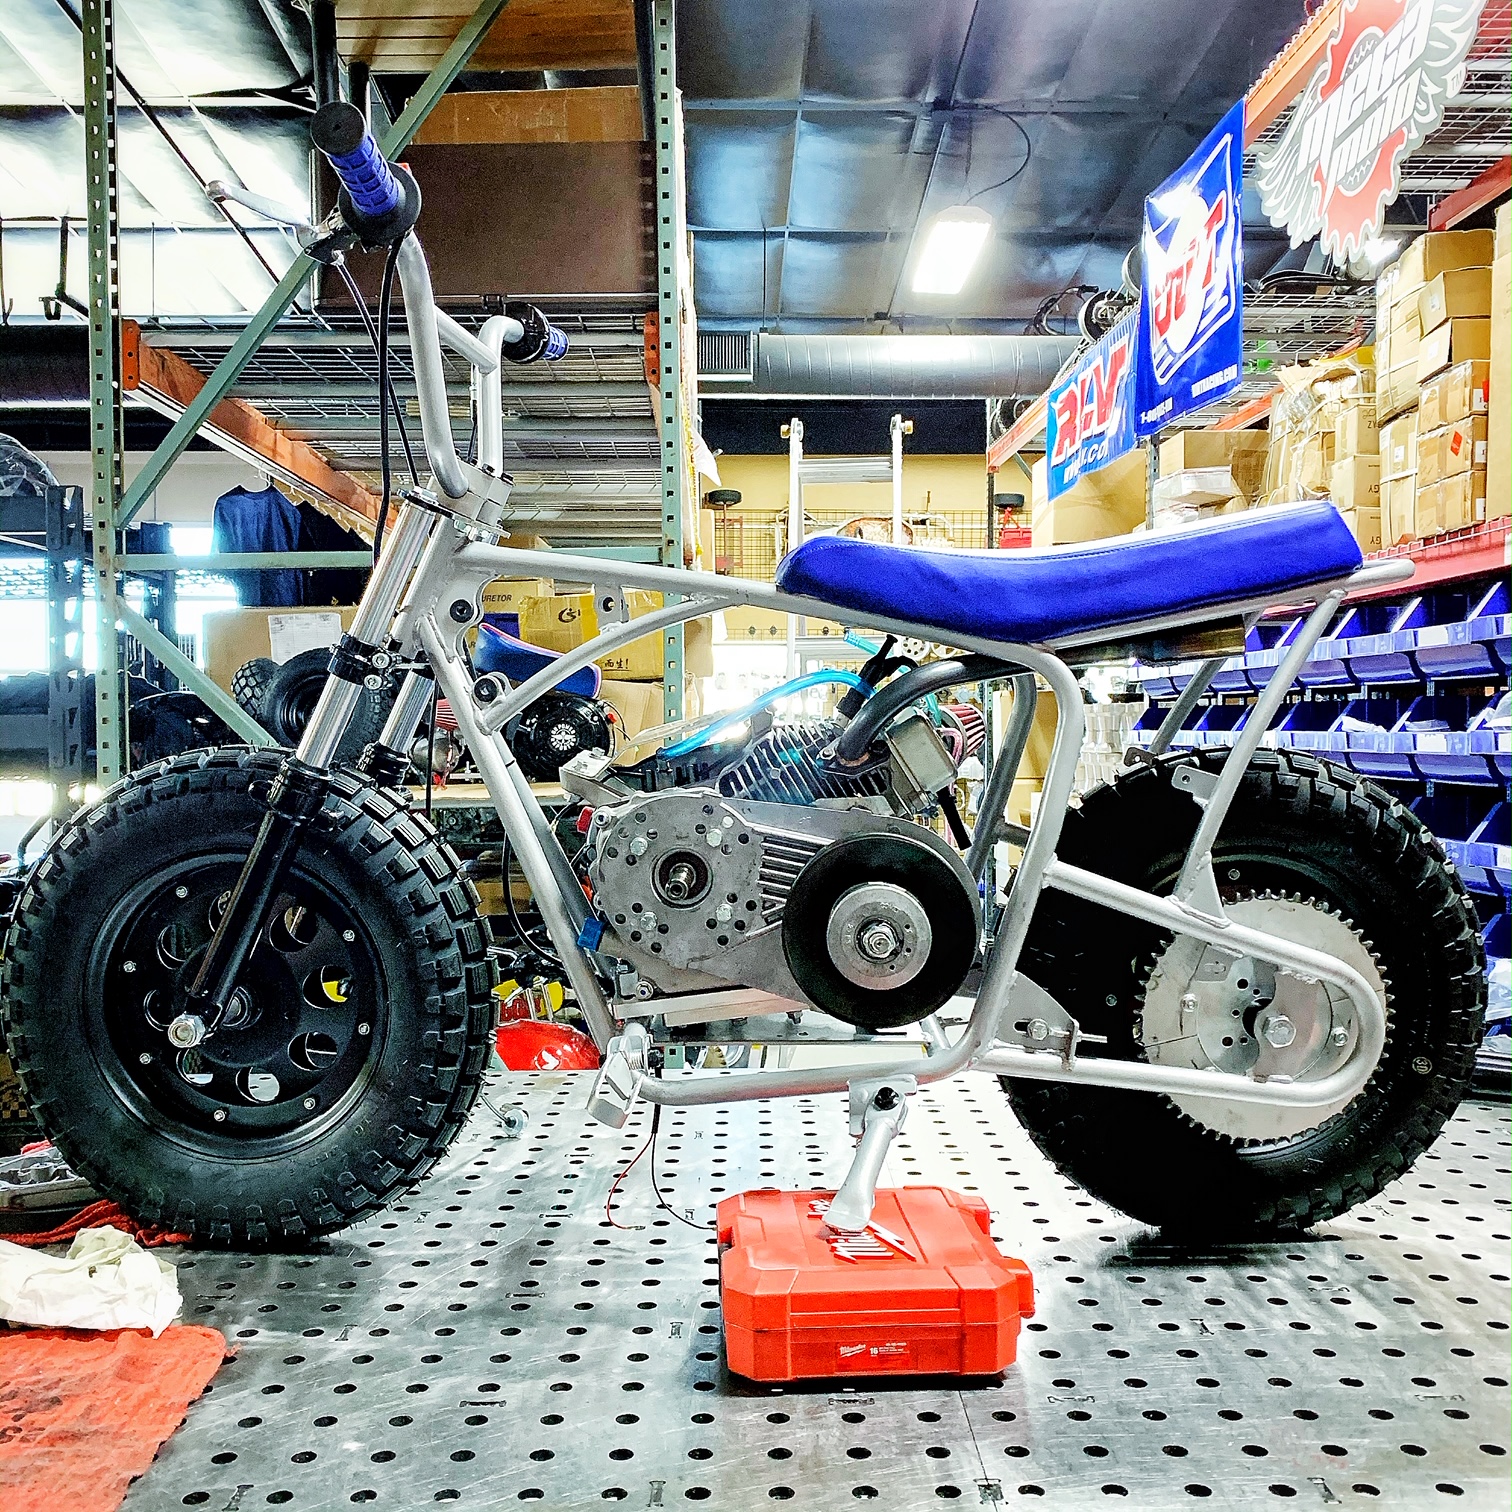
We decided to go with the 10" Black Modular Wheels with a 4.00 - 10" Trials Tires. Going to these wheels then means that we are going with 5/8"ID bearings with also means 5/8" axles. And since 5/8" axles are bigger than the 12mm axle that these frames come with, you will have to drill your frame and forks out to 5/8".
https://www.gopowersports.com/10-black-steel-modular-wheel/
https://www.gopowersports.com/4-00-10-front-rear-tire-trials-irc-191/
https://www.gopowersports.com/3-50-4-00-10-tube-90-degree-stem/
https://www.gopowersports.com/5-8-id-sealed-bearing-1-3-8-od-common/ - Pull the snap ring off these bearings
https://www.gopowersports.com/5-8-mini-bike-axle/- used a 10" up front and 10.5" in the rear
5/8"ID Spanners. You need 2 spanners cut to length to keep your wheel centered.
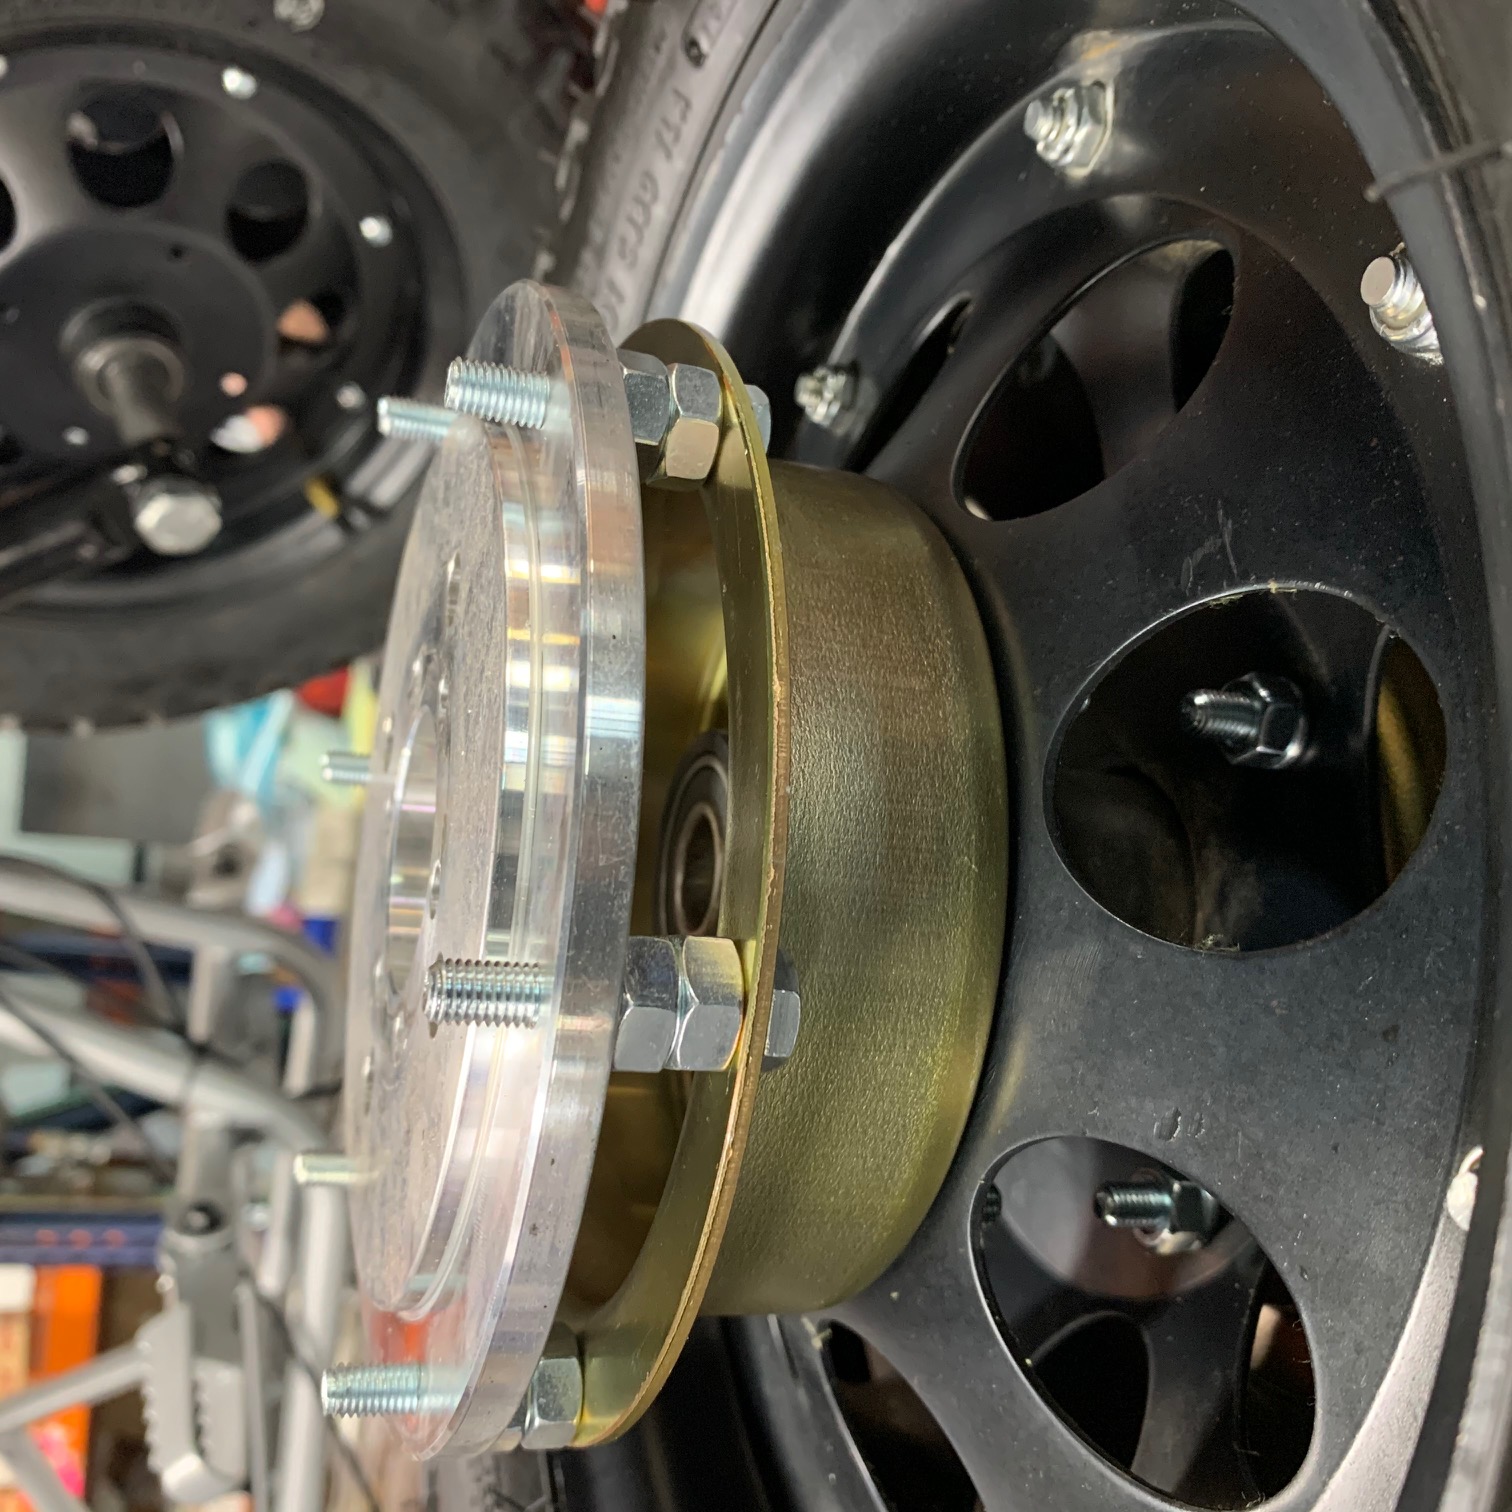
Rear Wheel Setup
https://www.gopowersports.com/brake-drum-and-sprocket-hub-4-5id/ - Gold hub in photo above. You'll need one for each side
https://www.gopowersports.com/universal-sprocket-adapter/
https://www.gopowersports.com/mini-bike-brake-disc-6-hole/
https://www.gopowersports.com/split-sprocket-41-420/
https://www.gopowersports.com/rk-gold-premium-racing-chain/
The Universal Sprocket Adapter (silver piece above) takes a 1/4-28 Bolt. You will need to source longer bolts. 1.25" long bolts did the trick for us but every application may be different. Mock up your wheel and see which bolts and spacers are needed for your frame. We used 8mm flat nuts for spacers because they are consistently the same height which makes it ideal for spacing.
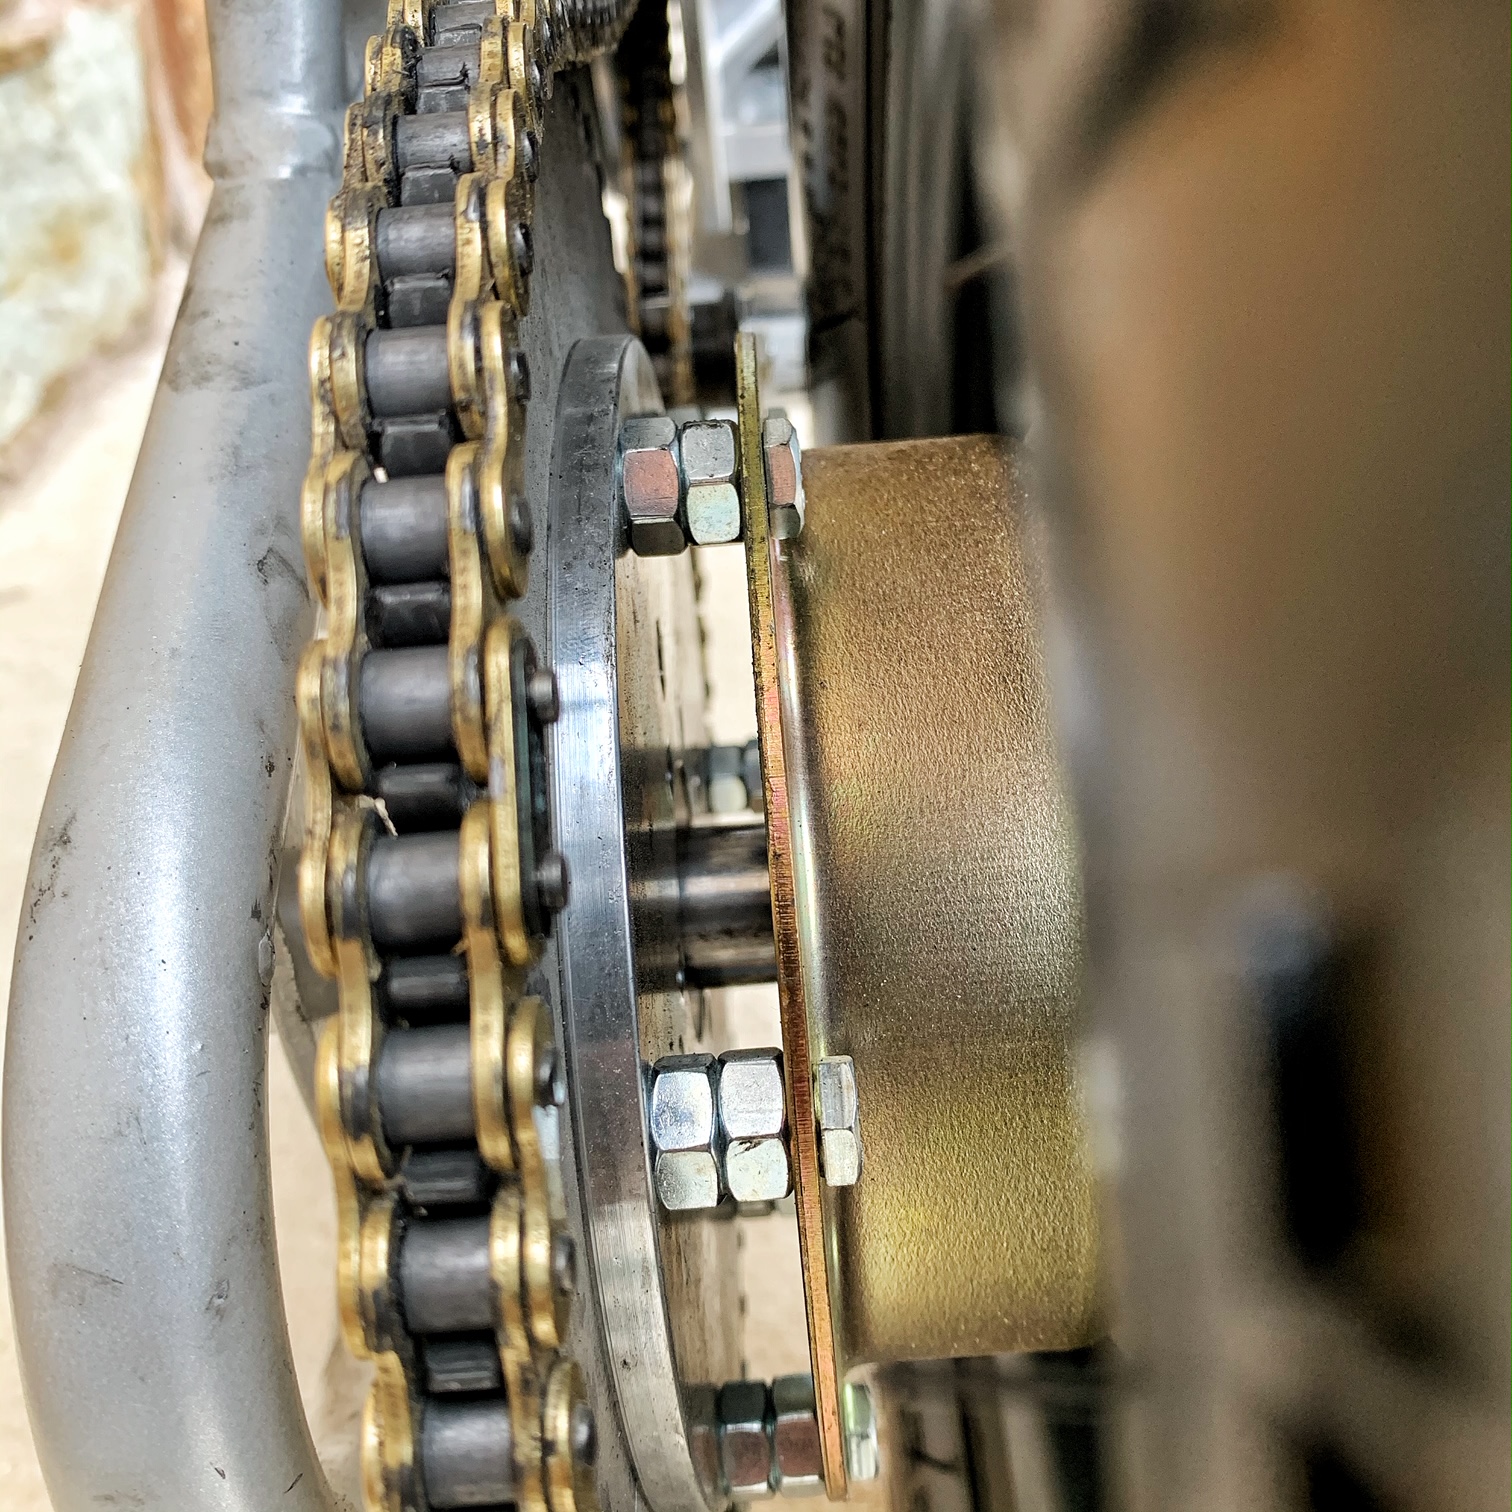
Here's the drive side complete with our #41/420 Split Sprocket mounted to the Universal Sprocket Adapter.
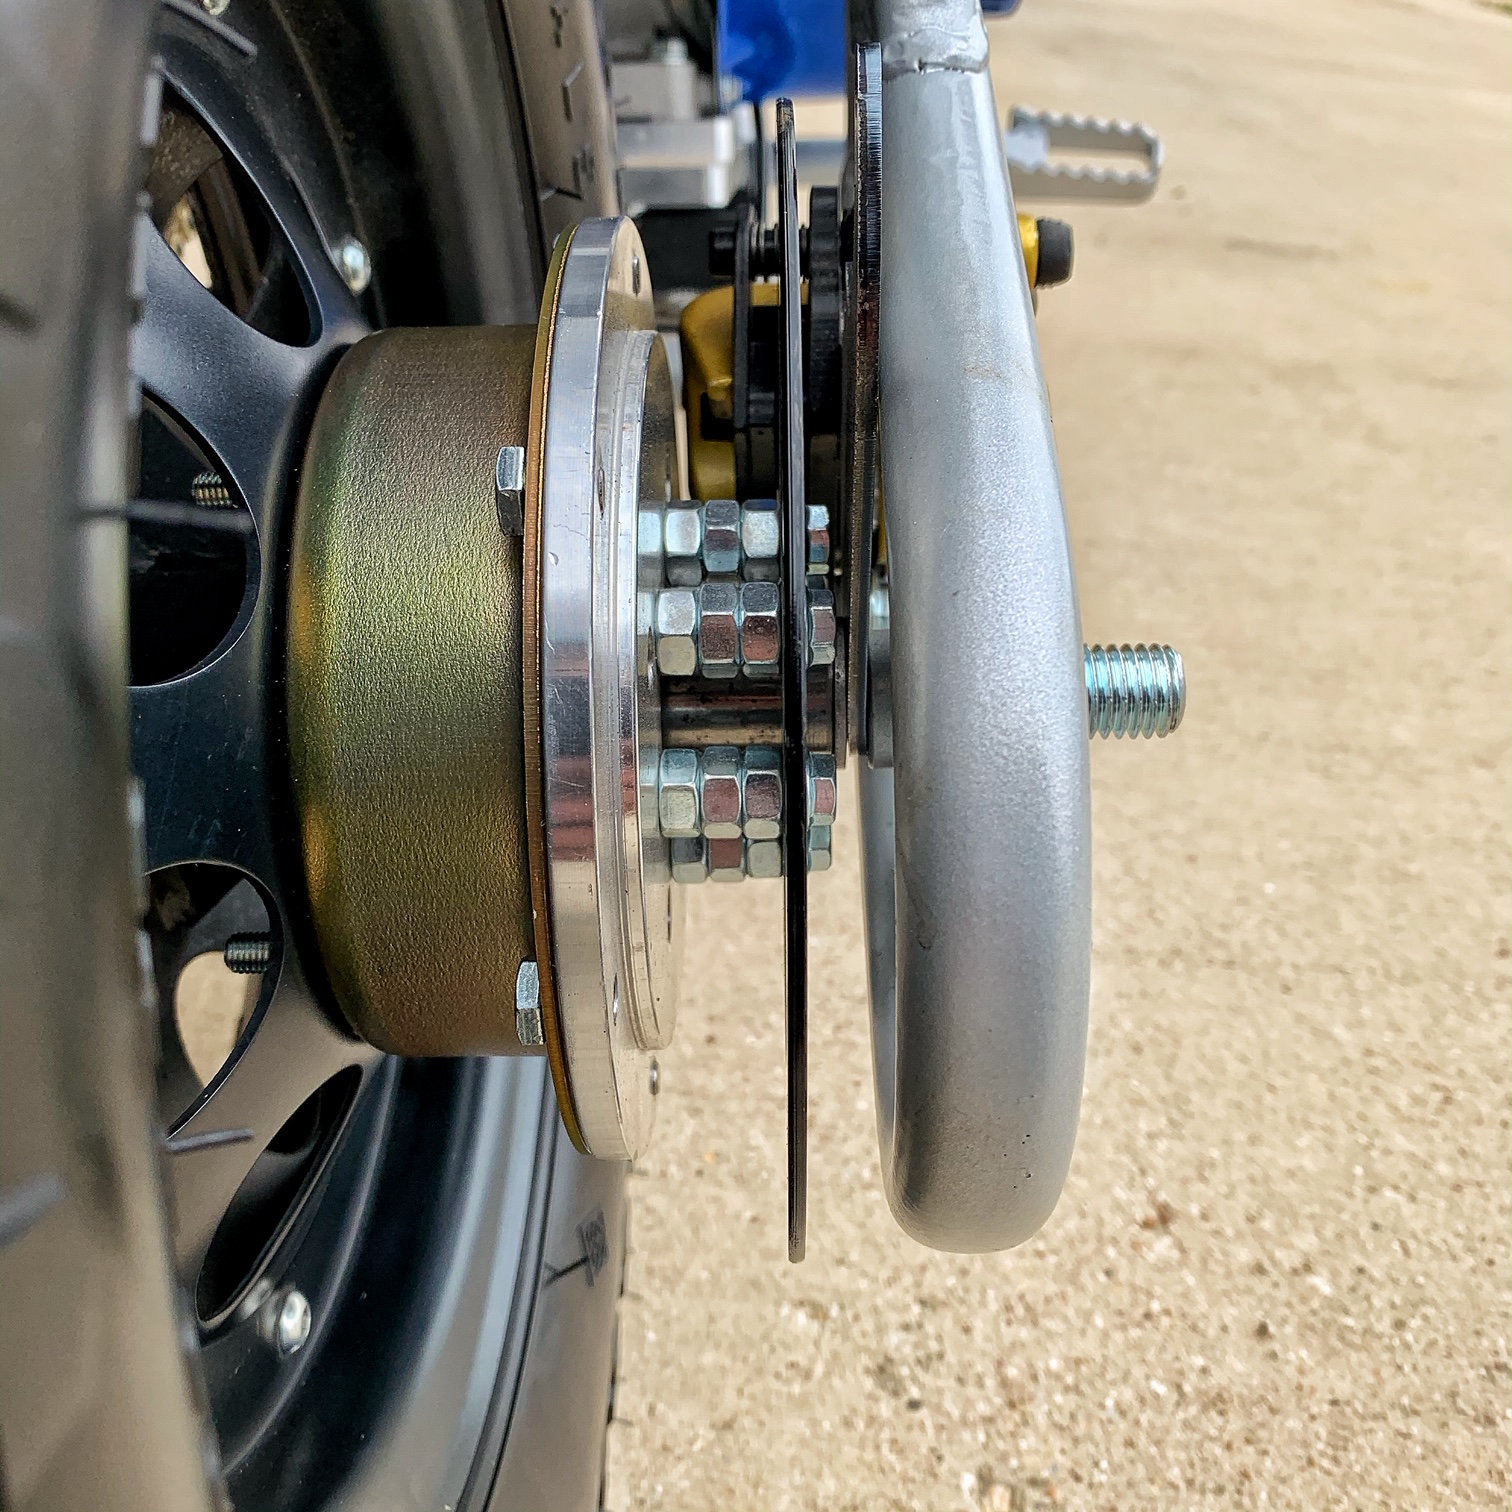
Above is the brake side. We used the inside 6 hole pattern to connect with our 6 Hole Brake Disc. Same method of using nuts as spacers. The upgraded caliper is thicker, so we had to shim the disc a little further away from the wheel to avoid rubbing.
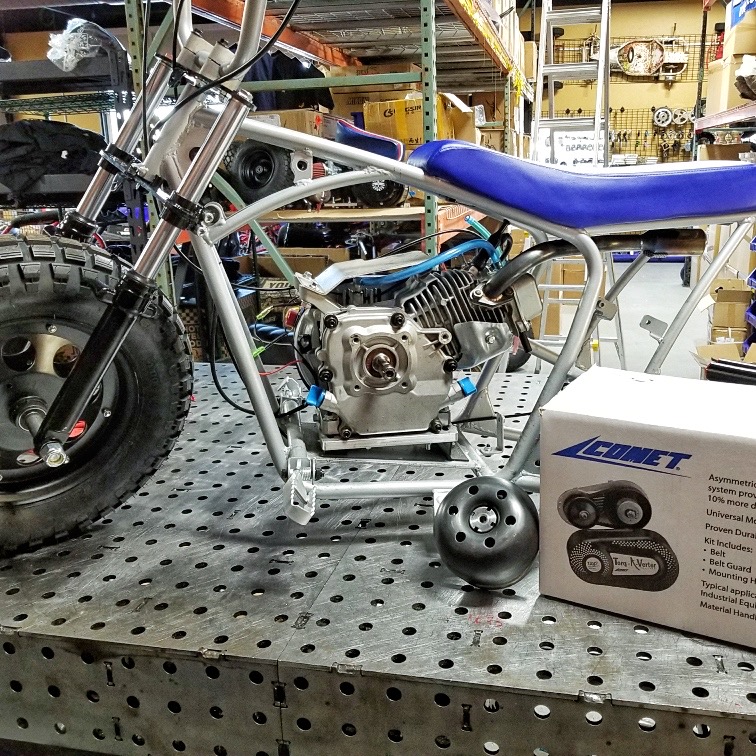
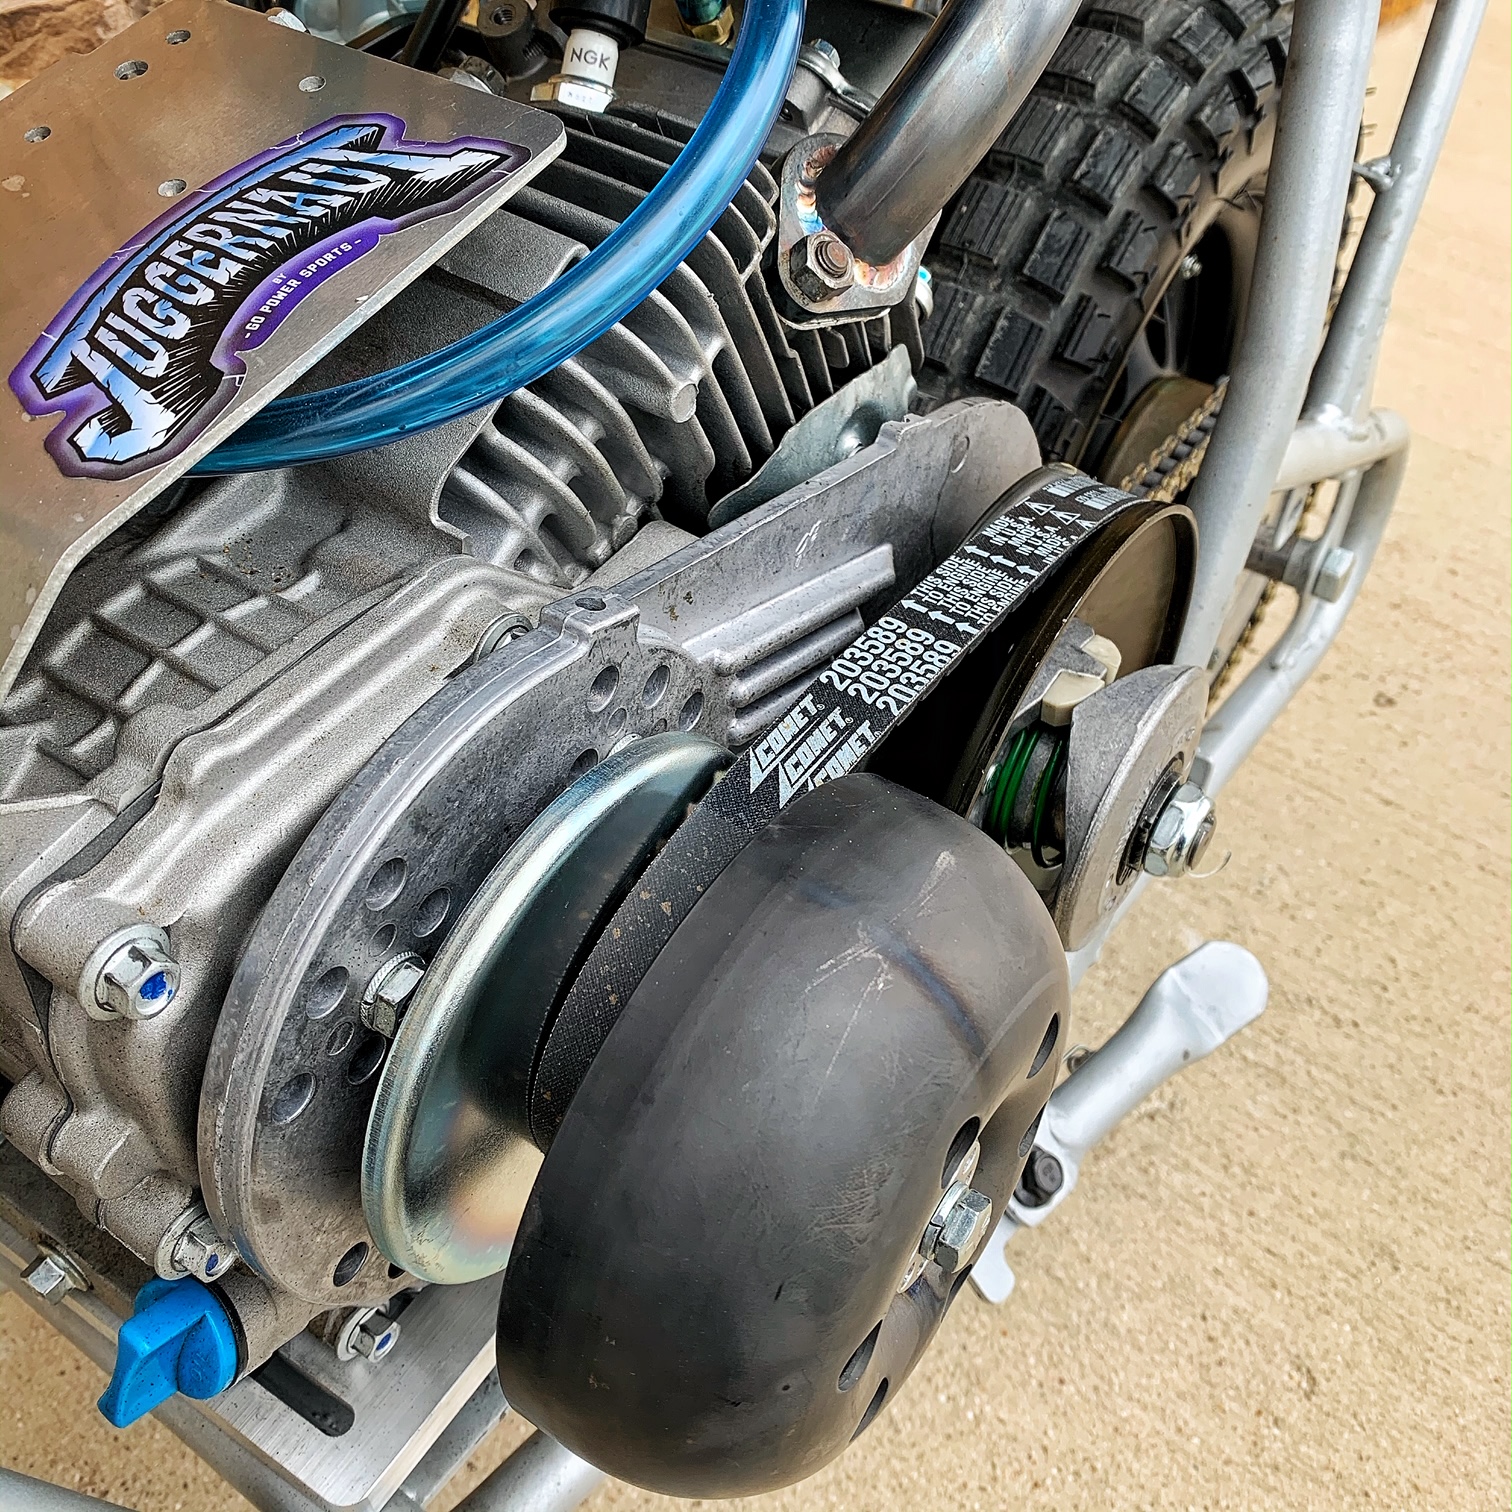
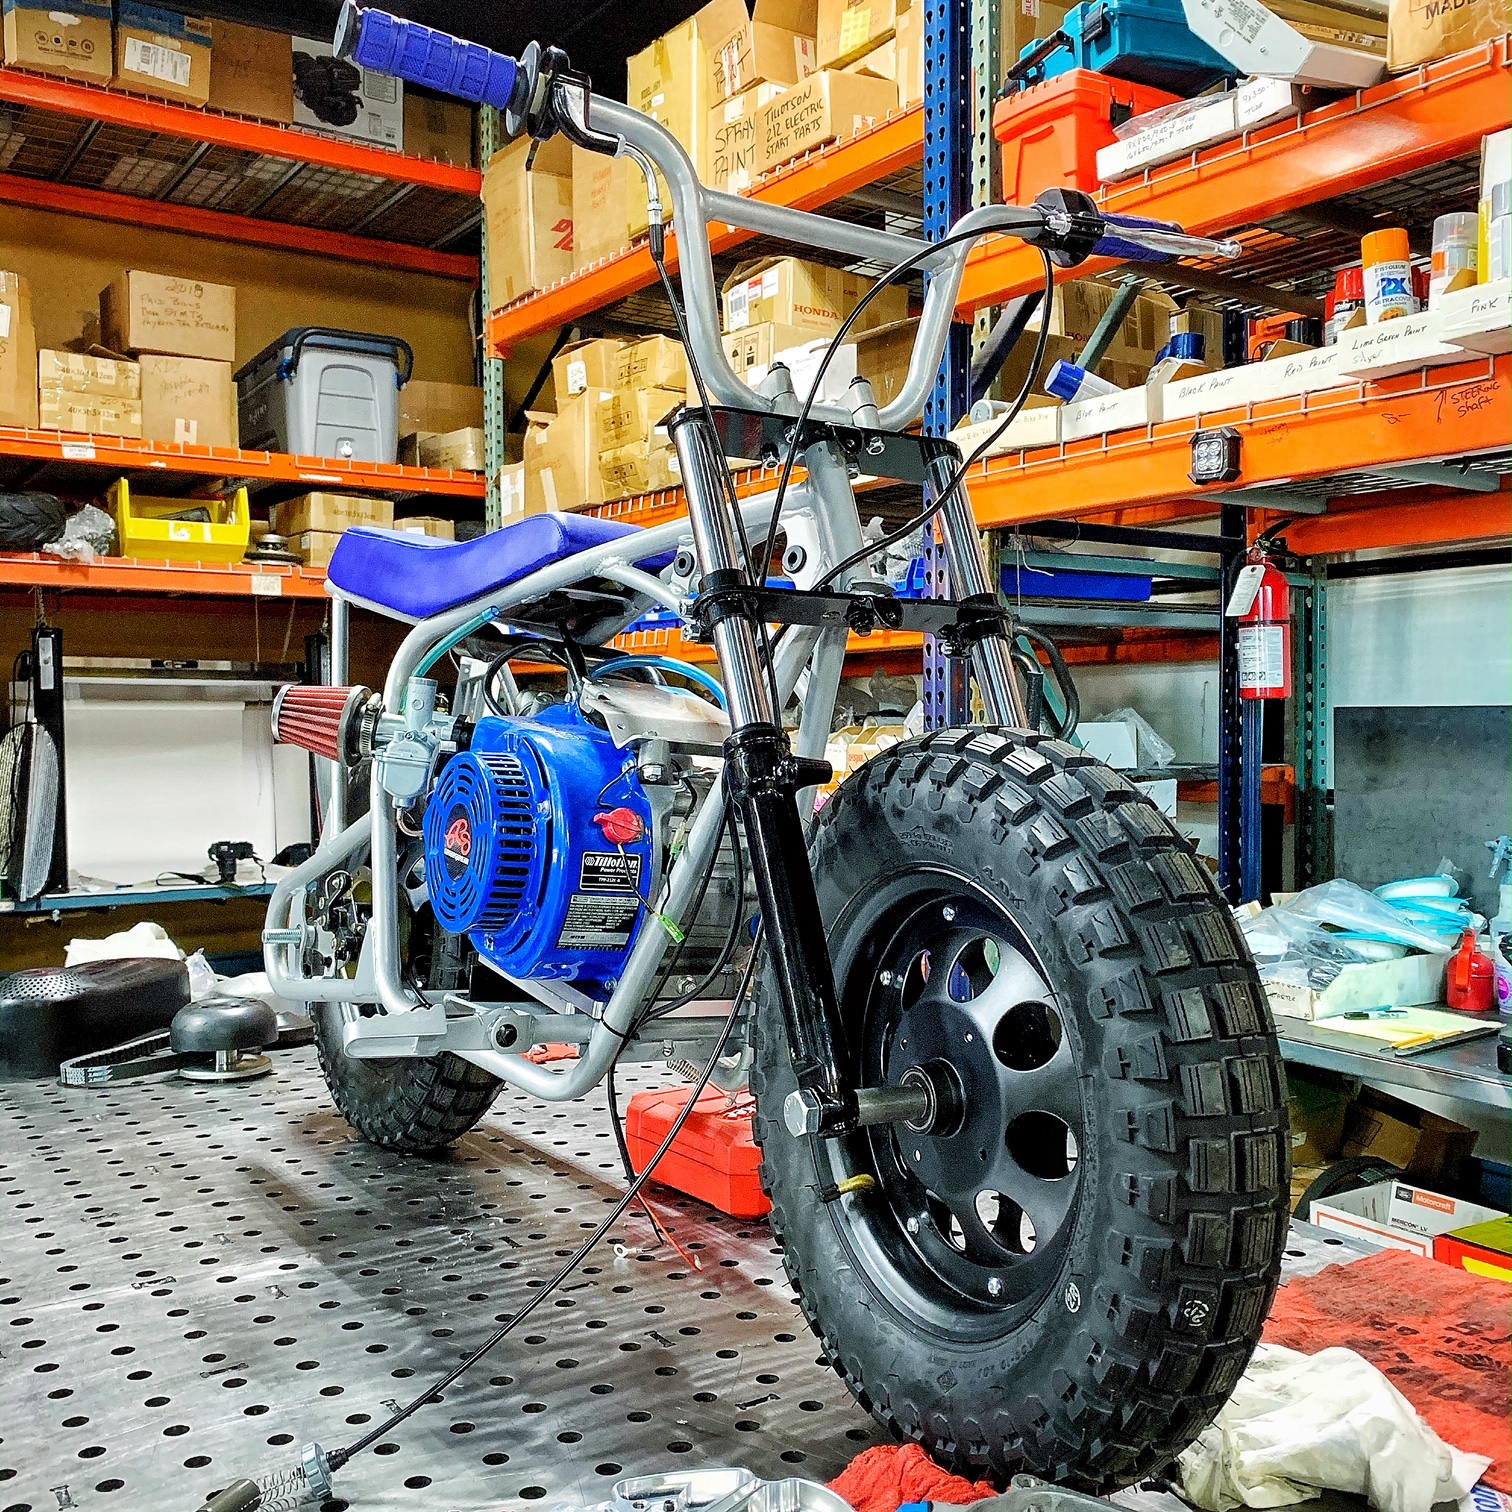
Super 30 TAV Kit Install
https://www.gopowersports.com/super-30-75-torq-a-verter/ - This is for the aftermarket kit, not the above Comet kit. Will work just the same.
We've seen many people cut the frame and re-weld a support that is out of the TAV's way, which is a much quicker and cheaper way to do this process. But if you don't want to cut your frame, then here's what we used.
https://www.gopowersports.com/mega-moto-80-105-adjustable-motor-mount-kit/ - This kit is perfect for the Mega Moto 80/105 frames. It bolts on and gives you plenty of adjustability, but it does not sit high and forward enough for the Super 30 TAV kit to fit. We then added a second adjustable motor mount plate as well as drilled 2 new holes into Bottom Bent plate.
https://www.gopowersports.com/fully-adjustable-motor-plate-small-block/ - Adjustable plate all by itself
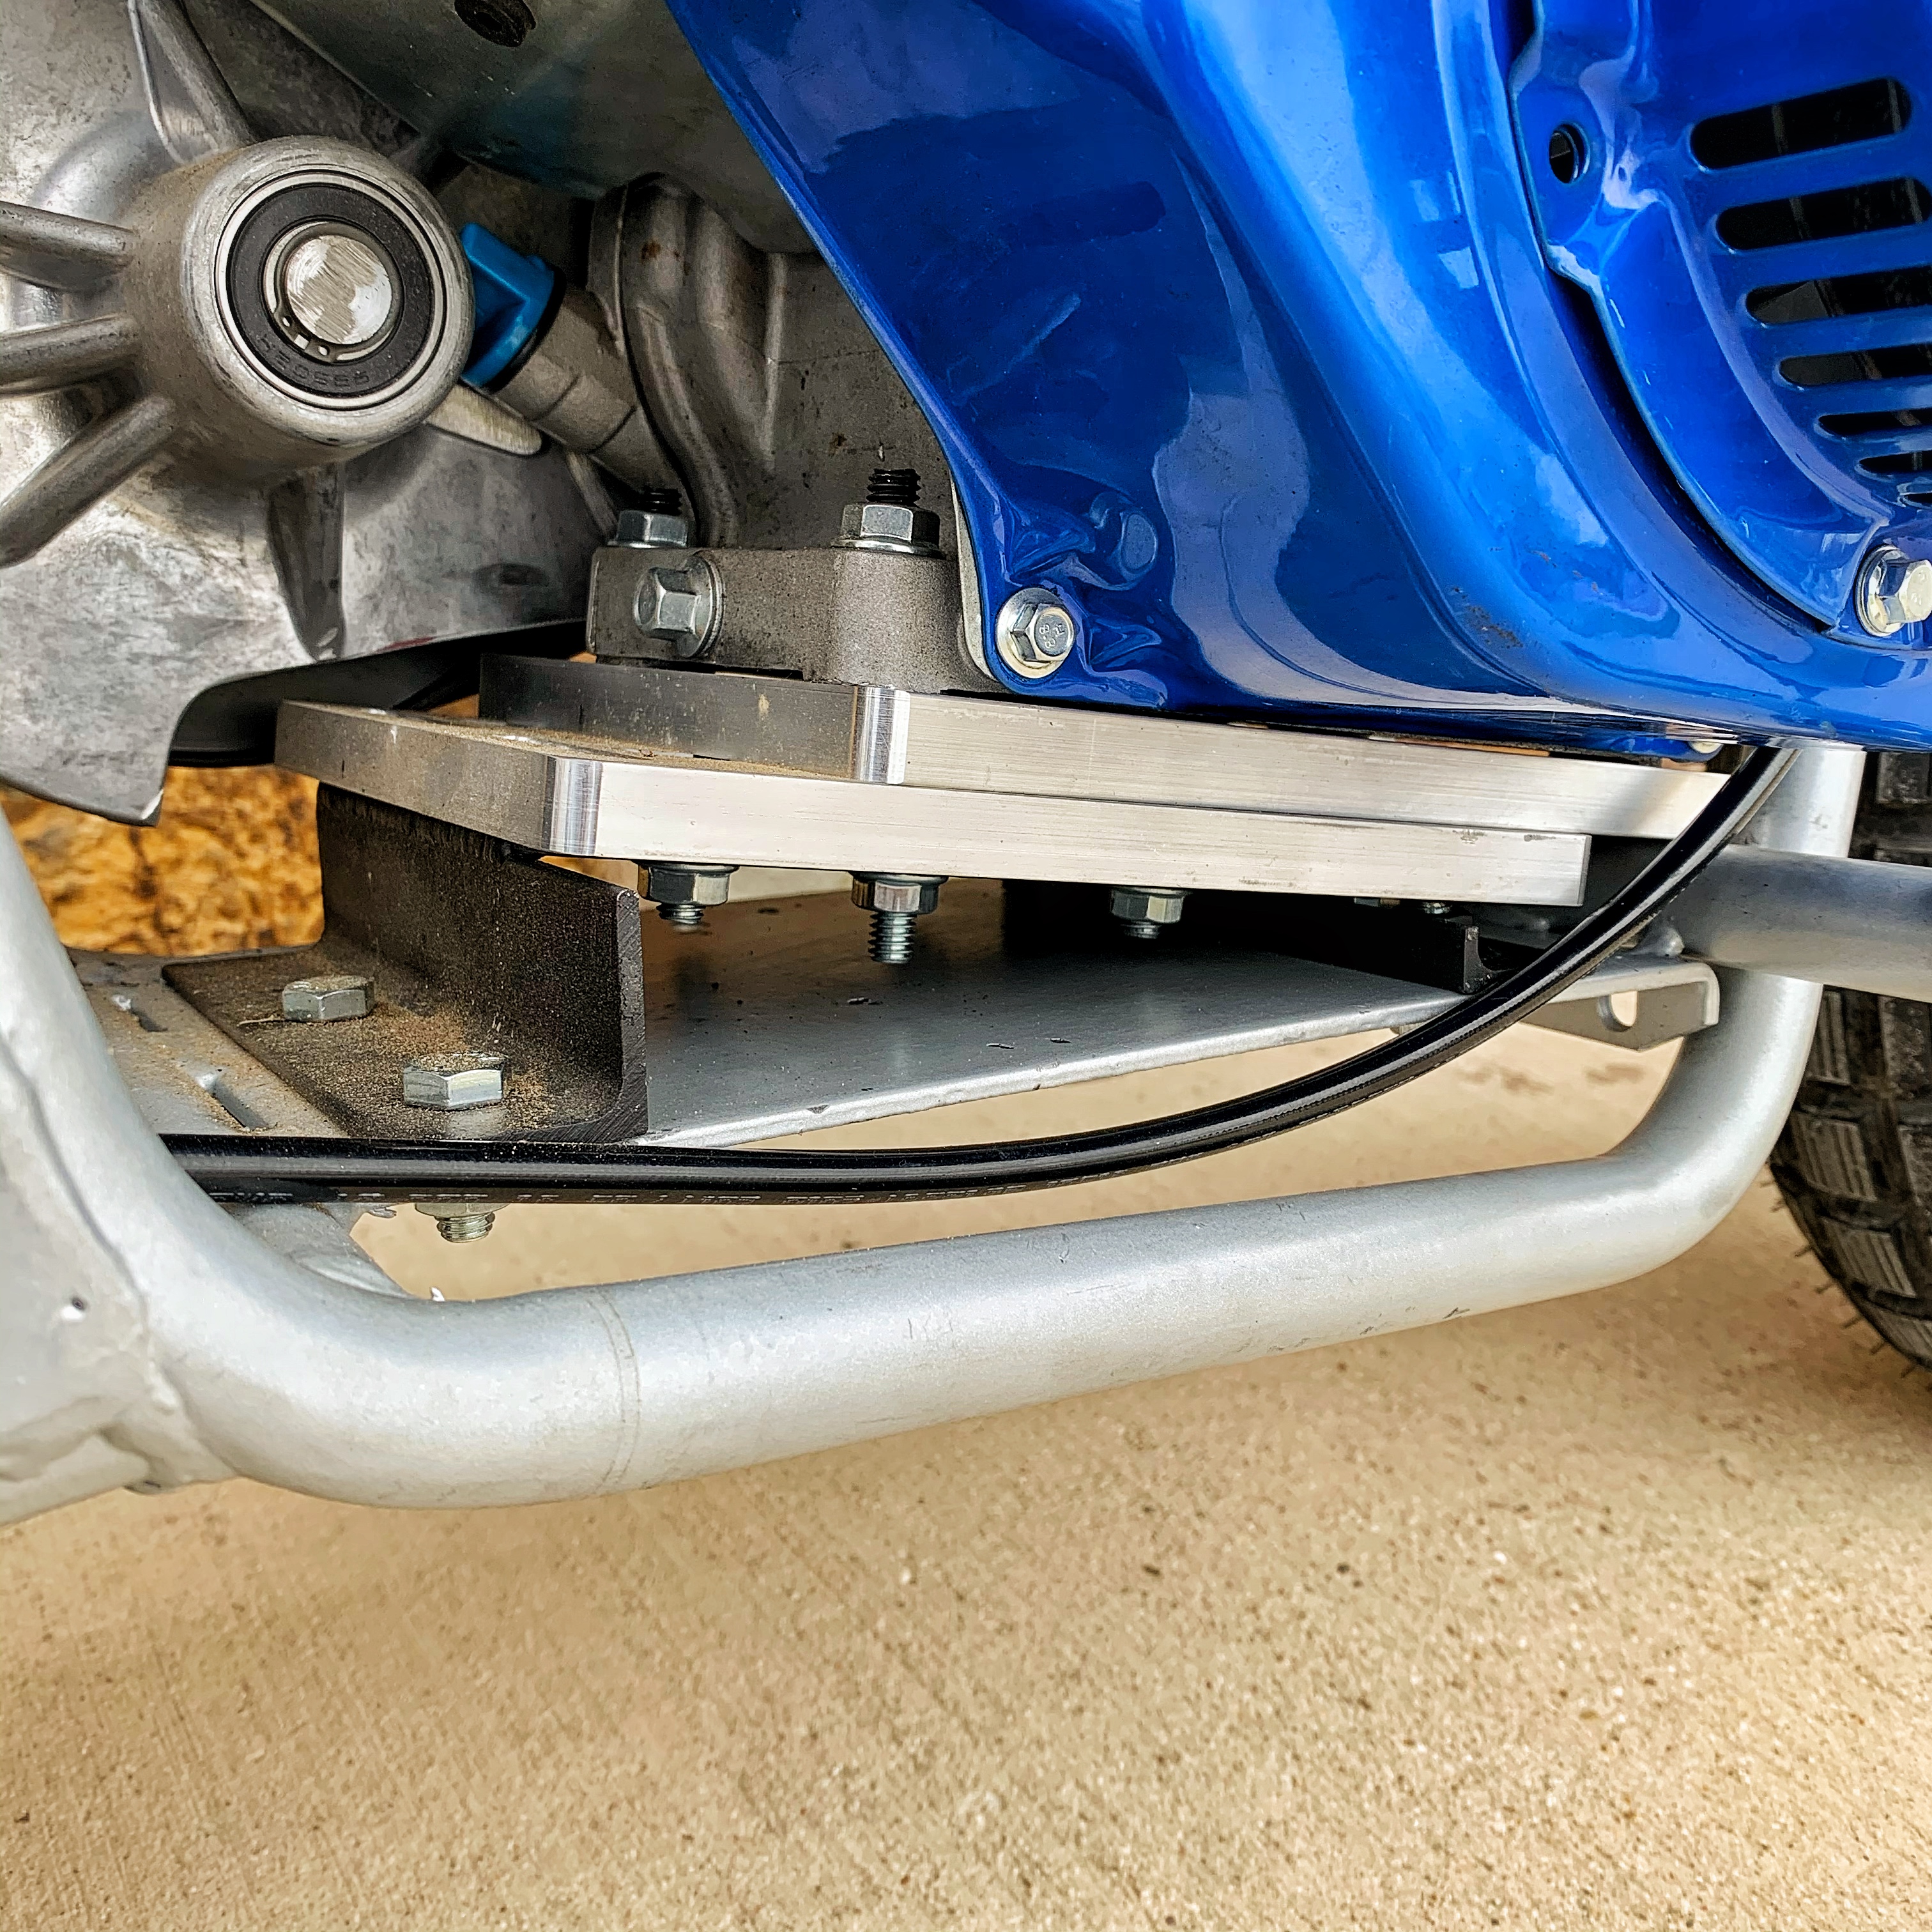
We also had to cut the Comet back plate to allow for more clearance. Above is a side shot how it ended up.
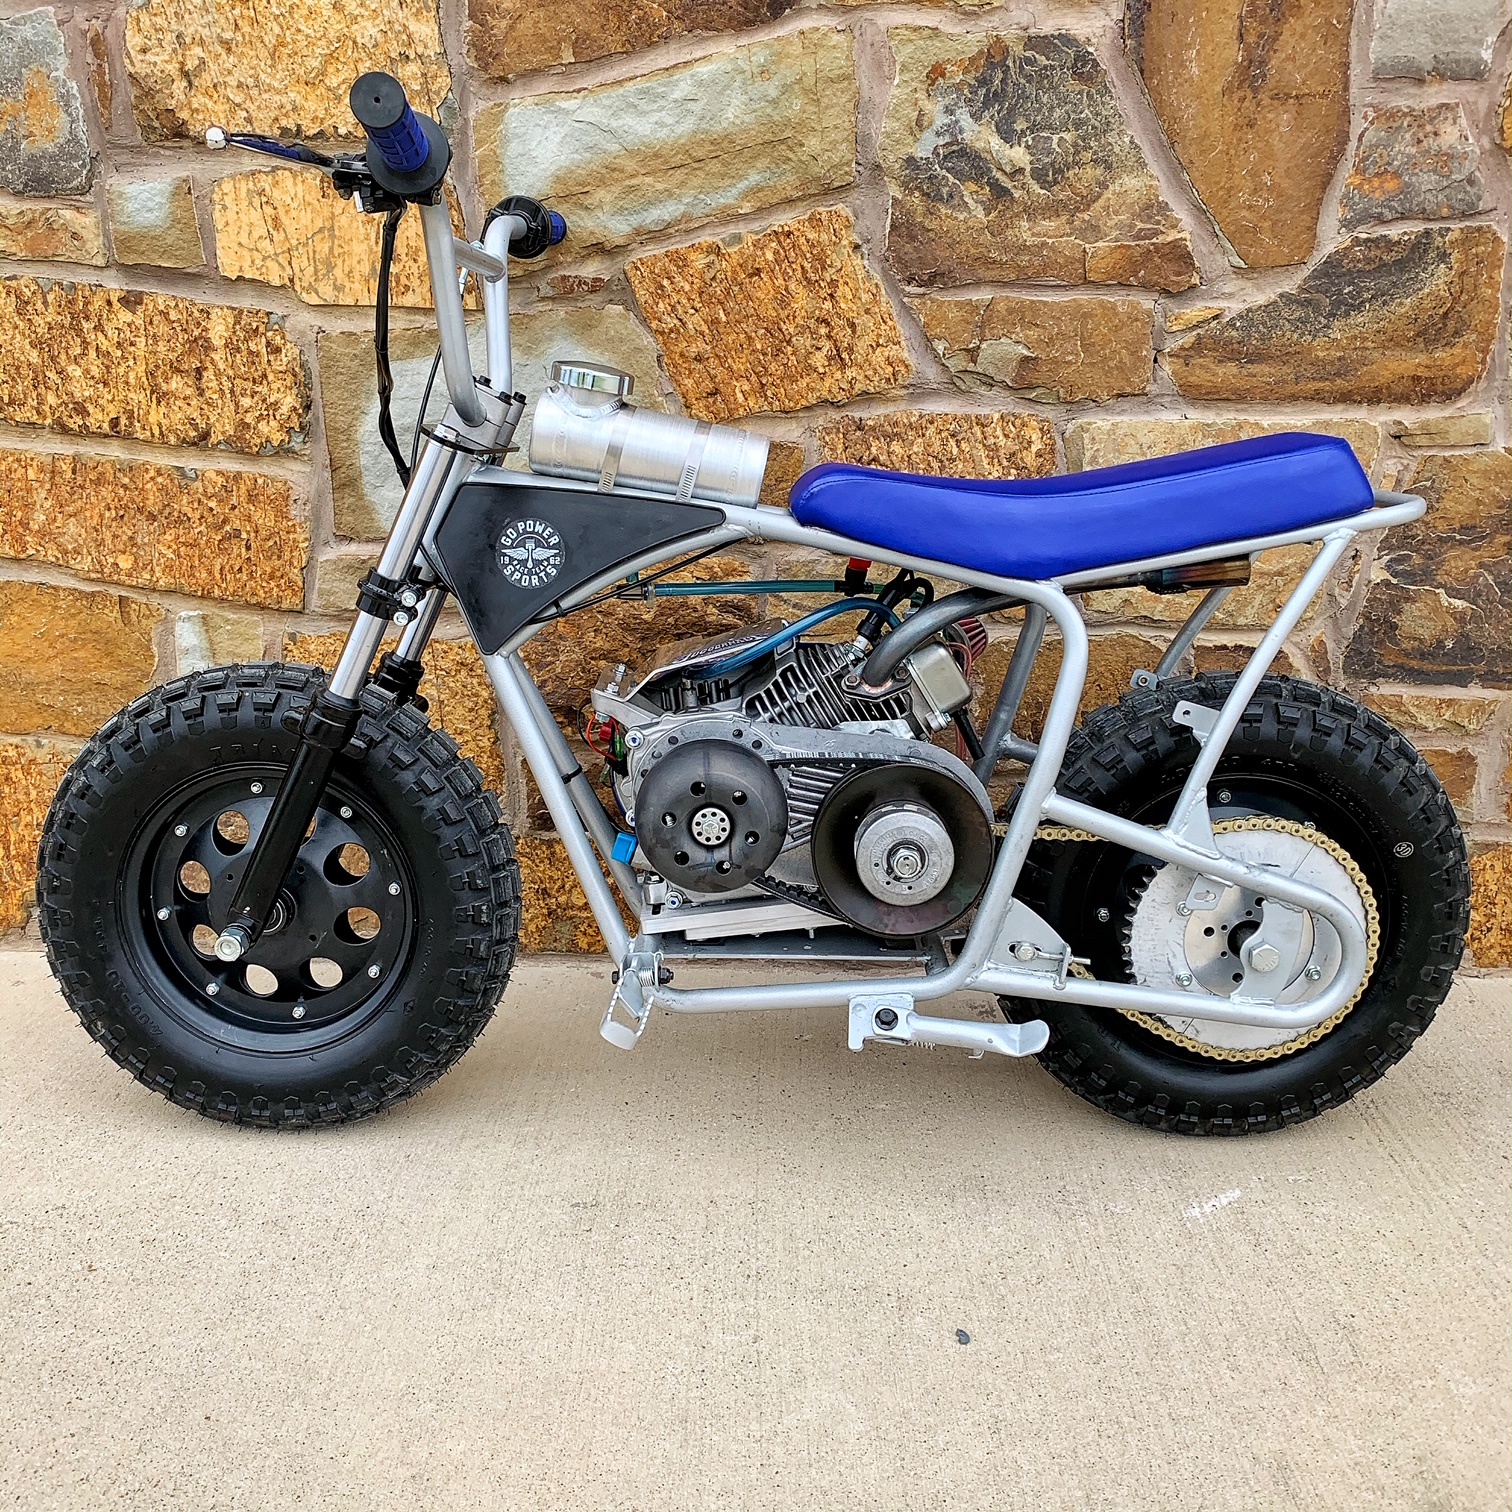
The GoPowerSports Juggernaut installed on our Torque Converter Kit, powered by a Stage 2 Tillotson Engine. Had to take that the Tillotson Gas Tank off since it sits higher than most tanks and we lifted the engine for the Torque Converter.
https://www.gopowersports.com/212cc-tillotson-hemi-engine/
https://www.gopowersports.com/stage-2-212cc-tillotson-performance-kit/
-6689 Slipstream Flywheel
-HOT .265 Cam
-Aftermarket 22mm Mikuni Kit w/ 40" Cable
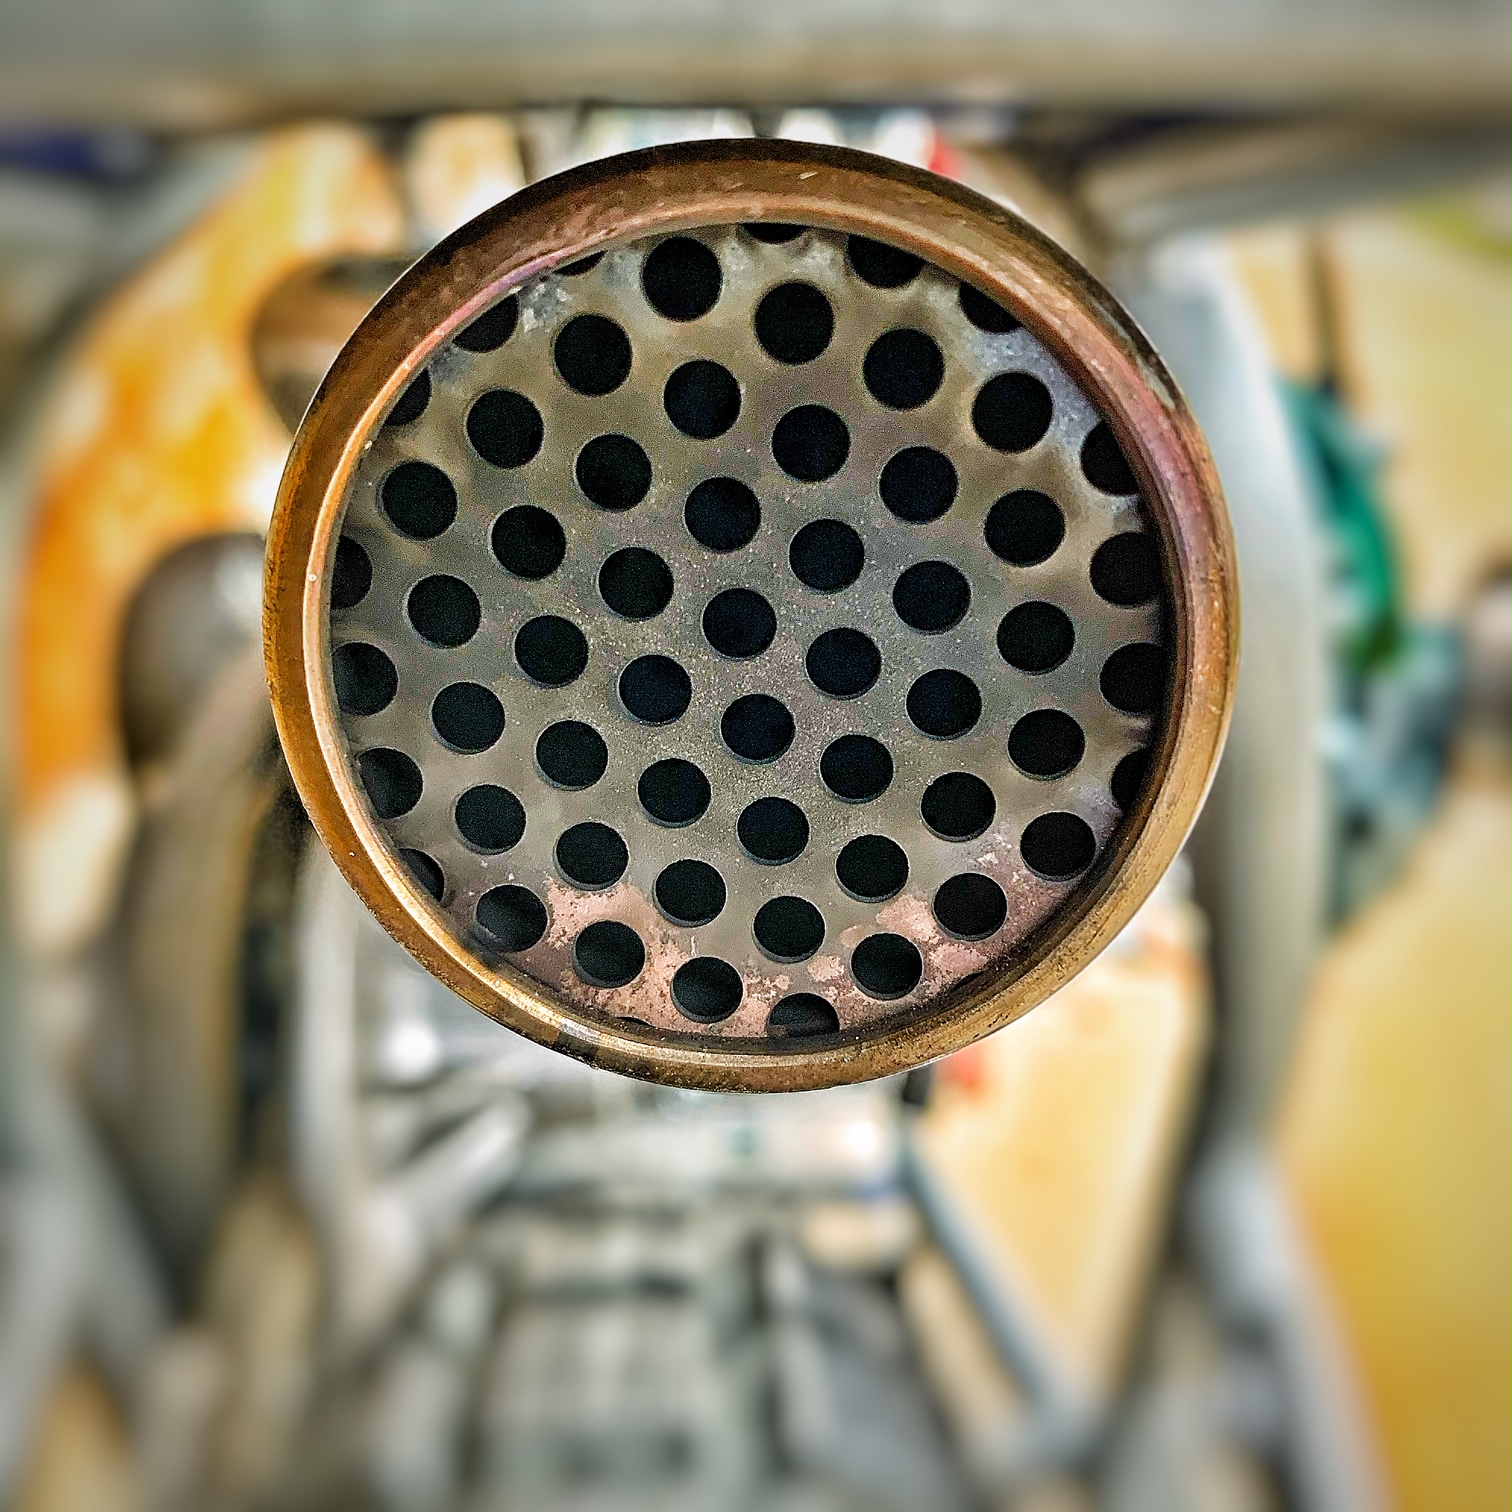
https://www.gopowersports.com/header-pipe-build-your-own/
https://www.gopowersports.com/rlv-4100-1-exhaust-silencer-muffler-with-hd-ss-clamp/
https://www.gopowersports.com/full-top-plate-throttle-mechanism/ - We also offer a Half Top Plate
https://www.gopowersports.com/8-gas-tank/
https://www.gopowersports.com/1-4-id-fuel-line/
https://www.gopowersports.com/90-degree-fuel-filter/
Notable add-ons:
https://www.gopowersports.com/koso-mini-tachometer/
https://www.gopowersports.com/clear-plastic-tav-cover/
Hope this helps everyone out there. Take care Race Team!